
Embarking on a remodel or renovation project and wondering, “what size nails do you use for subflooring?” A seemingly simple question, but the right answer is the key to the foundation of your dream space.
Whether you’re a homeowner looking to revamp your vintage property, a DIY enthusiast hunting for that professional finish, or a real estate mogul ensuring quality in every inch of the investment, the devil is in the details, especially when it comes to nailing that subfloor.
The verdict?
For subfloor installations, it’s typically recommended to use 8d ring shank nails (which are about 2.5 inches long) for securing plywood to floor joists. If using thicker subfloors or hardwood underlayment, longer nails or screws may be necessary. Ensure the fasteners penetrate the joists adequately without protruding through the other side.
But hold on! I know what you’re thinking. What about:
- Is there a specific type of nail that outperforms others for plywood?
- Should I be wary of the nail gun I use?
- How does weather play into my choice of nails or screws?
- Is it ever okay to mix and match nails and screws?
- What role does the manufacturing process play in my choice?
…and many more nail-biting (pun intended!) details. So, whether you’re in this for the long-haul renovation or a quick property flip, you’re about to get the most comprehensive nail-down on everything subfloor.
Unraveling the Nail-Size Mystery: What’s the Real Deal?
You’re staring at an assortment of nails, scratching your head, wondering, “Which size should I use for my subfloor?” Don’t fret; you’re about to embark on a quick, enlightening journey. Dive right in to clear those murky waters of doubt.
Understanding the Size Spectrum
Picture this: you’re at the local hardware store, overwhelmed by the wall of nails before you. From the inch nails that seem just right to the long nail that looks like it’s better suited for a vampire movie. It’s a jungle out there, but worry not, I’m here to be your guide.
In my experience, the size nail you’ll need largely depends on the thickness of your subflooring material. The rule of thumb (nope, not talking about where that hammer shouldn’t land) is to choose a nail length that’s about 2 to 2.5 times the thickness of your subflooring. It ensures that the nail penetrates the subfloor and anchors securely into the floor joists without going too deep.
Subfloor Nail Sizes: The Gold Standard
For the uninitiated, subflooring acts as a stabilizer, providing a flat, solid surface over the floor joists. And while it might seem like any old nail would do the trick, the type and size of your nail can make a world of difference.
Most plywood subfloors, which are a popular choice, are typically ¾-inch thick. For such subfloors, 2-inch nails are your best buddy. They give just the right penetration depth without feeling intrusive.
However, for those working with a thicker subfloor (maybe you’re a fan of the extra cushion), longer nails, like 2.5-inch or 3-inch, might be the perfect match. It’s like wearing a belt; you want it snug, not strangling or hanging loose.
Why Size Matters
A nail that’s too short can lead to a squeaky floor, reminiscent of a haunted house (minus the ghosts, hopefully). On the other hand, go too long, and you risk damaging the floor joists or underlayers. The right nail length ensures your subfloor stays tight and squeak-free.
The great news is, for those special subfloor materials or unique situations, manufacturers often provide guidelines. It’s like having a cheat sheet during a test; you just need to know where to look.
A Couple Things You May Have Not Thought About
Always invest in quality nails. While it might be tempting to save a few bucks on a cheaper option, remember: a sturdy subfloor is foundational. Your future self (and your floor) will thank you.
Speaking of future, one thing to keep in mind is the weather conditions for your subfloor installation. It’s not directly related to nail size, but it sure impacts the longevity of your floor.
Navigating the Subfloor Jungle: Plywood Vs. The Rest
Ever felt like subflooring was an unsolvable puzzle, with pieces that just don’t fit? Maybe you’re questioning, “Which type should I lay under my gleaming hardwood or my chic tiles?” Hold onto your tool belt; we’re diving deep into the world of subfloors.
Plywood Subfloors: The All-Star
Plywood has been the darling of many homeowners and builders for what seems like eons. And it’s easy to see why. But what makes plywood subfloors the popular choice for many?
- Durability & Stability: Plywood, especially when complemented with the right type of nail and a nail gun, offers an impeccable balance of strength and flexibility. It’s like the reliable friend who always shows up – rain or shine.
- Versatility: Whether you’re planning on laying hardwood floors, carpet, or even tiles, plywood provides a dependable base. In my experience, the plywood subfloor is akin to the chameleon of the flooring world; it effortlessly adapts to its companions.
- Cost-Effective: Got a tight budget? Plywood offers an ideal mix of quality and affordability. You get to ensure a rock-solid foundation without blowing through your savings.
Interior vs. Exterior Subfloors: Spotting the Difference
Choosing between interior subfloors and exterior floors is like deciding between a lounge suit and outdoor gear – each has its specific place and purpose.
- Interior Subfloors: These are the unsung heroes beneath your plush carpets or gleaming tiles. Typically, they’re made of plywood sheathing and are designed to provide stability and insulation from the elements. Ever noticed how your home stays cozy despite the snowstorm outside? Thank your interior subfloors.
- Exterior Floors: Now, these are a whole different ball game. Designed to withstand the brunt of weather conditions, they need to be resilient. Unlike interior subfloors that are sheltered, exterior floors face the wrath of sun, rain, and sometimes, a misaimed football. For exteriors, materials like concrete or specially treated wood are often the go-to.
Decoding Plywood Sheathing: Not Just Another Sheet
Look closer, and you’ll find that all plywood isn’t created equal. Plywood sheathing is the heartthrob for subfloor installations. With its layers cross-laminated and bonded with sturdy glue, it’s a match made in heaven for interior subfloors. It resists warping, making it a best bet for longevity. On a side note, if plywood were in high school, sheathing would be the homecoming queen.
Choosing the Type: Your Blueprint to Success
The type of subfloor you choose can set the tone for the rest of your build. While plywood is often the darling for many indoor setups, don’t shy away from exploring other materials if you’re looking at exterior floors.
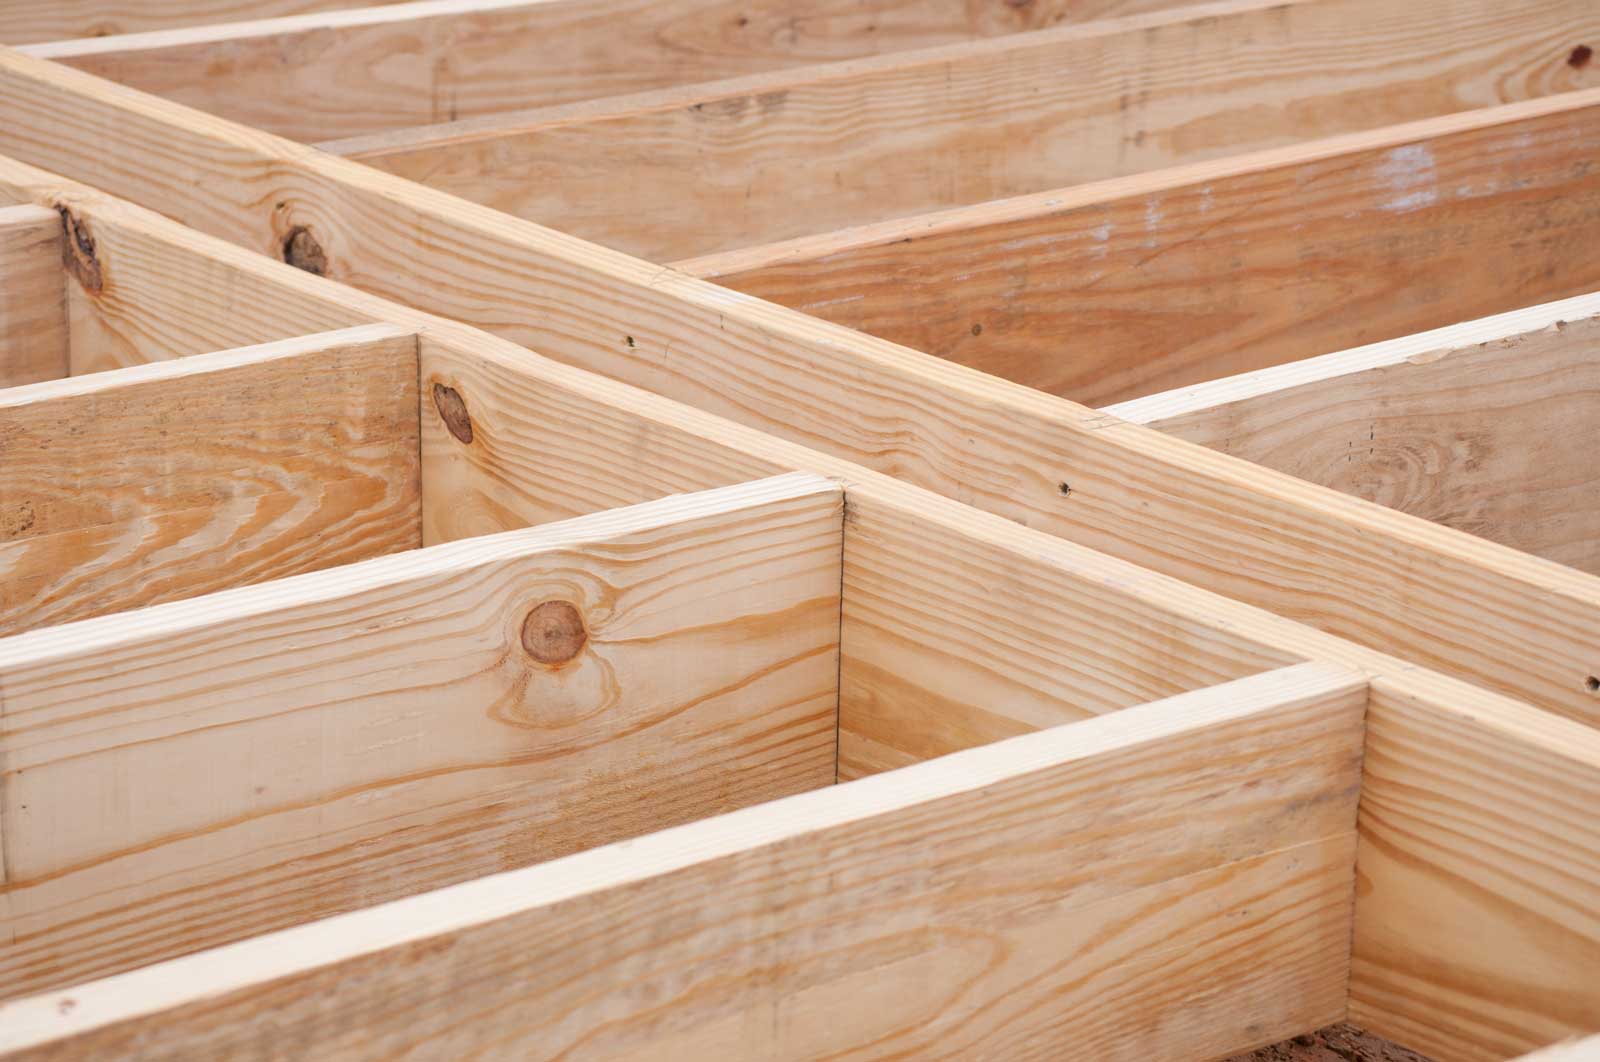
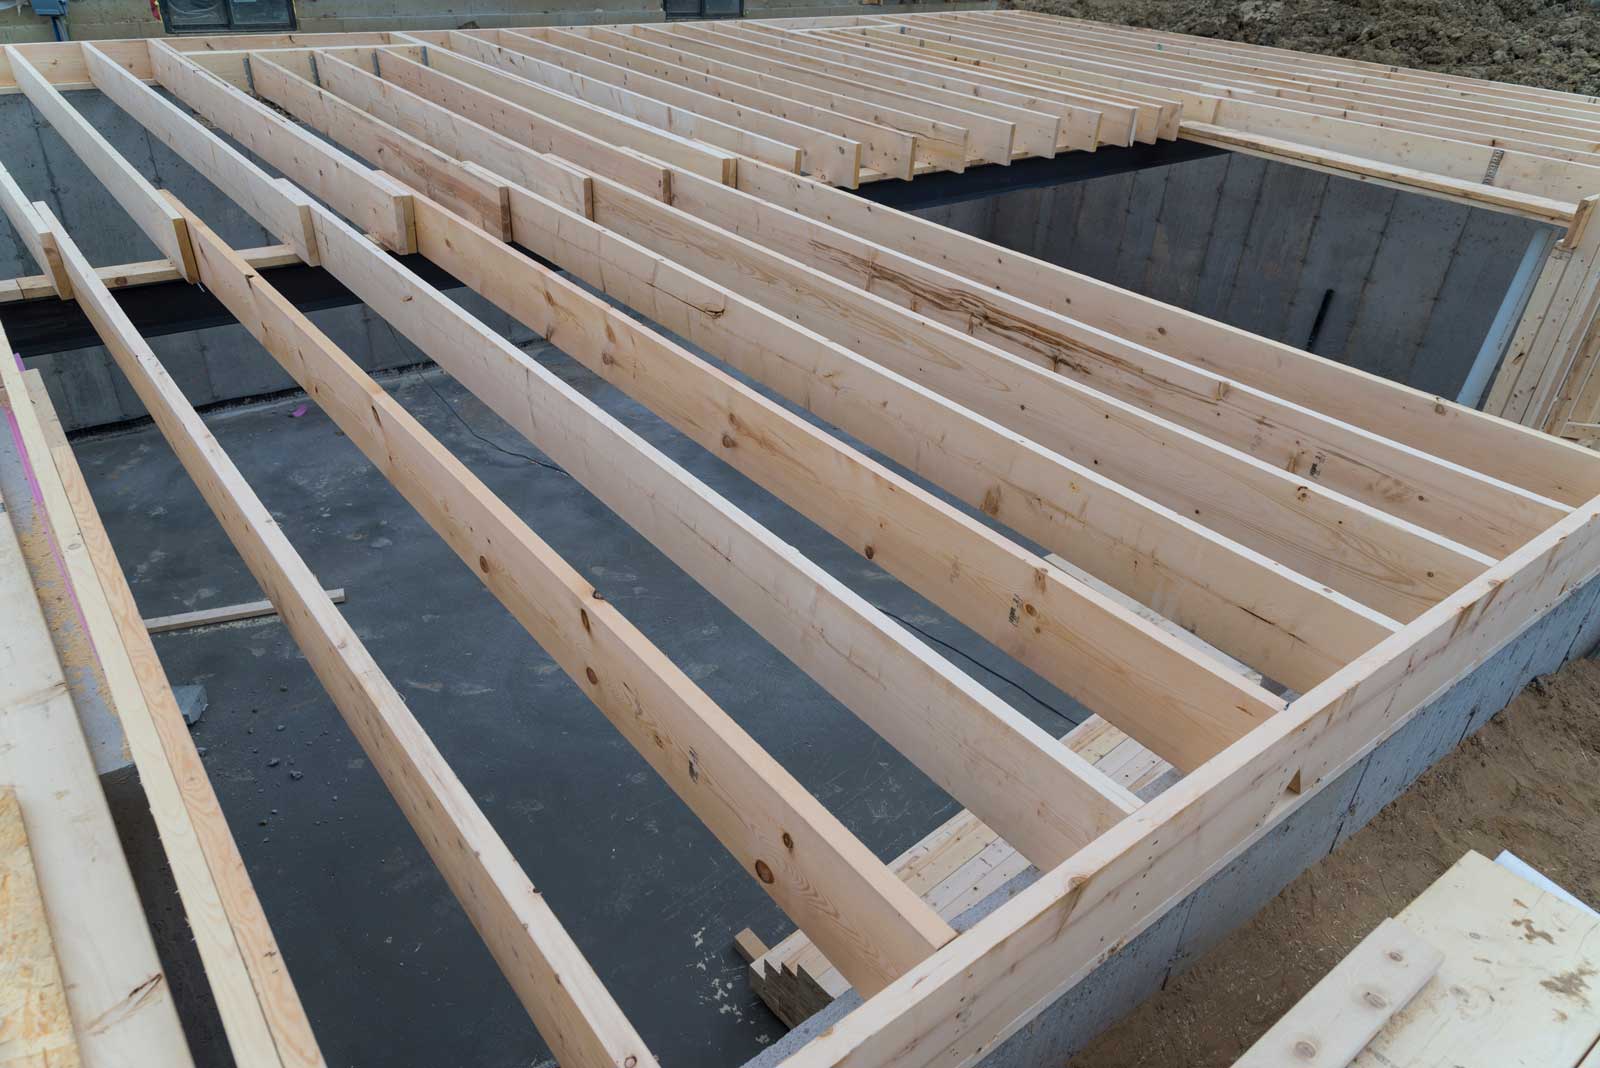
Floor Joists: The Unsung Heroes of Your Floors
Ever walked on a floor and marveled at its sturdiness? Chances are, you weren’t just standing on the surface. You were walking on a masterpiece built on strong foundations, invisible to the eye, but vital for stability. Dive with me into the world of floor joists, the unseen guardians of your floor’s universe.
Joists: What Are They Exactly?
Floor joists are the backbone of any structure, the silent framework that holds everything together. While you might be gushing over your sleek hardwood floors or marveling at that elegant tile, it’s the joists below that ensure your floor doesn’t greet you with a creak every morning.
- Strong and Steady: At the core, floor joists are the horizontal structures that support the load of the floor. They run between walls or beams, ensuring that the weight is evenly distributed. Think of them as the supporting actors that let the lead star shine.
- Material Matters: While you might think, “Wood is wood, right?” – Not exactly. The type of timber used, the spacing, and even the size can make a significant difference in the performance of your floor. From years in the business, I found that picking the right material can be the difference between a squeaky mess and a silent masterpiece.
Nailing It: Choosing the Right Nail for Joists
Securing your subfloor to those joists is no light task. It’s not about just any nail; it’s about the right size nails for floor joists and the appropriate type. Ever tried wearing shoes two sizes too big? Yep, the fit matters.
- Size Matters: It’s essential to use the appropriate size nails for floor joists to ensure stability. Too short and they won’t penetrate deep enough; too long and they might just become a tripping hazard. The rule of thumb? The nail should be at least three times the thickness of the material it’s penetrating.
- Types and Tips: Not all nails are created equal. While ring shank nails might be a popular choice due to their gripping power, understanding the nature of your subfloor with floor joists is key. For instance, while hardwood might need a particular type of nail, a plywood subfloor could require another. And let’s not forget about the nail gun. Trust me, getting the right tools can make the difference between a dreamy DIY project and a nailing nightmare.
You can learn more about choosing the right nails for floor joists here.
Bridging the Gaps: Ensuring Seamless Connections
Once you’ve chosen your joists and decided on the nail size, connecting the dots (or, in this case, the wooden beams) is vital. Your subfloor and joists should be as harmonious as a well-choreographed dance. After all, stability is the game, and you want to be on the winning team.
Nails vs. Screws: Securing Your Decision
So you’ve got the lowdown on floor joists and the various types of subfloors. With that solid foundation, the next logical step is to explore the best fasteners for the job. Nails or screws? Both have their merits and drawbacks. Let’s break it down for you.
Holding Power: Silence Those Squeaks
Stepping on a squeaky floor can be as unexpected as a pop quiz. But with the right fasteners, you can ace floor stability.
- Nails: Ring shank nails, in particular, can provide a good grip due to their unique design. Yet, they might shift over time, leading to those pesky squeaks.
- Screws: If you’re aiming for a floor that’s as quiet as a library, screws might be your best bet. Their threaded design holds tight, making squeaks less likely.
In my experience, after transitioning from nails to screws in a renovation project, the difference was night and day in terms of noise reduction.
Durability: A Lasting Impression
Your floor endures a lot: from the pitter-patter of feet to the hustle and bustle of daily life. Which fastener can stand the test of time?
- Nails: They can be steadfast, especially when applied correctly. However, high-traffic areas might see them loosen a tad over the years.
- Screws: The marathon runners of the fastener world. Built for endurance, screws often stand unyielding for longer periods.
Budget Watch: Upfront vs. Long-term Costs
Sure, initial expenses matter, but so does the value of your investment over time.
- Nails: Typically easier on the wallet initially, and with the speed of a nail gun, they’re quickly applied. An appealing choice for those on a tighter budget.
- Screws: They might have a steeper initial price tag, but their resilience can translate to fewer headaches and costs down the road.
As you gear up for your flooring adventure, weighing the pros and cons of nails versus screws is a decision that you really have to contend with. Each has its own unique advantages. It’s all about finding the perfect fit for your specific needs.
Specialty Nails: The Unsung Heroes of Flooring
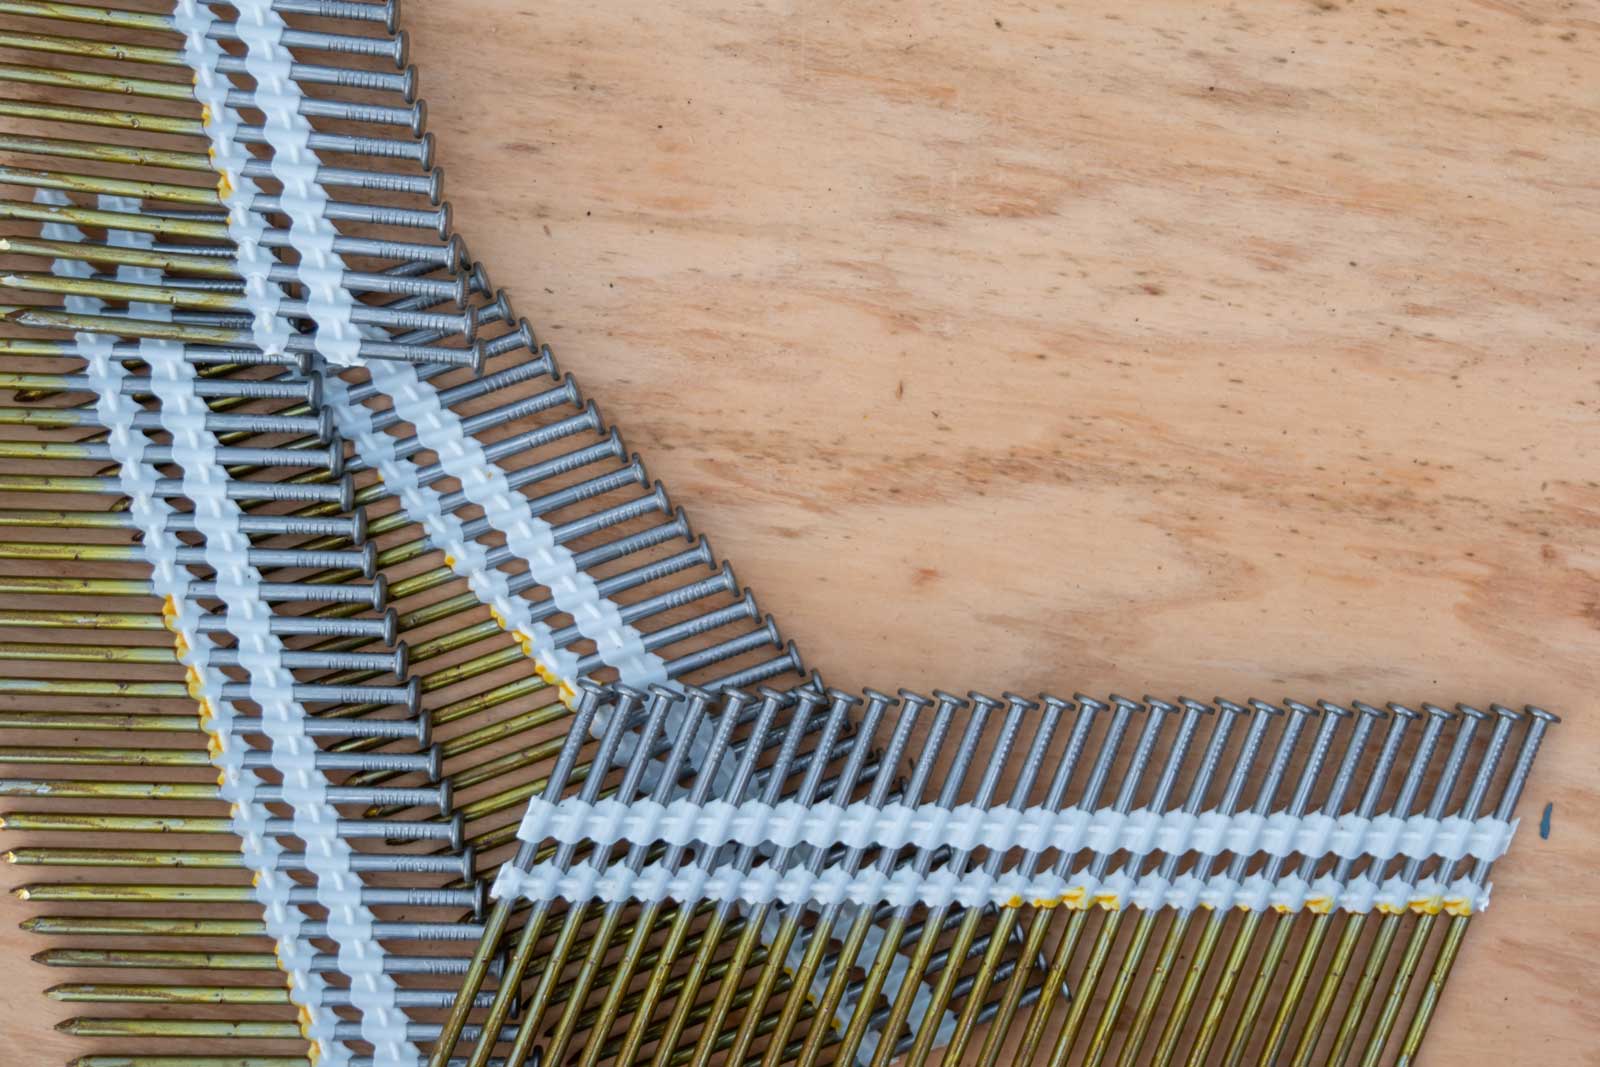
After diving deep into the world of screws and nails, there’s another contender worth spotlighting. Among the vast array of nails available, ring shank nails have carved out their niche, promising superior holding power and unique advantages. Let’s unpack the magic behind these specialty nails and see how they stack up against their traditional counterparts.
Ringing in the Benefits: Why Choose Ring Shank Nails?
Ever stumbled upon a golden nugget of knowledge that just made your DIY day? Here it is: the ring shank nail. This nail has a distinct design with a series of rings on its shank, ensuring that once it’s in, it’s in for the long haul.
- Holding Power: These nails grip like a toddler to their favorite toy. The unique ringed design prevents them from easily being pulled out, making them a top choice for projects demanding enduring strength.
- Resistance to Weather Conditions: Come rain, snow, or high winds, ring shank nails hold firm. For those living in areas with fluctuating weather conditions, this can be a game-changer.
- Versatility: From plywood sheathing to subfloor installations, these nails can do it all. Their robust nature makes them a go-to for various projects.
In my experience, I once worked on a decking project during a particularly stormy summer. While the weather was a challenge, the ring shank nails held fast, even when Mother Nature threw her worst.
Traditional vs. Ring Shank: A Nail Showdown
With all this praise, you might wonder how ring shank nails fare when placed side-by-side with traditional nails.
- Traditional Nails: A tried and true option, these nails are a staple in many projects. However, they might lack the staying power of their ringed counterparts.
- Square-cut Nails: A nod to yesteryears, these nails are often used for their aesthetic appeal in restoration projects. They offer a good grip, but ring shank nails still edge them out in terms of sheer holding might.
- Shear Strength: When it comes to bearing weight and resisting forces, ring shank nails boast an impressive shear strength, often outperforming traditional nails.
It’s clear that the details make all the difference. With their unmatched grip and resilience, ring shank nails are proving to be a powerful ally in the construction world. But the journey doesn’t end here. Stay tuned as we explore more facets of flooring and construction in the upcoming sections.
A Dive into Hardwood Floors: Nailing the Perfect Finish
Ah, hardwood floors – the Rolls Royce of home flooring. There’s nothing quite like the feel of genuine hardwood underfoot, but how do you ensure that elegant finish remains flawless for years? By understanding the nuances of nails and installation. Dive right in as we differentiate between nail sizes and types crucial for installing hardwood over a subfloor.
Finding the Perfect Match: Nail Size and Type
You wouldn’t wear a tuxedo to a beach party, right? Similarly, not every nail fits the hardwood bill. But fear not! With this guide, you’re well on your way to achieving that magazine-cover-worthy hardwood finish.
- Flooring Nails: Specifically designed for the job, these are your hardwood’s best friends. Their size and shape ensure that the hardwood is secure without any unsightly blemishes.
- Hardwood Nailers: This tool might just become your new best buddy for hardwood installation. These pneumatic nailers drive nails at the perfect angle and depth, ensuring a seamless finish.
- Nail Length: Here’s a quick rule of thumb: the nail should be at least twice the thickness of the hardwood. Typically, 1.5 to 2 inch nails are a popular choice.
- In my experience, while renovating a century-old cottage, the difference between the right and wrong nail was night and day. By switching to the ideal nail size, the creaky boards and floor squeaks were all but eliminated.
Solid Ground: Solid Wood Flooring vs. Other Types
You’ve got the nails down, but what about the hardwood itself? Solid wood flooring brings an authenticity and longevity that’s hard to beat.
- Thickness Matters: The thickness of the hardwood can determine the size of the nail. Thicker boards demand longer nails for long-lasting security.
- Installation Over Subfloor: A plywood subfloor offers a smooth, stable base for hardwood. Ensure that you choose the right type of screws and nails to anchor both layers together, preventing any potential floor squeaks.
- Floating vs. Nailed Down: While some hardwood installations involve nailing down each board, others “float” above the subfloor, secured only at the edges. The method you choose will influence the type and size of nail required.
With a grasp on the nail essentials for hardwood flooring, you’re not just setting the stage for a visually stunning floor but also ensuring its longevity. As we transition next, keep those tools handy, because every aspect of construction, from foundation to finish, intertwines to create your perfect home sanctuary.
Addressing Squeaky Floors: Silencing the Unwanted Home Soundtrack
Ever tried sneaking to the fridge at midnight, only to be ratted out by a chorus of squeaky floors? It’s like your house’s own version of a security alarm. Squeaky floors can be more than just an annoying nighttime nemesis. They indicate underlying issues, often related to how your floors were installed. After that deep dive into hardwood installation, it’s time to tackle the culprit behind those creaks and groans, and how the right tools (especially nails) can be your knight in shining armor.
Why Do Floors Sing the Blues (or Squeaks)?
Before you can address the squeak, it’s essential to understand the cause. By doing so, you ensure a more permanent solution rather than a quick fix.
- Subpar Subfloors: Often, squeaky floors arise from issues with the plywood subfloor. If not secured properly to the floor joists, gaps can form, leading to movement and, consequently, that irksome squeak.
- Nailing Nightmares: The wrong type of nail, or not enough of them, can result in shifting boards. A small movement can lead to a big squeak.
- Environmental Evils: Changes in weather conditions can cause wood to expand or contract. If your floor isn’t installed with this in mind, you might just end up with a symphony of squeaks.
The Right Tools to Quiet the Quirks
Using the right tools can make all the difference. If you’re looking to ensure your floors remain silent (and not just because you’ve thrown a rug over the noisy spot), read on.
- Quality Over Quantity: While it might be tempting to save a few bucks on cheaper nails, investing in higher quality options like ring shank nails can offer a tighter grip and reduce the likelihood of squeaks.
- Go Pneumatic: Using a pneumatic nailer ensures nails are driven in straight and secure, minimizing the chances of floor movement.
- Right Nail, Right Place: In my experience, while fixing a squeaky spot in my own home, I realized that merely replacing a few misaligned nails made a world of difference. Always make sure to nail directly into the floor joists, ensuring maximum stability.
Tackling squeaky floors might seem like child’s play. But, as we’ve discovered, it’s these seemingly small issues that can make the most significant difference in the comfort and functionality of your home. As we proceed, remember: in construction, every nail, screw, and plank has its purpose. Don’t underestimate the power of getting the nitty-gritty details right.
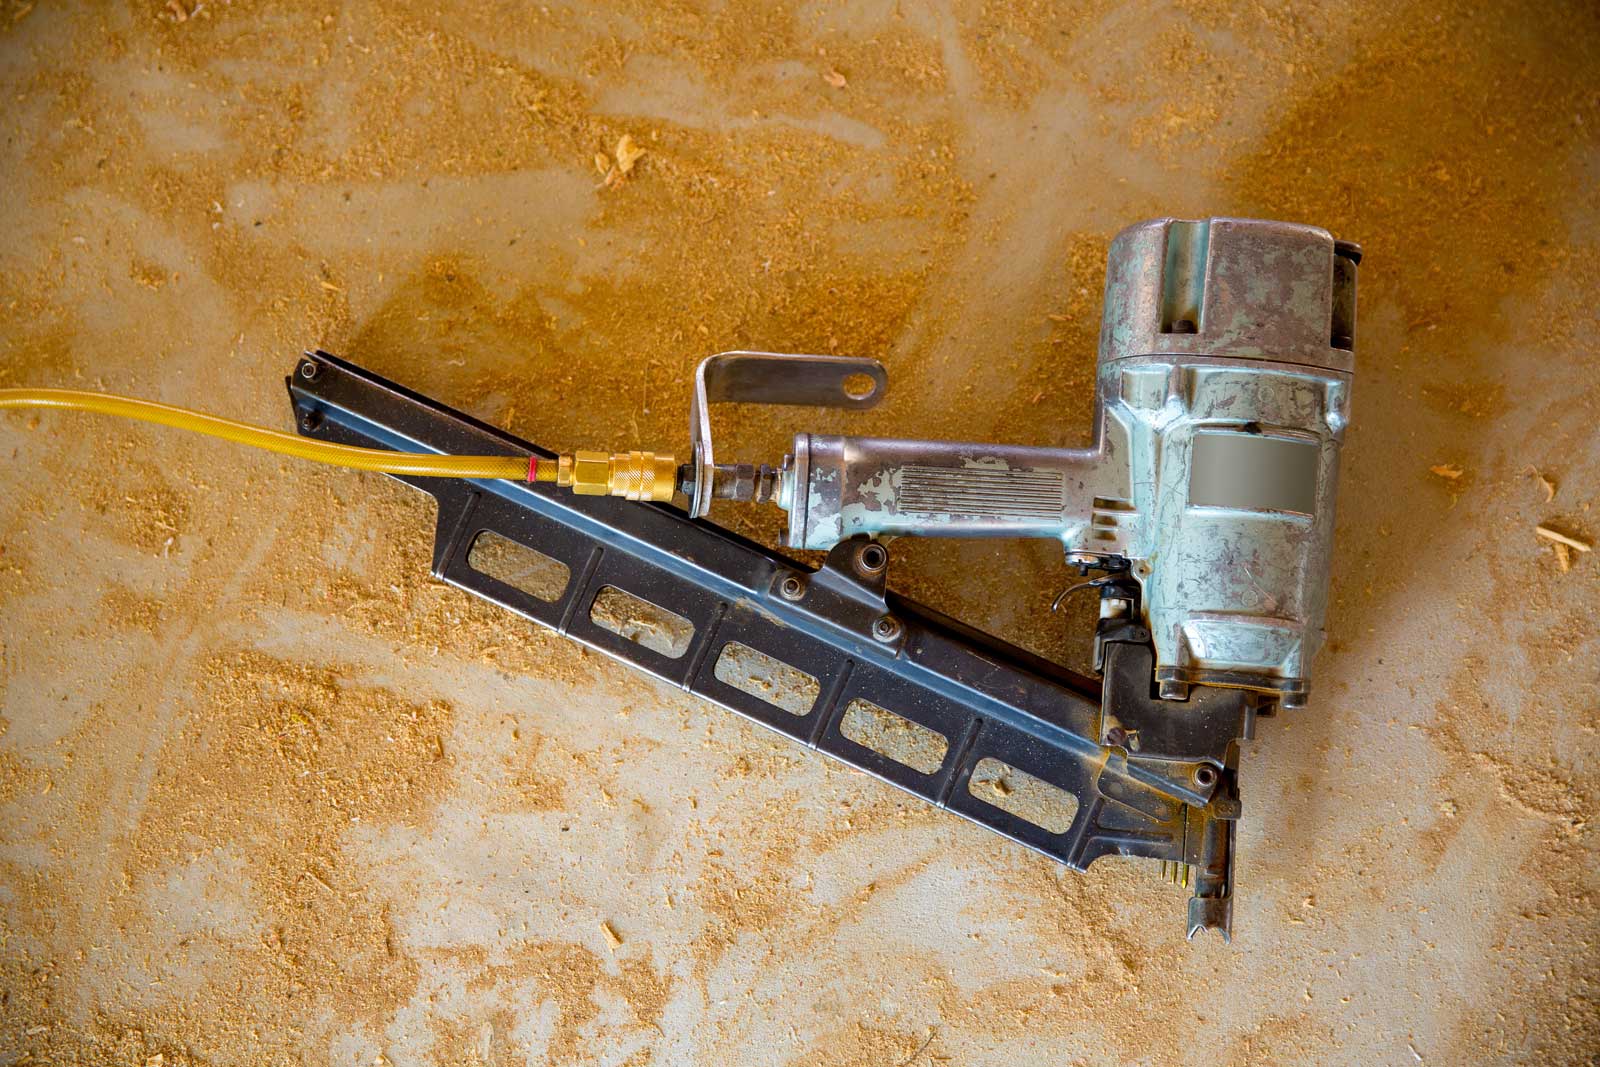
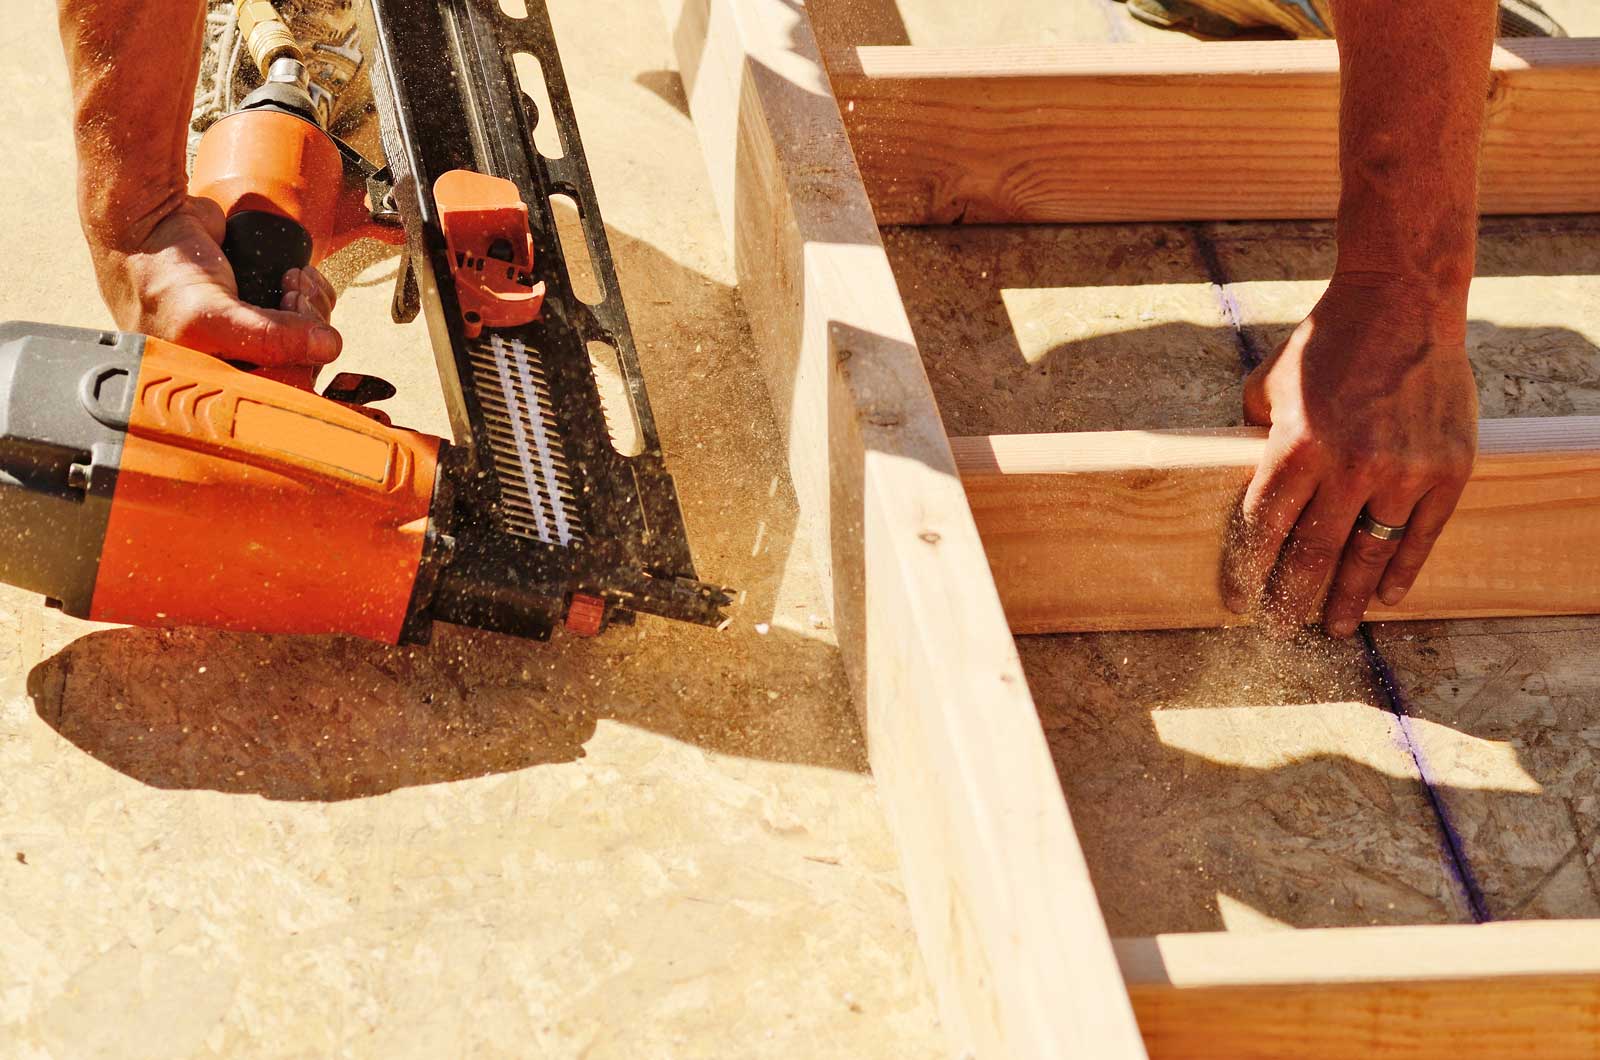
Tool Talk: Pneumatic Nailers and Other Nailing Guns
Ever had one of those DIY weekends where you’re excited to lay down new flooring, only to be halted in your tracks by the daunting task of nailing? Yeah, been there, nailed that. (Sorry, couldn’t resist.) But what if I told you there’s a tool that can make this entire process a breeze? After discussing those sneaky squeaks, it’s time to dive deep into the world of nailing guns, focusing on the mighty pneumatic nailer and exploring other nail gun options perfect for your needs.
The Power of the Pneumatic Nailer
You might be wondering, “Why all the fuss about this nailer?” Well, allow me to enlighten you.
- Precision and Power: A pneumatic nailer uses air pressure from air compressors to drive nails into various materials. This ensures each nail is driven consistently, reducing the risk of misfires or bent nails.
- Time is Money, Friend: For those on a tight schedule (or simply impatient like me), a pneumatic nailer can significantly speed up projects, allowing you to complete your flooring in record time.
- Less Muscle, More Hustle: Remember that time I tried to nail down a subfloor using just a hammer? It wasn’t pretty. Using a pneumatic nailer reduces fatigue, ensuring you keep going without compromising on quality.
Meet the Other Members of the Nailing Gun Club
While the pneumatic nailer might be a star player, it’s essential to recognize other key players in the nailing game.
- Brad Nailer: Perfect for lighter tasks, the brad nailer is your go-to for trim work or other delicate projects where a standard nail might be overkill. This nailer might be small, but it’s mighty, ensuring those finishing touches are just right.
- Hardwood Nailers: When working on hardwood installation, these specialized nailers are your best friends. They ensure your beautiful hardwood floors are securely fastened, looking flawless for years to come.
- Framing Nailer: Tackling a more significant construction project? You might want to get acquainted with the framing nailer. This heavy-duty tool can handle more extensive nails, ideal for those larger tasks around the home.
The right tools can make all the difference in your DIY adventures, ensuring not only a job well done but also a project you can be genuinely proud of. As we journey further, always remember that equipping yourself with knowledge is just as crucial as having the right tools in your arsenal.
Comparing Different Fastening Tools
Ever stand in a hardware store, staring at rows of fastening tools, only to walk out empty-handed because of choice paralysis? I’ve been there. After diving into the world of nailing guns, it’s now time to put these tools side by side and help you figure out which one will be your best ally in those home improvement escapades. Buckle up because we’re about to unpack the brad nailer, framing nailer, pneumatic nailer, and nail gun, deciphering their strengths and recommending the best choice for your specific needs.
The Brad Nailer: Trim Master
When I first got into DIY, someone told me the brad nailer was like having the best, most fine-tuned sports car of nailers – sleek, precise, and perfect for the finish. It’s specifically designed for those delicate tasks like trim work or attaching lightweight moldings.
- Strengths: The brad nailer shoots thin, small nails which are less likely to split delicate trims.
- Project Fit: Think cabinetry, window casings, and other intricate woodworking tasks. If you’re looking to add some finishing touches, this is your guy.
Framing Nailer: The Construction Beast
This bad boy – the framing nailer – is the tool you want when it’s time to lay down the foundation. As the name suggests, it’s designed for heavy-duty work.
- Strengths: This nailer can handle larger, longer nails, ensuring robust and durable connections, perfect for larger projects.
- Project Fit: Imagine building decks, room additions, or constructing houses. When the task is big, the framing nailer is your go-to.
Pneumatic Nailer: The Speed Demon
Remember our talk about the pneumatic nailer? Powered by air compressors, this tool offers consistency and speed.
- Strengths: Fast, reliable, and versatile. It can cover a range of tasks from flooring to roofing, all while saving your precious energy.
- Project Fit: Ideal for those who want a bit of everything. Whether it’s laying down hardwood floors or fixing up that plywood subfloor, it’s got you covered.
Nail Gun: The Generalist
Now, the generic term nail gun can refer to a variety of nailers, but in general, it’s a power tool that drives nails into wood or some other kind of material.
- Strengths: Versatility is the nail gun’s middle name. It’s a solid all-rounder for most tasks.
- Project Fit: Those general home improvement projects, from putting up drywall to building a fence. If you’re unsure where to start, the nail gun is a safe bet.
Project-Specific Recommendations
Alright, decision time. Here’s the lowdown based on your project needs:
- Trim and Delicate Work: Go with the brad nailer. Precision is key here.
- Large Construction Projects: The framing nailer is your muscle. It’ll power through the big tasks.
- Versatile Home Projects: If you’re floating between tasks, the pneumatic nailer or general nail gun should be in your toolkit.
- Hardwood Floor Installations: Here’s where the specialized hardwood nailers shine.
The right tool not only ensures a job well done but also makes the entire process enjoyable. From my personal experience, investing time in choosing the right tool can save hours of frustration later. Let’s keep this momentum going as we delve deeper into the world of home improvement.
Staples in Subfloor Installation: Are They Your Secret Weapon?
Ever looked down at a floor and wondered, “What’s holding this masterpiece together?” While nails and screws often steal the spotlight, there’s a hidden hero in the world of subflooring: staples. Before you rush to your nearest hardware store, let’s dig deep into the role of staples in subfloor installation, and then put them head to head against nails and screws.
Stick ’em Up: The Role of Staples in Subflooring
Staples might seem like the underdog in the subfloor world, but, in some scenarios, they’re the top dog. (Alright, enough with the dog metaphors).
Staple Advantages:
- Speed: With the right tools, stapling can be quicker than nailing or screwing.
- Secure Hold: Those long staples dive deep and grasp tight. The lower rings and upper rings on certain staples can provide an even stronger grip.
- Versatility: Staples can be used for various types of subfloors, including plywood underlayment and even 4-inch plywood.
In my experience, staples can be a game-changer for certain projects. They’ve saved me time, energy, and a few head scratches.
Nail vs. Screw vs. Staple: The Subfloor Showdown
We’ve sung the praises of staples, but how do they stack up against their nail and screw counterparts?
- Nails: These classic fasteners, especially ring shank nails, are known for their sheer strength. They’re a popular choice for securing plywood subfloors to floor joists. However, nails can sometimes lead to those dreaded squeaky floors if not installed properly.
- Screws: A best way for many DIYers and professionals, screws, especially those with larger threads, offer a strong, long-lasting hold. Remember the right type of screws and ensure that the screw head sits flush with the surface. With an auto-feed screw gun, the installation is a breeze.
- Staples: Often a more cost-effective choice (a godsend if you’re on a tight budget), staples provide a quick and efficient solution for subfloor installation. But, ensure you choose the right staple size to achieve the best hold.
The Verdict: To Staple or Not?
Staples are the unsung heroes of many subfloor installation projects. Their efficiency and effectiveness can’t be ignored. While nails and screws have their merits, staples offer a unique blend of speed and strength.
However, the best fastener for your project really boils down to your specific needs, the type of subfloor, and of course, personal preference. Always arm yourself with the right tools, and regardless of whether you’re stapling, nailing, or screwing, a solid subfloor is just a few steps away.
The Subfloor Speed Run: Time Considerations in Subfloor Installation
Ever wondered, “How can I shave hours off my subfloor project?” (Okay, maybe you’re not looking to set any world records, but efficiency never hurt anyone). The fasteners you choose can greatly impact the time it takes to lay down that floor. But wait, there’s more! Dive into our guide on time considerations for subfloor installation and find out how to hustle without the hassle.
Nails vs. Screws: A Race Against the Clock
Choosing between nails and screws? It’s more than just a choice of tools (but you know that, becasue we talked about that above). It’s about the time you have, the speed you need, and the quality you desire.
- Nails: Nailing can often be quicker. With a nail gun or pneumatic nailer in hand, you can fly through plywood subfloor installations. Plus, they’re the go-to for many construction projects. But beware, while nails are speedy, if not installed correctly, you might just find yourself with some annoying floor squeaks down the line.
- Screws: Now, screws might take a bit more time than nails (that’s right, patience is a virtue here). They require precision, ensuring the screw head sits flush and the size screws are just right. However, the good news? They often provide a long-lasting security that many professionals swear by. And with the auto-feed screw gun, you can reach record time.
In my experience, while nails might save me time initially, I often lean towards screws for projects where longevity and quality matter the most. It’s a tad bit more effort, but often worth the peace of mind.
Maximizing Your Time: Quickfire Tips for Efficient Installation
So, you’re eyeing the finish line and want to get there ASAP. Here’s how:
- Right Tools, Right Time: Always have the right tools at hand. Whether you’re using hardwood nailers or a basic screw gun, ensure they’re in good working condition. A well-maintained tool can save a lot of time in the long run.
- Know Your Material: Whether it’s plywood sheathing or 4-inch plywood, knowing the thickness and type of your subfloor material can help you choose the right size of nails or screws, reducing the chance of mistakes.
- Weather Conditions: Keep an eye on the forecast! Installing on a dry day can prevent delays and damage to your material.
- Pre-Planning is Key: Measure twice, cut (or screw) once! By planning out your subfloor installation in advance, you can ensure a smoother and faster process.
Remember, speed is essential, but quality is paramount. Don’t sacrifice the integrity of your floor just to try to get done. We’ve all been there and done that – sometimes you just want to be done. I can totally relate.
After all, while the tortoise might take his sweet time, he does finish the race in the end. But, hey, who’s comparing flooring to a fable? Keep these tips in your back pocket, and you’ll be flooring in no time!
Nailing the Details: Additional Considerations for Subfloor Installation
Hold on tight! We’re about to dive deep into the less-considered, yet crucial aspects of subfloor installations. Think you’ve got everything nailed down? Think again. From the gripping drama of fasteners to manufacturing mysteries and weather whims, it’s time to uncover the hidden layers of subfloor setup. Ready? Let’s floor it!
Hold Up! The Grip Game in Fastening
Ever tried holding a fish straight out of the water? That’s what it’s like dealing with a subfloor that lacks grip. The stronger the grip, the longer your floor lasts.
- Grip on Nails and Screws: The design of fasteners, like ring shank nails, is all about maximizing grip. Those spirals and rings aren’t just for show – they prevent the nail from backing out over time. The screw head and thread (be it smaller thread or larger threads) also play a major role in how well your screw grips the material.
- Subfloor Material Matters: Different materials offer varying levels of grip. While plywood subfloor offers a decent grip for most fasteners, materials like concrete slab may require specialized nails or screws for a firm hold.
In my experience, a project once went south because I overlooked the importance of grip. The nails I initially chose kept popping out of the plywood sheathing, causing endless floor squeaks. Switching to a different type of nail with better grip saved the day (and my sanity).
Peeking Behind the Curtain: The Manufacturing Process
Did you know that not all nails and screws are made the same? The manufacturing process significantly influences their quality, strength, and functionality.
- Crafting Nails: Whether it’s sinker nails or square-cut nails, the manufacturing technique can affect their shear strength and other properties. Processes that ensure consistent quality, like tempering or coating, result in higher quality nails that won’t let you down.
- Screwing with Perfection: The making of screws, especially the likes of wsv subfloor screws or steel screws, can be complex. From creating the perfect helical thread to ensuring the right screw head design, there’s an art and science behind every screw you pick up.
Stormy Weather Ahead: Nail & Screw Choice in Changing Climates
Rain, shine, or snow – weather conditions can be the unsung villain or hero of your subflooring story.
- Heat & Humidity: Moist conditions can be the enemy of certain fasteners, especially if they’re prone to rust. This is where stainless steel nails or screws with a special coating come into play.
- Cold Climates: In colder conditions, certain materials might contract, leading to gaps or weak points in your subfloor. Choosing the right type of screws that expand and contract with the material is key.
- General Outdoor Installations: For exterior floors, considering weather-resistant options like deck screws is crucial. Remember, it’s not just about enduring daily wear and tear, but also braving Mother Nature’s mood swings.
Bottom line? Whether you’re contending with grip, geeking out over manufacturing details, or checking the daily forecast, these considerations can make or break your subfloor installation.
The Intricate Dance of Nails & Screws: It’s More Science than Art
Picture this: You’re about to embark on a subfloor installation, and there’s a sprawling sea of nails and screws before you. How do you pick? Is it sheer luck or shear strength? And what’s this buzz about helical threads? Sounds complicated, doesn’t it? Well, buckle up, buddy! We’re about to break down the big bad world of technicalities, making it as easy as pie (and we all love pie). Get ready to delve deep!
Strength in Shear: The Unsung Hero
When it comes to fastening, it’s not just about sticking two things together. It’s about ensuring they stay together, especially when forces try to play villain.
- The Power of Shear Strength: Ever tried to break a stick by applying force straight down? That’s shear force. And the ability of your nail or screw to resist that force? You guessed it – shear strength. This is a game-changer, especially in subfloor installations where loads and forces are ever-present.
- Choosing the Right Player: Not all fasteners are made equal. While some, like the ring shank nails, are champions when it comes to shear strength, others might falter under pressure. Know the demands of your project and choose accordingly.
Now, here’s a little anecdote for you. In my experience, I once used common nails for a deck project thinking, “Hey, a nail’s a nail!” Big mistake. A week later and a minor dance party mishap, I was looking at a repair job. Lesson learned? Never underestimate the sheer importance of shear strength.
Helical Threads: Not Just a Fancy Term
For those who think helical threads sound like something straight out of a sci-fi novel, you’re in for a surprise.
- The Spiral Magic: Ever wondered why some screws seem to go in smoother and hold tighter? It’s that spiral design – the helical thread. It’s designed to convert rotational force into a linear force. In simpler terms, as you twist, it dives deep and holds tight.
- Why All the Buzz?: These threads offer more surface area, making it a darling when it comes to grip. It’s a popular choice, especially in construction projects where the stability of joints can make or break the outcome.
Remember: choosing the right fastener isn’t just about size or looks. Dive deeper into the science, and you’re not only ensuring a successful project but also saving yourself future headaches. With that knowledge in your tool belt, what’s next on the agenda? Bring it on!
Related & Frequently Asked Questions
I think we’ve covered it all on this topic, but there may still yet be a couple things you’re not sure on. Here are answers to a couple of the more frequently asked questions.
Q: Is 1/2 inch thick enough for subfloor?
A: While 1/2 inch can be used, 3/4 inch plywood is the more common and recommended thickness for subfloors to ensure stability and strength.
Q: Is 5/8 thick enough for subfloor?
A: Yes, 5/8 inch thickness is acceptable for subfloors, but 3/4 inch is often preferred for better stability.
Q: What is the nail spacing for flooring?
A: Nail spacing for hardwood flooring is typically every 6 to 8 inches along the floor joists.
Q: What kind of nailer is used for subfloor?
A: A framing nailer or a specialized subfloor nailer can be used for subfloor installations.


