
Ever marveled at the stunning trim work in luxury homes and wondered, “How do they achieve that impeccable finished look?”
We’re about to unveil a secret.
It starts with choosing the correct nails, like the ideal length from a 15-gauge or 16-gauge nailer, especially for exterior trims and door casings. It’s a game-changer!
So what’s the deal – what size nails should you use for baseboards?
For baseboards you should use finish nails, specifically between 15-gauge and 18-gauge, with a length that’s 2 to 2.5 times the thickness of the baseboard material. Typically, a 16-gauge nailer firing 1.5-inch to 2-inch nails works well for most baseboards. Ensure the nails penetrate at least 1 inch into the wall studs for secure attachment.
Yet, there’s more beneath the surface.
Like, why do professional contractors often prefer trim nailer guns with a large piston?
Or how does a pin nailer fit into the delicate art of trim work?
If these questions get your gears turning, prepare to be enlightened. We’re diving into key considerations like the thickness of the nail, type of material, and even the magic of construction adhesive. Ready to upgrade your DIY prowess?
- Recommended Nail Size for Baseboards: For most baseboards, finish nails between 15-gauge and 18-gauge, measuring 1.5-inch to 2-inch in length, are ideal.
- Nail Length Principle: The nail’s length should be about 2 to 2.5 times the thickness of the baseboard to ensure stability.
- Nail Penetration: Ensure nails penetrate at least 1 inch into wall studs for a firm hold.
- Nail Type: Finish nails, particularly those fired from a 16-gauge nailer, provide a polished look without excessively large holes.
- Alternative Attachment Methods: In some cases, combining nails with construction adhesive can offer enhanced stability and a more finished look.
What Size Nails Should You Use for Baseboards?
In my experience, the ideal size of nails for baseboards typically ranges between 1.5 to 2 inches in length. To determine the right size nails for your baseboard trim, you should also consider the thickness of the baseboard and the size of the nailer you’re using.
When it comes to baseboard trim thickness, most standard options are around 0.5 inches thick, whereas thicker baseboards may go up to 0.75 inches. To figure out the optimal nail size, add 0.75 inches to the thickness of your trim to account for drywall penetration. For instance:
- For a 0.5-inch thick baseboard: Add 0.75 inches, resulting in a 1.25-inch nail
- For a 0.75-inch thick baseboard: Add 0.75 inches, resulting in a 1.5-inch nail
You should be mindful of the nailer size you have at your disposal, as different nailer models accommodate different nail lengths. A 16-gauge finish nailer is a popular choice for baseboard installation, which typically supports nails between 1.25 to 2.5 inches in length.
However, some prefer to use an 18-gauge brad nailer for a smaller hole size. In this case, the ideal nail length is still 1.5 to 1.25 inches to ensure the required penetration and holding power for the baseboard trim.
Now that you’re aware of the factors to consider, you can confidently choose the right size nails for your baseboard project and achieve a professional-looking finish that brings your room together.
Nail Size and Its Importance: The Key to Perfect Baseboards
You might think choosing the right nails for your baseboards is a minor detail, but it can make all the difference. In this section, we’ll explore the importance of nail size and dive into nail gauges for baseboards. So, let’s get started and help you achieve flawless results.
Explanation of Nail Gauges: What They Mean and Their Significance
You may have heard the term “gauge” when it comes to nails, but what does it actually mean? Nail gauge refers to the diameter of the nail’s shank. With a higher gauge number, you’ll get a thinner nail, and vice versa. This might surprise you, but choosing the right gauge plays a crucial role in the overall appearance and durability of your baseboards.
In my experience, selecting the appropriate nail gauge can make all the difference between a sturdy baseboard and one that splits or loosens over time. When working with delicate trim materials, you need smaller gauge nails to prevent splitting, while for thicker baseboards, a larger gauge nail ensures a firm hold.
Breakdown of Common Sizes: 16-Gauge, 18-Gauge, and Their Suitability for Baseboards
Now that you understand the significance of nail gauges, let’s review two common sizes for baseboards: 16-gauge nails and 18-gauge nails, and explore their suitability.
- 16-Gauge Nails: These nails are thicker and provide greater holding power, making them a popular choice for installing baseboards. Their larger diameter enables better support, especially for more substantial trim materials. However, be cautious when using them for delicate or thinner baseboards, as they might cause splitting.
- 18-Gauge Nails: As they are thinner, these nails are ideal for more delicate trim materials, like thin or decorative baseboards. They have less holding power than 16-gauge nails but reduce the risk of splitting the material. Keep in mind that for thicker baseboards, these might not provide the desired level of support.
Remember, choosing the correct gauge and nail length is essential to the success of your baseboard installation. Be sure to take into account the thickness of your materials and the desired level of support when selecting your nails. Now that you know the importance of nail size and the ideal gauges for baseboards, you’re all set to achieve professional-grade results.

Types of Nails and Their Applications
Finding the right nail for your baseboard job can make all the difference. The wrong choice can lead to a lackluster outcome, or even damage to your walls and baseboards. Luckily, you’ve come to the right place to discover the best nails for baseboards and their specific applications.
Brad Nails: Benefits and Best Scenarios for Use
Brad nails are small, typically 18-gauge, and ideal for baseboard projects where a low-profile appearance is desired. Due to their size and structure, they’re perfect for attaching lightweight materials like trim and molding.
In my experience brad nails hold tight, but they don’t have the same holding power as larger nails. This makes them a great solution where discretion is key, as they can be easily covered with paint or wood filler. There’s no need to pre-drill holes with brad nails so you can save time during installation.
- Thin and discreet: effortlessly hidden with paint or filler
- No pre-drilling: reduces installation time
- Best for lightweight materials like trim and molding
Finish Nails: When and Why They are Preferred
Sometimes you need a bit more strength for your baseboard job, and that’s where finish nails come in. Finish nails are larger than brad nails, often 15 or 16-gauge, making them stronger and better for holding heavier materials.
These nails offer excellent holding power, which works well for baseboards made of thicker or harder wood. But be warned, finish nails may require some pre-drilling to prevent splitting. They’re the nail of choice when the job calls for durability and strength.
- Stronger than brad nails: ideal for heavier materials
- Solid holding power: suitable for baseboards made of harder wood
- May require pre-drilling: to prevent splitting
Comparing Smaller Nails (18-Gauge) Vs. Larger Nails (15 or 16-Gauge)
Now that you know the differences between brad and finish nails, let’s break it down further:
| Nail Type | Size Gauge | Best For | Holding Strength |
|---|---|---|---|
| Brad Nails | 18-gauge | Lightweight materials, trim, and molding | Lower |
| Finish Nails | 15-16 gauge | Heavier materials, thicker or harder wood baseboards | Higher |
Your baseboard project will determine which nail is best suited for the job. For lightweight materials or a more discreet appearance, opt for 18-gauge brad nails. For heavier or thicker wood baseboards requiring increased holding strength, larger 15 or 16-gauge finish nails should be your go-to choice. Remember, each nail type has its specific applications and advantages, ensuring a polished result that meets your expectations.
Tools and Equipment
Imagine nailing baseboards in a snap. That’s right, with the right tools and equipment, you can get the job done in no time! Let’s dive in to discover the essentials for a flawless baseboard installation.
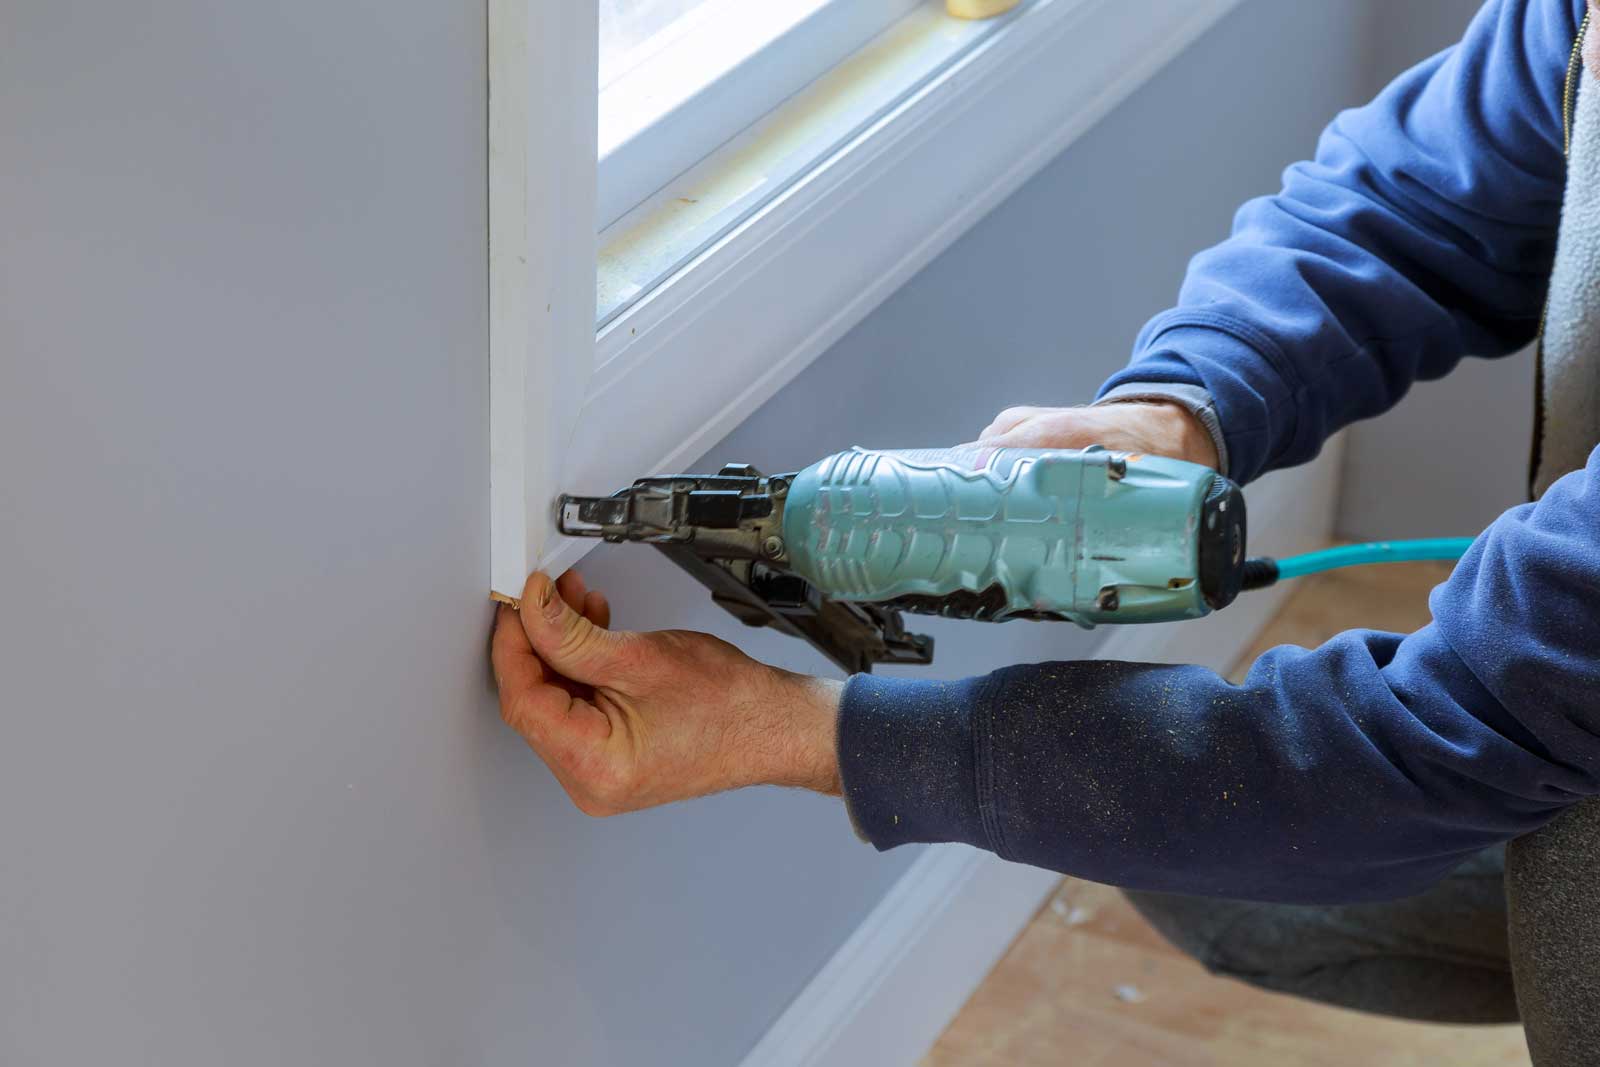
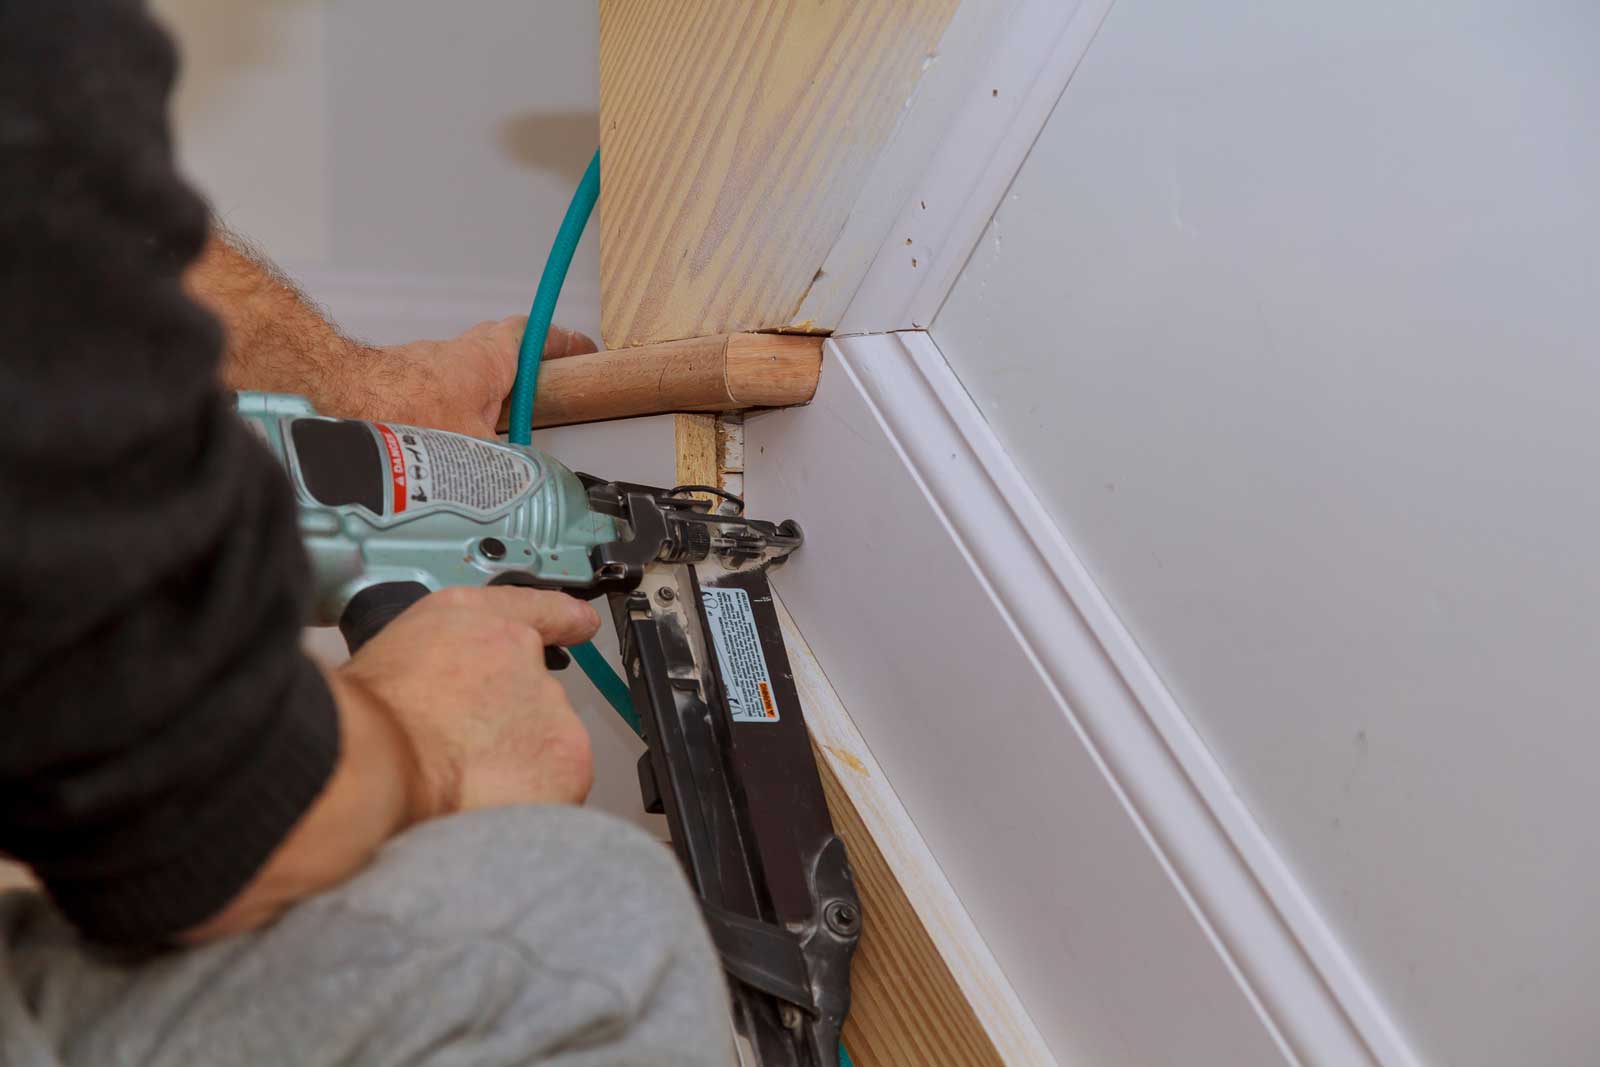
Nail Guns: Differentiating Between Pneumatic Nailers, Brad Nailers, and Finish Nailers
When it comes to choosing a nail gun for your baseboard project, you have three main options: pneumatic nailers, brad nailers, and finish nailers. Pneumatic nailers use compressed air to drive nails, making them a powerful choice for heavy-duty projects. However, they can be overkill for attaching baseboards, so let’s focus on the two other options.
Brad nailers are perfect for thin and delicate trim. They shoot 18-gauge nails, which are thin enough to prevent splitting the wood. Ideal for a seamless finish, brad nailers are an excellent choice for fastening baseboards.
Finish nailers, on the other hand, drive thicker 15 or 16-gauge nails. They offer a stronger hold but can be more visible in your final product. In my experience, finish nailers are best for attaching thicker baseboards or when additional strength is needed.
The choice between brad nailers and finish nailers depends on the thickness of your baseboards and your desired outcome.
Stud Finder: The Crucial Role in Avoiding Mistakes
Using a stud finder can make the difference between a perfectly installed baseboard and a DIY disaster. You may be asking yourself, “Why is a stud finder necessary?” Well, it allows you to locate studs behind your walls, providing a secure anchor for your nails.
When you use a stud finder, you can ensure each nail is driven into a solid backing, giving the baseboard a tight, stable fit that lasts for years.
Caulking Gun: Its Role in Finishing and Setting Baseboards
Finally, we come to the tool that puts the cherry on top of your baseboard installation: the caulking gun. This handy tool helps you apply caulk evenly between the baseboard and the wall for a crisp, professional finish.
Caulking not only creates a seamless appearance but also helps to seal any gaps, preventing drafts and pest entry. Proper caulking is essential, and a good caulking gun makes the job so much easier.
So, with these key tools and equipment in hand, you’re well on your way to a successful and efficient baseboard installation.
Baseboard Materials and Matching Nail Sizes
You don’t want to miss this. Choosing the right nail size for baseboard trim will determine the quality of your home improvement project. In this section, you’ll learn about baseboard materials and their matching nail sizes, ensuring your baseboard installation is flawless.
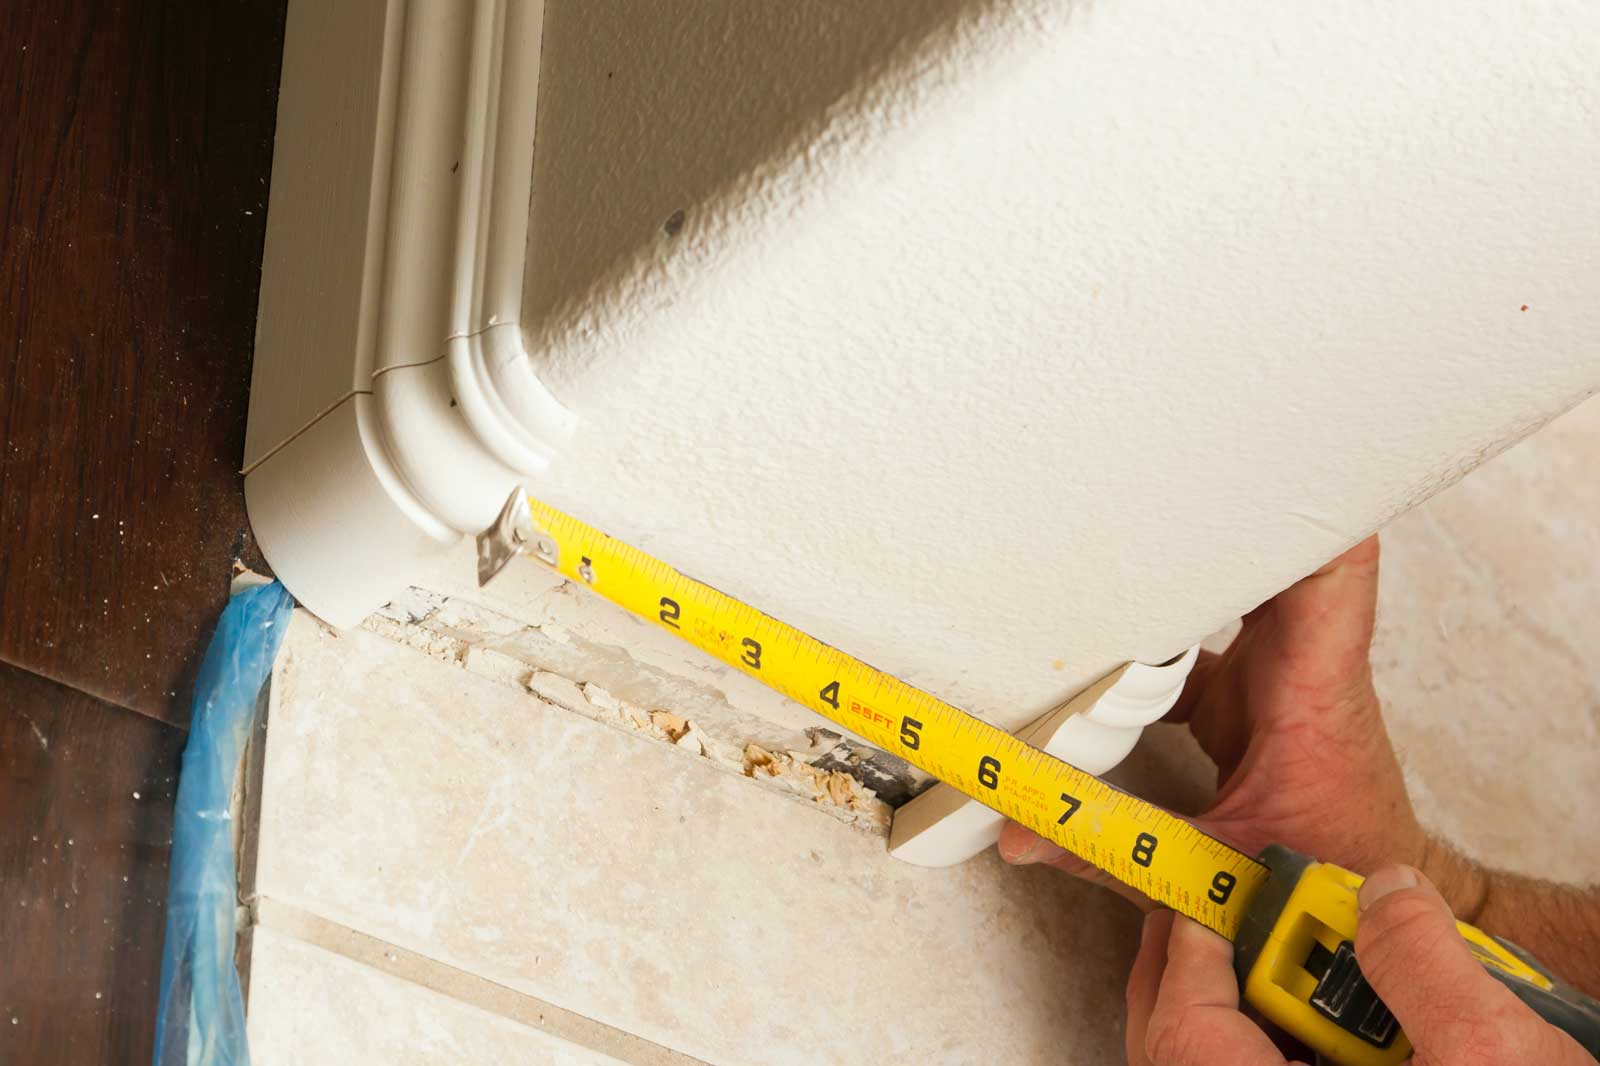
Thickness of the Baseboard: How it Determines Nail Length
In my experience, the thicker the baseboard, the longer the nail you’ll need. It’s important to choose the correct nail length in order to secure the baseboard to the wall without damaging either. Follow these guidelines for selecting nails based on baseboard thickness:
- 1/2-inch thick: 1 1/4-inch to 1-1/2-inch long nails
- 5/8-inch thick: 1 1/2-inch to 1-3/4-inch long nails
- 3/4-inch thick: 1 3/4-inch to 2-inch long nails
Remember, going too long might puncture the wall behind the baseboard, while too short nails may not hold the trim properly.
Different Baseboard Materials: Wood, MDF, PVC, and the Respective Nail Considerations
Selecting the right nails also depends on the baseboard material. Let’s dive into the most common materials and their nail considerations:
Wood
Classic choice, natural and versatile. Wood generally requires slightly longer nails due to its hardness. Moreover, using finishing nails with a small, round head that can be easily hidden can improve the aesthetics of your wooden baseboard.
MDF (Medium-density Fiberboard)
Affordable, engineered solution. MDF baseboards aren’t as hard as genuine wood, so a medium-length nail typically works best. Be attentive not to use excessive force, as MDF can be prone to splitting. Opt for panel pins with a slim profile to reduce the risk of splitting.
PVC (Polyvinyl Chloride)
Modern, water-resistant, low maintenance. PVC baseboards demand shorter nails compared to wood or MDF, as they’re more flexible and thinner. Choose corrosion-resistant nails like stainless steel or hot-dip galvanized nails for a long-lasting hold in humid conditions.
So now you’re prepared to handle any baseboard material and find the perfect nail sizes. Your next home improvement project will be a success, and your room will look polished and professional.
Brad Nails vs. Finish Nails: Which is Right for Your Baseboards?
You may be wondering which type of nail is best suited for your baseboard installation. Fear not! In this section, we’ll dive into the key differences between brad nails and finish nails, and how each is most effectively utilized for different scenarios. So let’s get started!
Brad Nails (18-Gauge) are Thinner and Ideal for Lightweight Trim or Where Splitting can be a Concern
In my experience, brad nails excel in projects where the trim material is thin or delicate and there’s a risk of splitting. These 18-gauge nails are smaller and have less prominent heads, which helps to minimize the appearance of nail holes. Often, they’re the best choice for attaching thin trims where a smaller hole is preferable. Additionally, their slender profiles provide a remarkable holding strength while reducing the risk of damaging your material.
Take note that it’s important to use the correct length of brad nails, typically ranging from 5/8″ to 2″ depending on the thickness of your trim.
Best for Attaching Thin Trims Where a Smaller Hole is Beneficial
Brad nails are your go-to for projects that require a discreet nail hole and a secure attachment to the wall. Due to their reduced diameter, these nails help create an overall cleaner appearance once the job is done. Remember that using brad nails is especially helpful when working with MDF or other soft, synthetic materials that may split easily.
Finish Nails (15 or 16-Gauge) are Stronger and have More Holding Power Due to Their Larger Diameter
Now let’s talk finish nails – these nails are thicker and provide greater holding power than brad nails. Typically ranging from 15 to 16-gauge, finish nails offer the best option for securing larger, more robust baseboards to the wall. Their increased size enables them to penetrate deeper into the wood, resulting in sturdier connections without the risk of splitting harder materials like solid wood baseboards.
Of course, the trade-off is that finish nails may leave a slightly larger hole, which may require more filling and sanding. However, their added security and grip make them a reliable choice for the job.
Suitable for Securing Larger, Thicker Baseboards to the Wall
When it comes down to the nitty-gritty, finish nails are your best bet for installing larger and thicker baseboards. Their superior holding power and compatibility with tougher materials make these nails the go-to resource for professional installations. Just stay aware that, as with brad nails, choosing the correct length for finish nails is essential for a successful outcome. Finish nails commonly range from 1″ to 2-1/2″ in length.
To sum it all up, brad nails are a fantastic choice for lightweight trim and delicate materials, while finish nails provide greater holding power for thicker, more substantial baseboards. So consider your requirements and choose the appropriate nail type for the job at hand. Happy nailing!
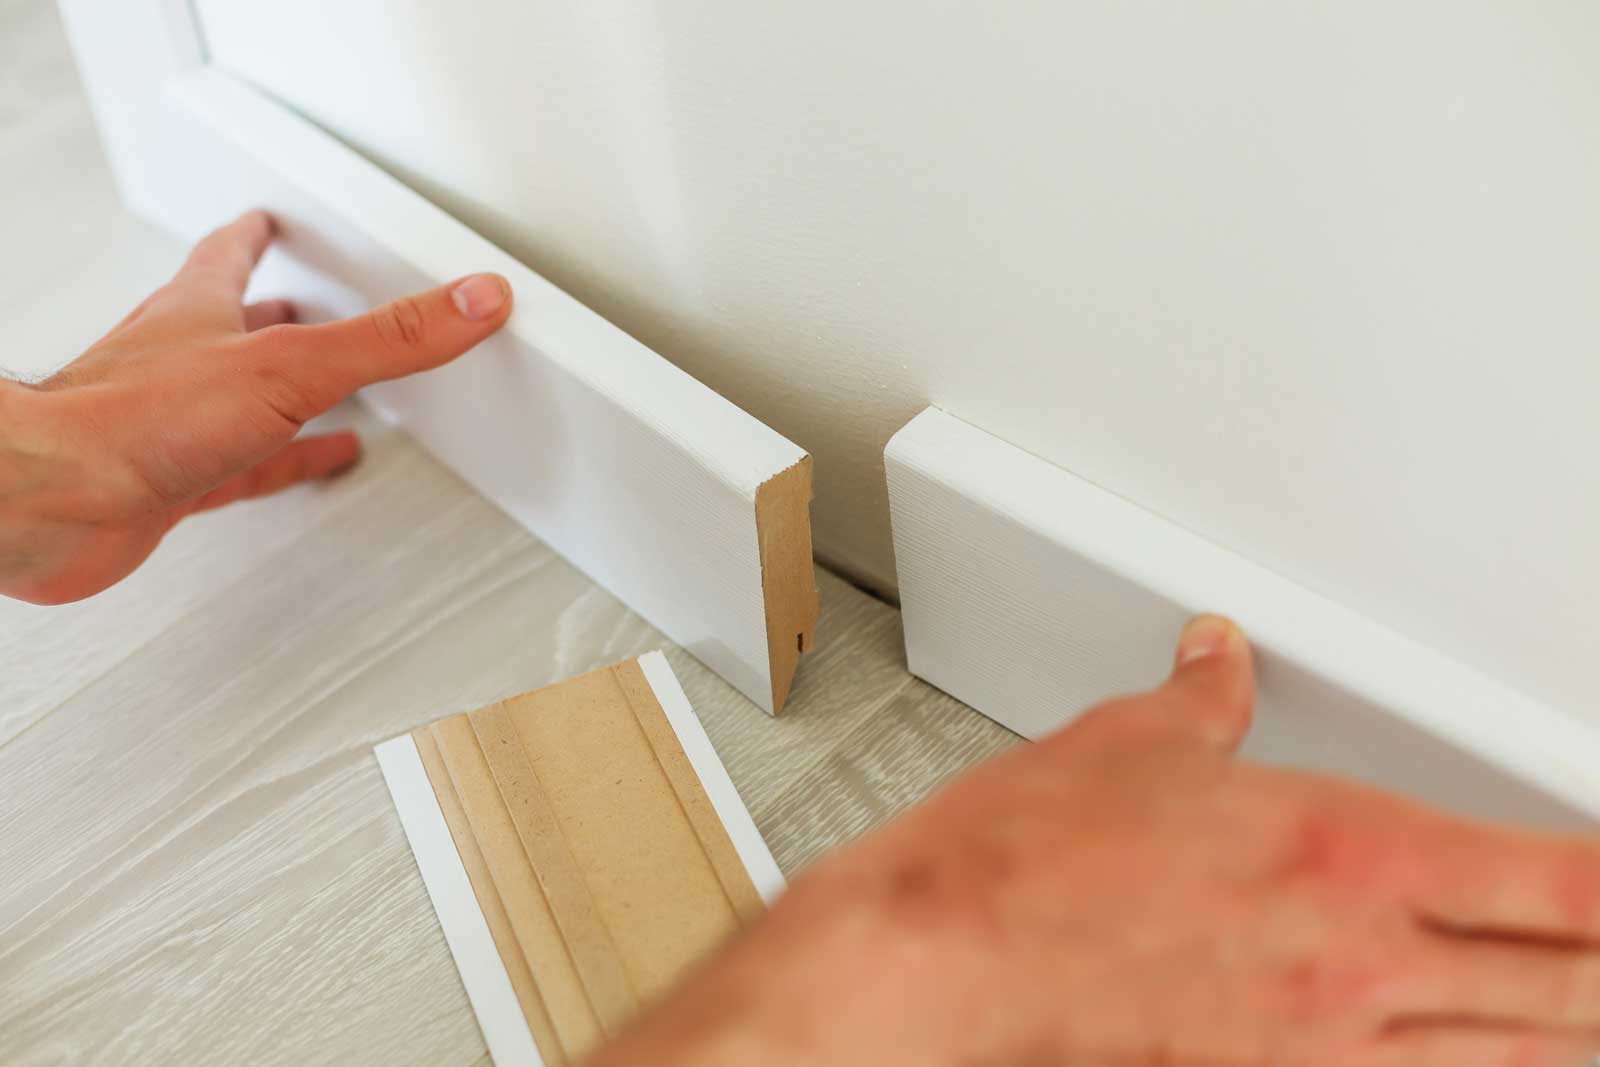
Installing the Baseboard: A Step-By-Step Guide to Success
Wondering how to nail your baseboard installation with precision? Tired of struggling with uneven edges and visible gaps? Here’s a foolproof method to achieve professional-grade results. In this section, we’ll cover the essentials of proper nailing technique, how to address nail holes for a seamless finish, and the importance of caulking for that crisp, clean look. Let’s get started!
Proper Nailing Technique: Nail Placement, Depth, and Spacing
In my experience, nailing technique is crucial to ensure your baseboard is securely fastened and looks flawless. To begin, always start by choosing the right nail size for your baseboard, typically between 2 to 2-1/2 inches long.
To achieve the perfect placement, drive nails into the studs in your wall – easily located using a stud finder. Remember to keep your nails approximately 12 to 16 inches apart for the best hold.
When it comes to depth and spacing, aim to sink the nail at a slight angle, roughly 1/8 inch beneath the surface of the wood. This will ensure the baseboard is securely fastened while preventing unsightly protruding nail heads.
Addressing Nail Holes: Using Wood Filler for a Seamless Finish
Does the thought of visible nail holes ruin your aesthetic dreams? Fret not! The simple solution lies in wood filler – seamlessly blending your nail holes right into the baseboard.
Start by selecting a wood filler that matches your baseboard’s color. Using a putty knife, apply wood filler to the nail holes, spreading it evenly over the full area. Allow ample drying time (as per the instructions on your filler) and then smooth the excess using fine-grit sandpaper. Make sure to wipe away any dust and admire your seamless, professional finish.
Caulking: Ensuring a Clean, Gap-Free Finish Between the Wall and Baseboard
You’re almost there! Just one final touch to make your baseboard installation truly shine. Caulking is the secret weapon that fills any gaps, leaving you with a clean, gap-free finish between the wall and baseboard.
Choose a paintable caulk and apply a thin, even bead along the top edge of the baseboard where it meets the wall. Smooth the caulk with your finger or a wet rag to ensure it blends seamlessly. Once it’s dry, it’s ready for painting!
With these tips and tricks, your baseboard installation will look expertly-done in no time. Now go forth and conquer your home improvement project with confidence and precision.
Advanced Considerations for Baseboard Nailing
You might think you know everything about baseboard nailing, but there’s more to it than meets the eye. In this section, we delve into expert tips and tricks for getting it just right. Let’s dive in and explore these advanced considerations.
Baseboard Thickness and Choosing the Corresponding Nail Length: Finding the Perfect Match
Baseboards come in various thicknesses, which affects the ideal nail length for installation. To achieve a secure connection, you need to find the right balance like a master craftsman.
- Thin Baseboards (1/2-inch): A 1-1/2 to 2-inch nail length should suffice.
- Medium Baseboards (3/4-inch): Opt for a 2 to 2-1/2-inch nail length.
- Thick Baseboards (1-inch): A 2-1/2 to 3-inch nail length is your best bet.
In my experience, matching nail length to baseboard thickness is crucial for a flawless result.
Ensuring Nails are Long Enough to Secure the Baseboard to the Wall, But Not Too Long to Cause Damage: The Delicate Dance
There’s a perfect sweet spot you need to hit when choosing baseboard nails: long enough to fasten the baseboard securely while avoiding any damage to the wall or utilities behind it. Keep these guidelines in mind:
- Minimum nail penetration: Aim for a nail that extends at least 1 inch into the wall.
- Maximize grip: Choose a nail with enough length to pass through the baseboard and into the wall’s wooden studs.
Remember: Too short of a nail fails to secure the baseboard, while too long may damage hidden pipes or electrical wires.
The Role of Shoe Molding or Quarter Round and Its Nail Requirements: Extra Support, Extra Style
Shoe molding or quarter-round can enhance your baseboard installation by providing additional support and a polished appearance. Don’t overlook this fantastic finishing touch!
- Shoe Molding Nail Length: A 1-1/2 inch nail length is typically sufficient for shoe molding.
- Quarter Round Nail Length: Opt for a 2-inch nail to adequately secure this decorative trim.
By considering these advanced techniques and following these guidelines, you’ll be well on your way to mastering baseboard nailing and achieving professional-looking results.
Common Mistakes and How to Avoid Them
You’re about to become a baseboard installation pro. But wait! There are some common mistakes that can sabotage your project. Keep reading to learn what they are and how to avoid them like a champ.
The Pitfalls of Using the Wrong Nail Size
Choosing the wrong nail size for your baseboard trim can lead to disaster. In my experience, using nails that are too short won’t hold the baseboard securely, while nails that are too long can damage your walls. Use common sense and select the appropriate nail size for your project, typically between 1 ½ to 2 ½ inches long.
Remember, the size of the nail also depends on the thickness of your baseboard. For instance, a ½-inch-thick baseboard would require a 2-inch nail. When in doubt, consult the baseboard manufacturer’s recommendations or seek advice from a hardware store professional.
Overdriving Nails and Causing Damage to the Baseboard
Overdriving nails can turn your baseboards into a messy sight. Applying too much force when using a nail gun or hammer can cause the nails to go too deep. Using the wrong-depth adjustment settings on a nail gun can also lead to these issues that can even damage your baseboards.
To prevent overdriving nails, always test your nail gun settings on a scrap piece of trim first. If you’re using a hammer, be cautious and gentle when driving the nails into the baseboard. And here’s a pro tip: use a workpiece as a buffer between your hammer and the trim to prevent any direct damage.
Failing to Use a Stud Finder and Missing the Wall Studs
Missing the wall studs can significantly reduce the stability of your baseboard. A stud finder is a must-have tool for locating the studs behind your walls. Without it, you might end up with a poorly attached and loose baseboard. So, don’t wing it – use a stud finder!
Mark the stud locations on the wall before attaching the baseboard trim. This will ensure that your nails are driven into the studs, providing maximum stability for your baseboards. Trust me, taking that extra step will save you a lot of frustration in the long run.
With these expert tips, you’re ready to tackle your baseboard installation project with confidence. Just remember to choose the right nail size, avoid overdriving nails, and always use a stud finder.
Related & Frequently Asked Questions
Still have questions? We’ve got answers.
Q: What size of the nails is best suited for trim pieces like baseboards?
A: For baseboards, the ideal size of nails typically falls between 15-gauge and 18-gauge nailers, guaranteeing that the length of the nail securely attaches the baseboard to the wall.
Q: Why might thinner nails with small heads be a good choice for delicate moldings?
A: Thinner nails, especially those with small heads, are a good choice for delicate moldings because they offer a cleaner finish with minimal visible nail head, preserving the intricate details of the trim.
Q: When installing a new baseboard, would a small nailer or an 18-gauge nailer be more effective?
A: For a new baseboard, an 18-gauge nailer is often recommended as it provides a balance between strength and finish, especially when securing longer trim pieces.
Q: With various trim nailers available, how do I determine the best type of nails for door casing or window casings?
A: When dealing with trim like door casing or window casings, consider the thickness and type of material. Trim nails, often driven by power brad nailers, are a good option due to their smaller diameter and ability to provide a finished look.
Q: For tighter spots or intricate trim work, is it a better idea to use nails with a smaller head or a specific size nailer?
A: For tight spots and intricate trim, nails with a smaller head are ideal, and using a smaller nailer or pin nailer can offer better control and precision, ensuring a neat appearance.


