
How long does Liquid Nails take to dry? We’ve all had that moment where you’re moving fast and your project seems perfect, but then you wonder if you moved too soon, so you’re not alone.
In reality, under the right conditions, it’s actually way quicker than you might be thinking. But it isn’t always that straightforward.
So what’s the deal: what’s the drying time for Liquid Nails?
Liquid Nails typically takes 24 hours to dry under optimal conditions. However, drying times can and will vary based on several factors like humidity, temperature, and the type of surfaces being bonded. For the strongest bond, clamp the surfaces together for at least 30 minutes and be prepared to allow up to a full week for the adhesive to cure completely.
That’s the short answer, but I’m sure you still have more questions. Questions like:
What about its performance on different kinds of materials?
How does outdoor weather affect it?
Are there any insider tricks to ensure optimal adhesion?
Does indoor vs. outdoor make a difference?
Are there ways to mess it all up unknowingly?
If these questions have you nodding in agreement, you’re in the right place. Dive deep with me as we cover all the details and the things you didn’t know you needed to know about Liquid Nails drying time.
- Drying Time of Liquid Nails: Liquid Nails generally takes 24 hours to dry under optimal conditions, but a full week is needed for it to cure completely.
- Factors Influencing Drying Time: Humidity, temperature, and the type of surfaces being bonded can alter drying times.
- Clamping for Stronger Bonds: For the best bond strength, surfaces should be clamped together for at least 30 minutes post-application.
- Audience Relevance: Homeowners, DIY enthusiasts, home improvement professionals, real estate experts, property investors, and property flippers will find this information crucial for their projects.
- Variations of Liquid Nails: There are multiple variants of Liquid Nails, such as those specifically for wood or construction, which might have varying drying times and characteristics.
Heads up! Before we get too far along here, if you want to connect with other homeowners, DIYers, and builders and get more great ideas for your home to make your space the best join my free private Facebook group, Remodel Reality here.
The Answer: How Long Does Liquid Nails Take to Dry?
You’re about to discover the drying time of Liquid Nails, a popular adhesive often used in construction and DIY projects. In this section, we’ll clear up some misconceptions and provide an overarching understanding of drying and cure times.
In general, Liquid Nails has an initial drying time of 24 hours. However, keep in mind that drying time can vary depending on factors such as temperature, humidity, and the specific product used.
- Temperature: A higher temperature will result in a faster drying time, while lower temperatures can slow down the process.
- Humidity: Higher humidity levels can also lead to longer drying times, as moisture in the air can hinder the adhesive’s ability to dry.
- Product type: Liquid Nails offers a range of products, each with its unique formulas and drying times.
For a personalized drying time based on your specific project and conditions, always refer to the product’s label or consult the manufacturer’s guidelines.
Distinguishing Between Drying Time and Cure Time
It’s essential to understand the difference between drying time and cure time when working with Liquid Nails. Drying time refers to the period for the adhesive to set, while cure time is the duration required for the adhesive to reach its full strength.
The drying time, as mentioned earlier, is typically 24 hours. However, the cure time for Liquid Nails can take up to 7 days. During this time, you should avoid putting excessive stress on the bond to ensure a strong and lasting bond.
In my experience, providing ample drying and cure time is crucial for the adhesive’s optimal performance, so it’s best not to rush the process.
And there you have it! By allowing the proper drying and cure time for Liquid Nails, you’re on your way to completing a successful project. Keep these key points in mind, and you’ll achieve the strongest, most reliable bond possible.
The Science Of Drying: Understanding Drying Vs. Curing
You might be wondering what exactly happens when liquid nails take to dry and how it affects the adhesive’s strength. Well, you’ve come to the right place. In this section, we will delve into the world of drying and curing and explain the chemical processes behind these phenomenons.
Explanation Of What Happens Chemically As Liquid Nails Dries
Liquid nails, like other adhesive products, undergo a series of complex chemical reactions when drying. Firstly, the solvent evaporation process begins, during which the adhesive loses its liquid content, allowing the molecules to come in closer contact. This causes the polymerization process to occur, where individual adhesive molecules link together to form larger chains, creating a stronger bond. Cross-linking further solidifies the adhesive’s structure, allowing it to effectively bond the surfaces together.
In my experience, understanding at least something about the chemical process is helpful in determining how long you should wait for liquid nails to dry before proceeding with your project.
The Difference Between The Adhesive Setting (Drying) And Achieving Full Strength (Curing)
While it’s essential to know how the drying process works, it’s equally important to distinguish between drying and curing. When an adhesive sets or dries, it refers to the time required for the adhesive to lose its initial tackiness and become rigid enough to hold the surfaces together. However, this is just the starting point.
The curing process takes place over an extended period (usually 24 hours or more) and refers to the adhesive reaching its maximum bond strength. During curing, the adhesive’s chemical structure further develops through ongoing cross-linking, eventually reaching its optimal performance.
As you work on your project, it’s crucial to give the liquid nails adequate time to not only dry but also cure, ensuring a secure and long-lasting bond.
Now that you’re armed with this knowledge, you can confidently take on any project involving liquid nails, properly understanding the science behind the drying and curing process. Just remember to be patient and give your adhesive the time it needs to reach its full potential.

Factors Influencing Drying Time
Have you ever wondered why your liquid nails take different amounts of time to dry? The answer lies in various factors influencing its drying time. Let’s dive into these factors and see how they affect the drying process.
Environmental Conditions: Temperature, Humidity, And Ventilation
Temperature plays a crucial role in drying time. When working in lower temperatures, adhesive drying slows down, while in higher temperatures, it speeds up. So, keep the workspace temperature consistent and within the recommended range of liquid nails for optimal drying.
Humidity also impacts the drying time. Higher humidity can prolong the drying process, while low humidity speeds it up. Ventilation is a critical component, too – proper airflow helps evaporate solvents and allows the adhesive to cure efficiently.
Surface Type: Porous Vs. Non-Porous Materials And Their Impact On Drying Time
The type of surface you are working with is another factor that influences drying time. Porous materials (like wood and concrete) allow air and moisture to pass through, absorbing the adhesive and drying faster. On the other hand, non-porous materials (like metal and plastic) will cause the adhesive to dry slowly since there’s nowhere for the moisture to escape.
Application Specifics: Thickness Of The Adhesive Layer, Method Of Application, And Preparation Of The Surface
- Thickness of adhesive layer: A thicker layer of liquid nails takes longer to dry, while thin layers dry faster. So, apply only the recommended amount of adhesive for your specific project.
- Method of application: How you apply the adhesive matters. Using the correct method and tools, like a notched trowel or proper-sized nozzle, ensures an even layer and faster drying time.
- Preparation of the surface: Proper surface preparation is crucial. Clean and dry surfaces provide better adhesion, ensuring faster drying time. In my experience, a poorly prepared surface can cause the adhesive to take much longer to dry.
All this stuff will help you get a better handle on your estimate for the drying time of liquid nails and ensure a successful project completion.
Application Advice For Faster Drying
Are you ready to make your Liquid Nails projects go smoother and faster? I have just the advice you need! In this section, you’ll discover the best techniques to ensure a faster drying time for your Liquid Nails adhesive, whether you’re an experienced user or just starting out.
Best Practices For Applying Liquid Nails
Knowing the best practices for applying Liquid Nails is essential for a successful project. Remember, the key to a quicker drying time is a thinner application:
- Clean the surfaces: Make sure the surfaces you’re bonding are clean and free of any dust, dirt, or grease.
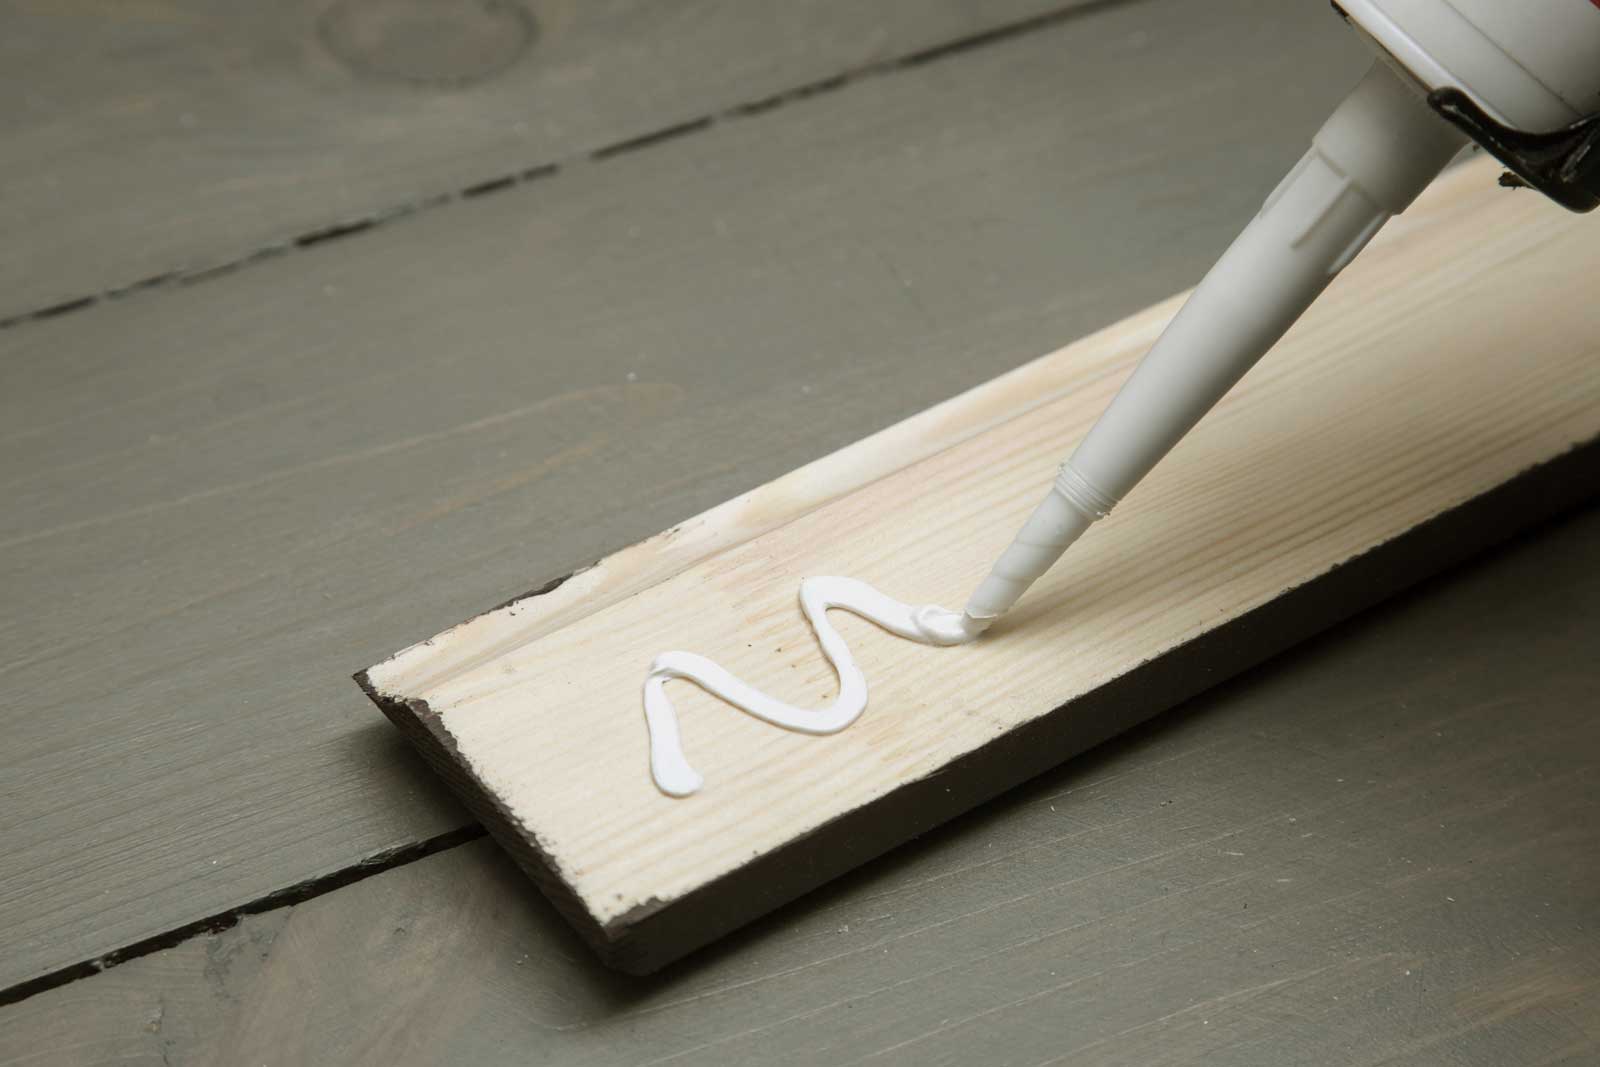
- Apply a thin layer: Use a caulk gun to evenly apply a thin bead of adhesive along the surface, as a thinner layer dries faster.
- Press firmly: Join the surfaces swiftly and press firmly, ensuring even distribution of adhesive and optimal adhesion.
In my experience, following these simple steps will result in faster drying times and a more durable bond.
Tips For First-Time Users
If this is your first time using Liquid Nails, don’t worry! Follow these proven tips to make your first experience a breeze:
- Take your time: Don’t rush the process. Read the product instructions carefully and apply the adhesive with precision.
- Test on a small surface: Before committing to a large project, it’s wise to practice on a small, inconspicuous area to gain confidence and experience.
- Stay safe: Wear gloves and a mask, as Liquid Nails contains chemicals and can give off strong fumes.
Remember, practice makes perfect, so keep at it, and you’ll get the hang of it in no time.
How To Achieve Optimal Drying Conditions
To further speed up the drying process, aim for optimal drying conditions:
- Temperature: Keep the area well-ventilated, and maintain a room temperature between 65°F and 75°F for best results.
- Humidity: Aim for a humidity level between 40% and 60%. Higher humidity can slow down the drying process.
- Avoid moisture: Do not allow water or moisture to come in contact with the adhesive during the drying process.
By following these steps, you’ll create an environment that promotes quicker drying times and ensures a strong, lasting bond.
Now go ahead, put these valuable application tips for faster drying of Liquid Nails to good use and take your DIY projects to the next level. Don’t forget, practice is key, and getting great results will surely make you feel more confident and capable in tackling any project that comes your way.
Brand And Types Of Liquid Nails
You’ve just stumbled upon your next DIY project, but you’re not quite certain which adhesive to use. Fret not, because this guide is here to help you understand the ins and outs of Liquid Nails products. In this section, we’ll explore the history of this iconic brand, the most popular construction adhesives, and how drying times can vary based on the type of product you choose. Let’s dive in!
History And Evolution Of The Liquid Nails Brand
Liquid Nails has been a household name since its inception in the 1960s. They revolutionized the adhesive market by providing a reliable and versatile option for virtually any construction or home improvement project. Over the years, their product lineup has expanded and evolved to meet the ever-changing needs of consumers, solidifying their reputation as a go-to solution for all things bonding.
As a DIY enthusiast yourself, you’ve probably encountered Liquid Nails products in various settings – whether it’s simple home repairs or ambitious construction projects. Their longstanding commitment to quality and innovation has made them a trusted essential in toolboxes worldwide.
Dive Into The Most Popular Construction Adhesives And Specifics Of Each Type
When it comes time to choose the perfect adhesive for your project, Liquid Nails offers a wide range of options tailored to specific needs. Here are some of their most popular construction adhesives:
- Liquid Nails Original (LN-601) – A versatile, solvent-based formula known for its water and weather resistance, perfect for both indoor and outdoor applications.
- Liquid Nails Heavy Duty (LN-903) – A strong, durable adhesive designed for more demanding projects, such as bonding heavy materials like brick, stone, and concrete.
- Liquid Nails Small Projects (LN-700) – A fast-drying option tailored for smaller tasks such as crafts, trim, and molding work.
- Liquid Nails Fuze*It (LN-2000) – An all-surface adhesive that bonds nearly everything, from wood and metal to tile and glass, making it an invaluable addition to your tool collection.
Differences In Drying Times Based On The Type Of Liquid Nails Product Used
In my experience, one of the most critical factors to consider when selecting a Liquid Nails adhesive is the drying time. Understanding that various products have different drying times will ensure a successful and efficient project. Here’s what you can expect from each type:
- Liquid Nails Original: Typical drying time is between 24-48 hours. However, a full cure might take up to 7 days.
- Liquid Nails Heavy Duty: Tack-free in about 30 minutes, and full cure within 48 hours.
- Liquid Nails Small Projects: Surprisingly quick, a tack-free time of 5-10 minutes, and full cure within 24 hours.
- Liquid Nails Fuze*It: Achieves tack-free status in 15 minutes and fully cures in 24 hours.
Keep these details in mind when selecting your ideal Liquid Nails product, and you’ll be well on your way to a successful and efficient DIY project. As you can see, nailing down the perfect adhesive for your task is easier than you might’ve thought!
Liquid Nails Vs. Traditional Nails
Have you ever found yourself torn between choosing liquid nails or traditional nails for your next project? In this guide, we’ll unravel the mystery behind these two options and help you make an informed decision. Let’s dive in!
Pros And Cons Of Using Liquid Nails Compared To Traditional Nails
Liquid Nails:
Pros:
- They create a strong and long-lasting bond between materials.
- They fill gaps ensuring a snug fit for uneven surfaces.
- They offer a fast and efficient solution for various applications.
- They are resistant to weather, moisture, and temperature changes.
Cons:
- They require a longer drying time which can cause delays in your project.
- They may not be suitable for heavy-duty applications.
- They don’t allow for easy adjustments once the bond has formed.
Traditional Nails:
Pros:
- They provide an immediate and strong hold.
- They are easily adjustable during the installation process.
- They are ideal for heavy-duty applications.
- They have a lower cost and are readily available.
Cons:
- They cannot fill gaps between materials, which may leave spaces and create weak connections.
- They can cause damage to materials when hammered incorrectly.
Situations Where One May Be Preferable Over The Other
When to use Liquid Nails:
- When working with materials that could be damaged by traditional nails, such as ceramics, glass, or delicate wood.
- For projects exposed to outdoor elements, where the durability of liquid nails is ideal.
- When binding dissimilar materials that may not hold as well with traditional nails.
When to use Traditional Nails:
- In heavy-duty applications, such as framing or hanging doors, where nails provide better holding power.
- When quick installation and ease of adjustment are paramount.
- When working with materials that don’t have adverse reactions to traditional nails, like standard wood and metal projects.
In my experience, it’s essential to assess your project needs carefully and align them with the pros and cons of each option. By understanding the benefits and drawbacks of both liquid nails and traditional nails, you can make the best choice for your specific situation and achieve a professional-quality result. Remember, the key to a successful project is using the right tools and materials for the job.
Versatility And Uses Of Liquid Nails
Are you tired of dealing with weak adhesives that don’t stand up to your projects’ demands? Liquid Nails is the go-to solution for countless professionals and DIY-ers alike, offering incredible strength and versatility. In this section, we’ll explore how Liquid Nails can tackle anything from minor repairs to major construction, saving you time and frustration in the process.
Highlighting The Variety Of Projects Liquid Nails Can Be Used For: From Minor Repairs To Major Construction
Liquid Nails is an excellent choice for a wide range of tasks, boasting impressive flexibility in its applications. For instance, you might find it useful in minor repairs around your home, such as fixing a loose piece of molding or reattaching a broken tile. By using this adhesive, you can avoid the expense and hassle of conventional fasteners or more complicated solutions.
When it comes to larger scale construction projects, Liquid Nails continues to shine. With its ability to bond to an array of materials including wood, drywall, metal, and even concrete, you’ll wonder how you ever managed without it. In my experience, using Liquid Nails helped secure some new framing for a new bathroom in my home renovation, cutting down on the number of nails I needed and ensuring a strong, long-lasting bond.
Discussing Its Heavy-Duty Variants And Their Applications
Given the diverse range of jobs it’s suited for, it’s no surprise that Liquid Nails offers a series of heavy-duty variants designed to tackle even the toughest challenges. Among these is the aptly named Liquid Nails Heavy Duty, formulated to provide superior holding power and greater resistance to high temperatures and water exposure.
When using one of the heavy-duty options, you’ll find that it excels in tasks like securing subflooring, attaching roof shingles, or even mending heavier pieces of furniture. If you’ve ever attempted such a project, you know that having a reliable adhesive in your toolkit can make all the difference.
As you can see, Liquid Nails offers an impressive range of uses and capabilities. Whether tackling simple fixes or diving into ambitious construction feats, this adhesive is bound to deliver on its promises. From personal experience to professional recommendations, it’s clear why Liquid Nails has become a staple in the world of construction and repairs.
Challenges, Solutions, And Safety Guidelines
You’re ready to tackle that DIY project using Liquid Nails, but unsure how long it takes to dry or how to address common problems. Don’t worry, we’ve got you covered! In this section, we’ll go through some challenges you may face and provide tips, tricks, and essential safety measures to ensure successful bonding.
Addressing Common Problems Users Might Face, Like Adhesive Not Drying Or Adhering Properly
In my experience, it’s not uncommon for users to encounter issues with Liquid Nails taking too long to dry or not sticking. This usually stems from a few common mistakes:
- Applying too much adhesive: Over-applying can cause extended drying times and weaker bonds. Keep it thin and even, following the manufacturer’s instructions.
- Insufficient clamp or pressure time: Liquid Nails requires some initial pressure to ensure proper bonding. Clamping or applying pressure for the recommended time (typically 24 hours) is crucial.
- Poor surface preparation: Dirty or wet surfaces can compromise the adhesive’s bonding strength. Clean and dry both surfaces properly before applying Liquid Nails.
Tips And Tricks To Solve These Challenges
Implementing the following tips will significantly increase your chances of success:
- Choose the right adhesive: Liquid Nails has a variety of formulas designed for different materials and situations. Select the ideal adhesive for your project.
- Thin, even layers: Use a notched trowel to spread the adhesive in thin, consistent layers.
- Mind the temperature: Liquid Nails is most effective when used in moderate temperatures (between 50°F and 90°F). Avoid using it in extreme cold or heat.
- Allow adequate cure time: For most Liquid Nails products, it takes 7 days to reach their maximum strength. Remember, patience is key for a durable bond.
Safety Measures To Take While Using Liquid Nails
It’s always a good idea to follow these safety measures while using Liquid Nails:
- Ventilation: Use Liquid Nails in well-ventilated areas to minimize inhalation of potentially harmful vapors.
- Protective gear: Wear gloves, goggles, and a mask to protect yourself from skin, eye, and respiratory irritation.
- Safe storage: Store Liquid Nails away from heat sources, flames, and direct sunlight, and keep it out of the reach of children and pets.
- Follow manufacturer’s guidelines: Read and adhere to all instructions and warnings provided by the adhesive manufacturer.
By addressing common challenges, employing these tips and tricks, and adhering to the safety guidelines provided, your Liquid Nails project will be set for success. Enjoy the satisfaction of a well-bonded DIY result while ensuring the safety of you and your loved ones.
Comparison With Other Adhesives
Adhesives can make or break your DIY project. But with so many options like wood glue, construction adhesive, and Gorilla Glue, how do you know which one to use? In this quick comparison, we’ll discuss the differences among adhesives and help you make the right choice for your next project.
Liquid Nails vs. Wood Glue, Gorilla Glue, and Others
When working with wood, your first instinct might be to reach for wood glue. This adhesive product is designed specifically for bonding wood and is a popular choice among carpenters and woodworkers. On the other hand, Liquid Nails is a construction adhesive that works well for a variety of materials, including wood, drywall, and metal.
Gorilla Glue is another versatile adhesive. Known for its strong bond and water-resistant properties, it can be used for both indoor and outdoor projects. In my experience, it’s a solid choice for woodworking, but should not be used on materials like rubber or leather.
It’s essential to understand the specific purpose of each adhesive to choose the most appropriate product for the job.
Strength, Drying Time, and Versatility Comparisons
When it comes to strength, Liquid Nails and Gorilla Glue stand out. These adhesives offer superior bonding capabilities for heavy-duty tasks. While wood glue is generally strong enough for woodworking, it lacks the same holding power for heavier materials.
Drying time is another essential factor to consider. Wood glue dries relatively quickly, typically setting in 20 to 30 minutes. Gorilla Glue, on the other hand, takes longer to set, sometimes up to 24 hours. Liquid Nails varies depending on the specific formula, with drying times ranging from 15 minutes to 24 hours.
As for versatility, Liquid Nails and Gorilla Glue are your go-to options. These adhesives work well on a wide range of materials, whereas wood glue is specifically designed for woodworking.
| Adhesive | Strength | Approximate Drying Time | Versatility |
|---|---|---|---|
| Wood Glue | Good | 20-30 minutes | Wood only |
| Liquid Nails | Excellent | 15 minutes – 24 hours | Most materials |
| Gorilla Glue | Excellent | Up to 24 hours | Most materials |
Ultimately, the choice of adhesive boils down to the specifics of your project. Keep your materials and desired outcome in mind when deciding which product to use, and remember that sometimes a combination of adhesives might be the best solution.
Removal And Cleanup
You’ve tackled the project, and now it’s time for the cleanup. But what do you do about unwanted Liquid Nails adhesive? Don’t worry—we’ve got you covered. In this section, we’ll walk you through the steps and best methods for removing that stubborn adhesive. Plus, we’ll share some crucial safety precautions to keep in mind during the process.
Steps And Best Methods For Removing Unwanted Liquid Nails Adhesive
In my experience, removing Liquid Nails can seem daunting, but with the right tools and techniques, it can be a breeze. Here are the steps to effectively get rid of the adhesive:
- Soften the adhesive: Use a hairdryer or heat gun on a low setting to warm up and soften the adhesive. This will make it easier to scrape off.
- Scrape it off: Use a putty knife or scraper to gently remove the softened adhesive. Be careful not to damage the surface beneath.
- Clean the residue: Apply a small amount of adhesive remover or rubbing alcohol to a cloth and clean any remaining residue from the surface. This step ensures a clean and smooth finish.
Safety Precautions To Take During The Removal Process
Safety should always be a top priority. Here are some precautions you should take when removing Liquid Nails adhesive:
- Ventilation: Make sure you work in a well-ventilated area, especially when using adhesive removers or rubbing alcohol. These products can release harmful fumes.
- Protective gear: Wear safety glasses, gloves, and a mask to protect yourself from dust, debris, and fumes.
- Avoid excessive heat: When using a heat gun or hairdryer, be cautious not to apply too much heat, as it can damage the surface beneath the adhesive.
By following these simple steps and safety precautions, you can ensure your Liquid Nails removal and cleanup process goes smoothly. Just remember to be patient and work carefully to achieve the best results. And with a little persistence, you’ll have a clean, adhesive-free surface in no time.
FAQs
Are you tired of waiting for your Liquid Nails to dry? Wondering if there’s a faster, easier way to get the job done? Look no further! In this helpful FAQ section, I’ll answer some of the most commonly asked questions about Liquid Nails, so you can tackle your projects with confidence and ease.
How Long Does It Take For Liquid Nails To Work?
It generally takes Liquid Nails 24 to 48 hours to achieve a strong bond. However, this can vary depending on factors such as temperature, humidity, and the materials being bonded.
Is Liquid Nails Fast Drying?
Liquid Nails is not considered a fast-drying adhesive. Unlike some super glues, it requires a longer curing time to achieve its maximum strength.
Is Liquid Nails Permanent?
Yes, Liquid Nails is designed to provide a permanent bond between a wide range of materials. Once fully cured, it should hold up under various conditions and resist weathering and wear.
Why Is My Liquid Nails Not Drying?
If your Liquid Nails isn’t drying, it could be due to factors such as humidity, temperature, or the surfaces it’s being used on. Additionally, applying too much adhesive could increase the drying time significantly.
How Can I Make My Liquid Nails Dry Faster?
While there isn’t a guaranteed method to speed up the drying process, you can try applying a thinner layer of adhesive and ensuring the area is well-ventilated and dry. This can help promote faster curing times.
Is Liquid Nails Stronger Than Wood Glue?
Liquid Nails offers superior bonding strength compared to most traditional wood glues. It’s often used in construction and woodworking projects due to its ability to bond various materials securely.
Will Liquid Nails Stick To Anything?
While Liquid Nails is a versatile adhesive, it may not bond effectively to certain materials like polyethylene, polypropylene, or Teflon. Always check the product label for specific instructions and compatibility.
Does Liquid Nails Dry Faster With Heat?
Applying heat can help speed up the drying process for Liquid Nails, although it’s not always necessary. Ensure you don’t overheat the adhesive, as this can weaken the bond.
How Long Does It Take Liquid Nails To Fully Dry?
It typically takes 7 to 14 days for Liquid Nails to fully cure and reach maximum strength, depending on factors like temperature, humidity, and the surfaces used.
How Long Before You Can Paint Over Liquid Nails?
Generally, you can paint over Liquid Nails after it has fully cured. It’s essential to ensure the adhesive is completely dry before painting to avoid compromising the bond or paint quality.
In my experience, being patient and allowing Liquid Nails to cure properly is key to achieving the best results. By understanding the factors that influence its drying time, you can be well-prepared for your next project.
Next Steps
Want to join others who are creating the most amazing home redesigns & renovations and get more tips, tricks and hacks on how to make your home the best it can be?
Join my brand new free private Facebook group, Remodel Reality to connect with other people like you to make your space the best!


