
Have you ever found yourself wrestling with a frustratingly stubborn door that simply refuses to close properly? You’re not alone. A common issue for homeowners is a door latch that doesn’t go in all the way, resulting in a door that hangs dangerously open or fails to latch securely. Understanding the root causes of this pesky problem is vital to finding a long-lasting solution and preventing potential security concerns.
Picture this: You’re rushing out the door, late for yet another important meeting (I mean, aren’t we all?). The door slams behind you, only to slowly creak back ajar. Not an ideal situation, especially when you can’t afford to lose precious minutes. Identifying why your door latch isn’t going in all the way can save you time and stress, making your home a safer and more efficient place to live. So, let’s dive in and explore some common reasons for door latch issues and guide you towards a solution that works.
Heads up! Before we get too far along here, if you want to connect with other homeowners, DIYers, and builders and get more great ideas for your home to make your space the best join my free private Facebook group, Remodel Reality here.
Understanding Door Latches
Ever found yourself struggling with a door latch that doesn’t go in all the way? Fear not, you’re not alone. In this section, we’ll explore the inner workings of door latches and how to keep them functioning smoothly. (Trust me, I’ve been there – trying to close the door to my man cave while my favorite team was playing, only to wrestle with the latch for the umpteenth time.)
First off, let’s understand the mechanism. A typical door latch consists of a metal latch which, when the door handle is turned, retracts into the lock casing. This allows the door to open and close, as the latch interacts with the door strike plate, ensuring the door stays shut when it should.
One common issue with door latches is misalignment. Over time, the latch may not align properly with the hole in the strike plate, making it difficult for the latch to go in all the way. This can be caused by a variety of factors, including a sagging door frame or worn-out hinges. Don’t worry, though – this can usually be fixed easily with some tools and a little patience.
Maintenance is key to preventing problems with door latches. Regularly inspect your door hinges and ensure they are not loose. A door that is properly hung will help keep the latch mechanism running smoothly. It’s also a good idea to lubricate the moving parts of the latch mechanism to reduce friction and prevent wear. Just make sure to use a quality lube, like Tri-Flow, and steer clear of WD40.
A smart trick to identify latch alignment issues is the “lipstick test.” Simply smear a little lipstick on the latch and close the door, then observe the pattern left on the strike plate. This will help pinpoint any adjustment needed. After you’ve identified the culprit, you can fix it using rotary tools and other methods, as outlined in this DIY guide.
How about a quick story to relate? I once rented a cabin for a retreat with my buddies – all ready for a weekend of bonding and adventure. Little did we know the cabin’s front door latch had a mind of its own, refusing to let us lock up for the night. Armed with a Swiss Army knife and our wits, we managed to fix the misaligned latch and protect our humble abode!
Remember, understanding door latches is not just about the lock and the mechanism itself. Consider the door hinges, the frame, and the regular maintenance that keeps it all ticking. With a little knowledge and attention to detail, you’ll keep your doors latching securely and keep any pesky door latch issues at bay. And now, it’s time to put your newfound door latch know-how to work!
Locating the Problem
Let me tell you a little secret: door latch issues are more common than you might think. But fear not, my friend! I’m here to help you troubleshoot that jammed or malfunctioning door latch without breaking a sweat.
First things first, let’s get our detective hats on and figure out what’s causing the problem. Here’s a list of suspects that could be affecting your door latch:
- Misaligned strike plate: It’s almost like the door and the frame are in some sort of standoff, not willing to cooperate (I know, sounds like an episode of your favorite crime show). A misaligned strike plate could be the main reason why your door latch doesn’t go in all the way. Perform the lipstick test to see if the latch aligns properly with the strike plate. A simple adjustment might do the trick.
- Worn-out or damaged latch: Heavy usage and time can take a toll on your door latch. If the latch seems to be malfunctioning or is stuck closed, it could be time for a replacement. A new part might just save the day.
- Lack of lubrication: Sure, it’s not the most glamorous solution, but sometimes our doors just need a little TLC. Try lubricating the latch with a quality lube, like Tri-Flow. Avoid using WD40; trust me, your door deserves better.
- Faulty hinges: Hinges are like the unsung heroes of our doors; they keep things in order and running smoothly. However, a problem with your top or bottom hinge could be causing your door latch to act up. Inspect the hinges for any visible damage or wear and consider replacing them if necessary.
Now, I’m not saying we’re door whisperers here (although, that does have a nice ring to it), but with these tips in mind, you’ll have that door latch working like a dream in no time. And hey, who knows, maybe you’ll become the go-to door guru in your neighborhood! Just remember to approach the problem with a confident, knowledgeable, and clear mindset. Your door will thank you.
Diagnosing Misalignment Issues
Ever struggled with a door latch that simply won’t go in all the way? It’s not just frustrating; it can also pose a security risk. In this section, we’ll delve into how to diagnose misalignment issues with your door latch and strike plate to help ensure smooth and secure door operation.
First things first, let’s determine if it’s a case of a misaligned strike plate or some other issue with the door. A common and effective method to diagnose this is by conducting the lipstick test. What you need to do is simply apply lipstick to the latch itself and then close the door, allowing the lipstick to transfer onto the strike plate. If the marks on the strike plate do not align properly with the latch, you’ve identified your misalignment culprit.
Having a misaligned door latch can stem from several factors, such as issues with the door jamb or even wall framing. Sometimes, the solution can be as simple as tightening or adjusting the screws on the hinges or strike plate. Other times though, it may require replacing certain parts or making adjustments to the door jam.
Remember when I thought loosening a door hinge would fix the problem, and accidentally unhinged the entire door instead? Well, that should definitely be avoided—finding the proper diagnosis is crucial!
Feeling confident in your ability to identify the problem? Now it’s time to move forward and address those pesky misalignment issues. With the right information, diligence, and perhaps a touch of humor (sans door puns, of course), you’ll be able to restore your door to perfect working condition.
By following these steps and employing a bit of DIY elbow grease, you’ll see your door going from frustratingly misaligned to functional and user-friendly in no time. Remember, the key lies in proper diagnosis and understanding the reason behind the misalignment. So go ahead, take matters into your own hands, and get that door latch working smoothly like a well-oiled machine!
Effective Methods to Fix a Sticking Door Latch
Got a door latch that won’t fully cooperate? No problem, my friend! We’ve got some effective methods to help you quickly adjust, repair, or replace that pesky sticking door latch in your home. So, let’s dive into these DIY projects and secure your door with confidence. (Trust me, I’ve been there. I once spent an entire weekend wrestling with a stubborn door latch, only to realize all it needed was a little TLC.)
First up, one of the simplest solutions for a sticking door latch is to adjust the strike plate. Sometimes, the door latch doesn’t catch in the strike plate because of slight misalignments. In this case, you can either slightly enlarge the door latch opening in the strike plate or reposition the strike plate itself. This guide can walk you through the process.
Next, door hinges can often be the culprit of a sticking door latch. Over time, screws can loosen or even strip, causing the door to sag and the latch to misalign. All it takes is a little door hinge TLC. Tighten the screws, replace stripped ones, or use 3-inch screws for extra security, and your door latch should start behaving. Here’s a handy tutorial on how to fix that sticky door.
If tightening and adjustments don’t resolve the problem, consider replacing the door latch itself. A worn-out latch might stick, making it hard for the door to close properly. This is a brilliant opportunity for you to flex your DIY muscles and learn a new skill. Check out this video to see how it’s done.
Finally, if you’ve tried everything else and the door latch is still sticking, it may be time to seek professional help. While this may not be the DIY route you were hoping for, a reputable locksmith can assess and fix the issue in no time. Trust me – I’ve been in those shoes before and, sometimes, it’s better to leave it to the pros.
With these effective methods, you’re well on your way to conquering that home repair project and ensuring a perfectly functioning door latch. Remember, the key here is to stay patient, persistent, and positive. So, go forth and conquer that sticking door latch like the DIY hero you are!
Safety Precautions
Listen up, manly homeowners: a faulty door latch is more than just an annoyance – it can be a risk to your safety and security. So put on your safety glasses and pay attention, because we’re going to go over some essential safety precautions for dealing with that pesky door latch.
First things first, let’s talk safety. When attempting a DIY fix, always wear the proper protective gear, such as safety glasses and gloves. Getting a scratched cornea from a rogue door component is what we might call an ironic accident! (And no, that doesn’t qualify as a pun.)
Next up, consider your home’s security. Struggling with a stubborn latch? Hold your horses, cowboy. Stop and think about whether your door is still performing its most critical task: keeping your home secure. If the latch won’t fully engage, or could be easily forced open, it’s time to take action.
My buddy Dave once put off fixing a door latch in his home, only to find that his 2-year-old little explorer had managed to open the door and wander off. In this case, a minor problem quickly turned into a potential disaster.
Don’t let that be you – follow this golden rule: fix it now, or regret it later.
Let me share some quick tips to keep you safe and informed as you tackle that troublesome latch:
- Examine the latch closely and have a clear understanding of its operation.
- Avoid using excessive force or impacting the latch with tools, as this could cause further damage.
- Consult trusted resources or professionals for guidance on correcting the problem.
Armed with these safety precautions, you’re well on your way to victory, vanquishing that villainous door latch like the home improvement hero you are.
Dealing With Strike Plates
Imagine this: you’re just about to leave your house for that important meeting, and the door latch doesn’t go all the way in. Frustrating, right? Well, don’t worry, because we’re here to save the day. Dealing with strike plates is not as difficult as it seems, especially with the right know-how and tools at your disposal (just like a superhero!).
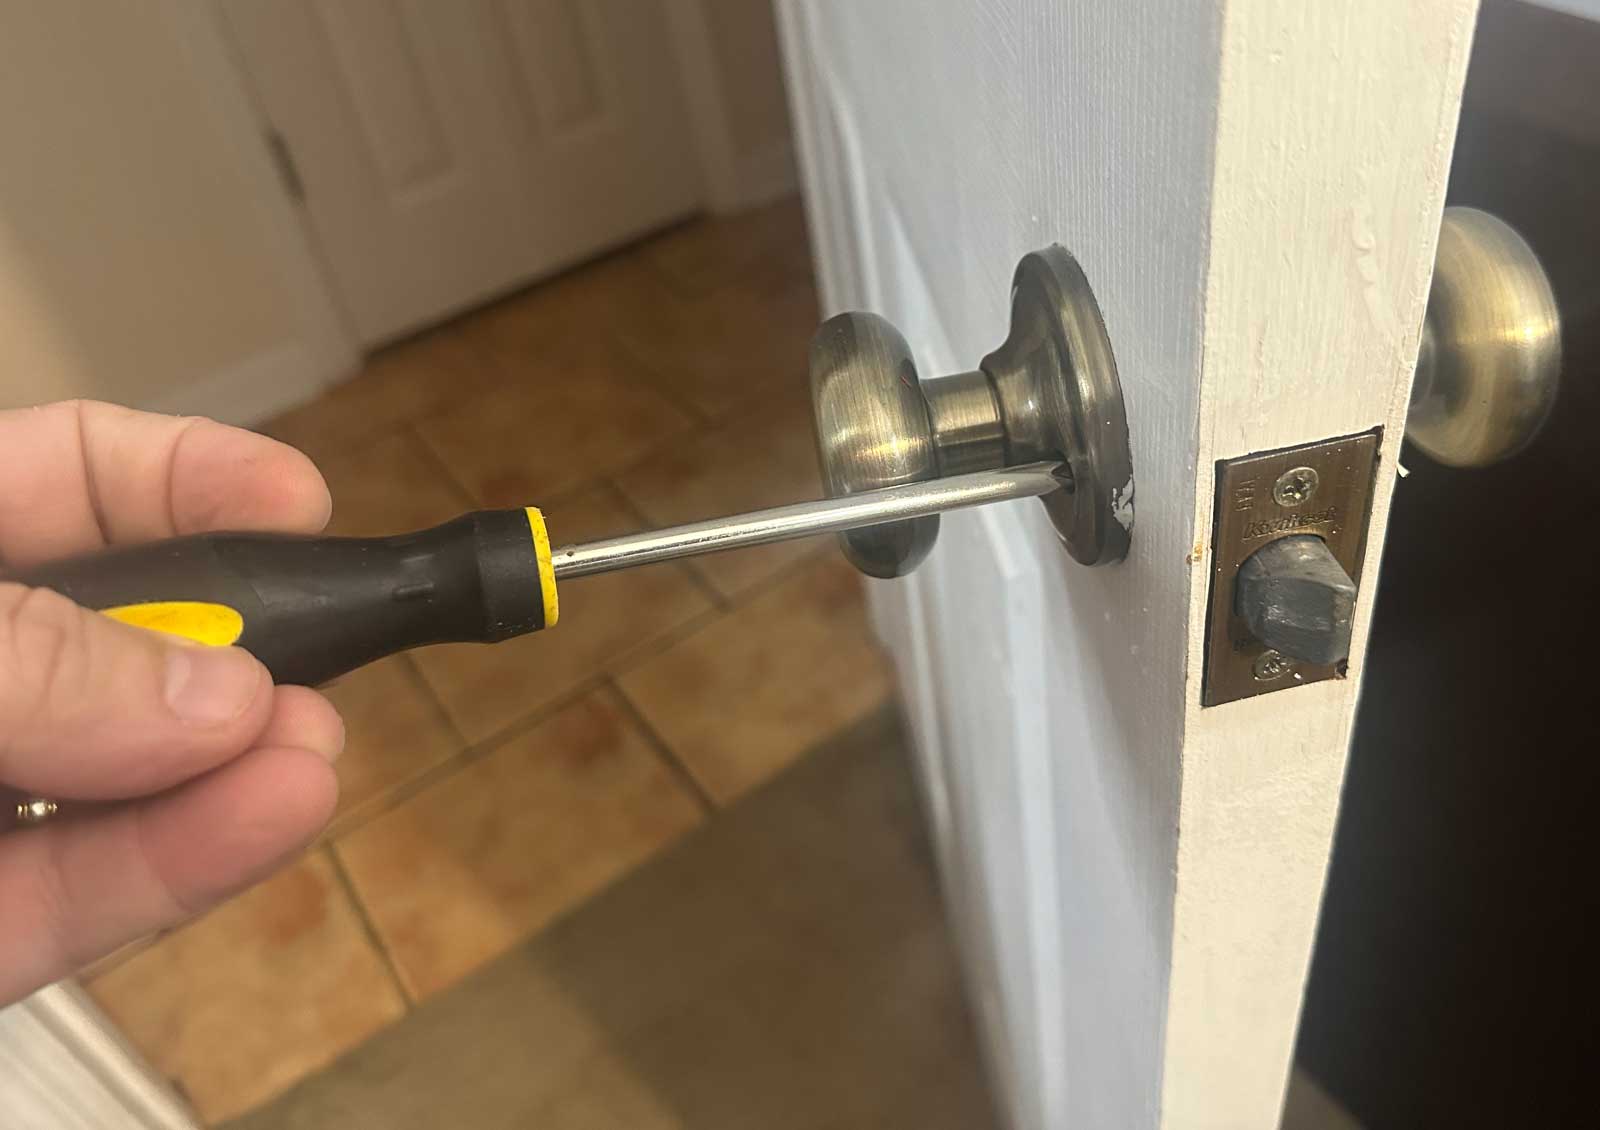
First things first, grab a screwdriver and check the screws on the strike plate. A common issue here is that the screws are too short and are not holding the plate securely in place. In situations like this, you may want to consider replacing them with a longer screw, which will provide better support for the strike plate.
Now take a close look at the alignment of your door latch and the strike plate hole. If they aren’t quite lining up, it’s time to make a few adjustments. To do this, you can either move the strike plate slightly (by loosening the screws) or enlarge the hole to accommodate the latch. To enlarge the hole, you can use a small triangular or flat file to remove just enough metal, allowing the latch to catch inside the plate and secure the door.
(found this gem of a technique once when I locked myself out during a camping trip, talk about getting back to nature!)
You might also want to consider your weather conditions. In case humidity is causing the door to swell, try resizing the strike plates to accommodate the latch more easily.
Remember, door hardware might seem intimidating, but with a little patience and a touch of confidence, you’ll have your door opening and closing with ease in no time. So, tackle those strike plates, unlock your inner superhero, and breeze through your day like the confident, knowledgeable professional you are.
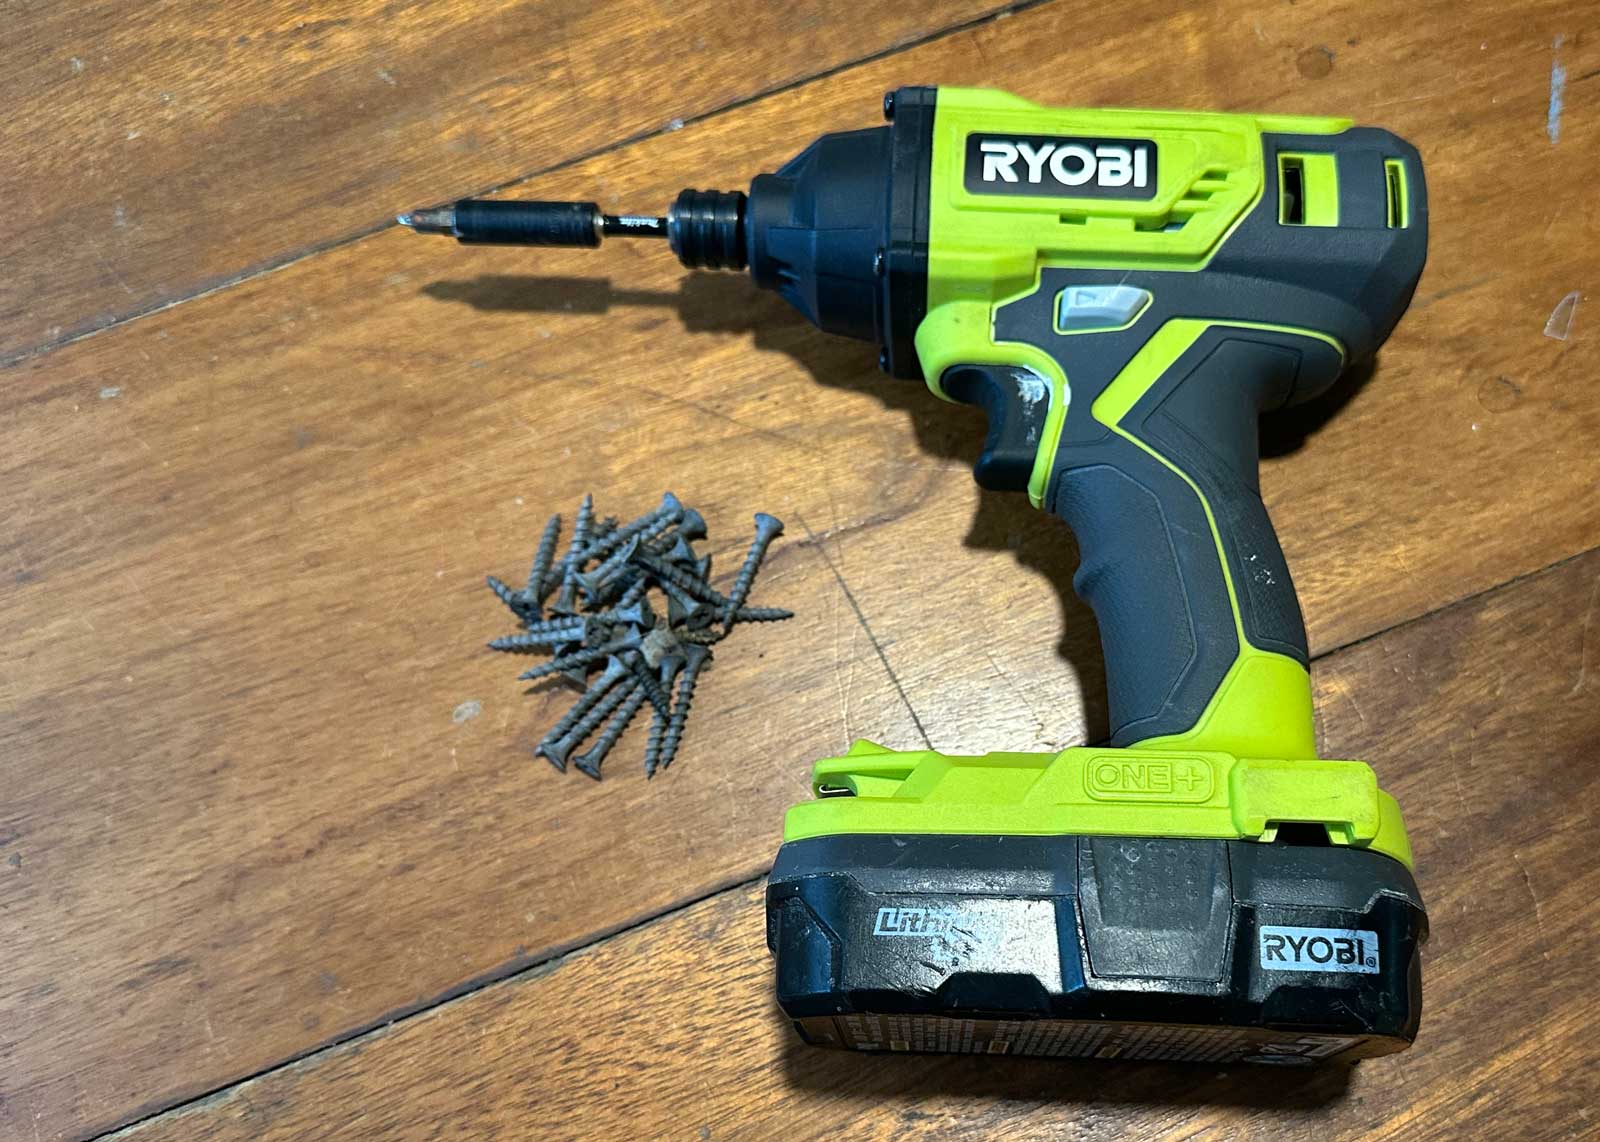
Drill, Chisel and Hammers
Imagine this: you’re in a hurry, but your door latch just won’t go in all the way. Frustrating, right? Well, I’ve got the solution for you, and it involves three essential tools: a drill, a chisel, and a good ol’ hammer. Ready to fix that pesky door latch? Let’s get started! (Don’t worry, it’s easier than you think.)
First things first, let’s talk about the drill. Your door latch misalignment issue might be solved with a simple hole enlargement, and that’s where this handy tool comes in. Grab a drill bit that’s slightly larger than your latch hole, and carefully drill away the extra material to give that latch some breathing room (source: iFixit Repair Guide).
Next up, the chisel. Sometimes all a stubborn door latch needs is a little persuasion. Position your chisel on the problematic area of the strike plate, and gently tap it with a hammer to shave off just enough material for the latch to engage smoothly (source: Family Handyman). Just like a sculptor working on a masterpiece, precision is key here.
Speaking of hammers, they’re not just for whacking things – though they do come in handy for tapping that chisel (lightly!) as I mentioned earlier. A hammer can also be an essential tool for nudging a poorly positioned strike plate into its proper place. Gently tap the strike plate in the direction it needs to go for better alignment with the door latch (remember: slow and steady wins the race).
Safety tip: Be sure to wear eye protection while drilling and chiseling – you don’t want metal or wood shavings entering your eyes.
Once you’ve finished with your trusty trio of tools – the drill, chisel, and hammer – give that door latch a test run. Chances are, you’ll have it functioning like new again in no time. You’re welcome!
Now, if you’ll excuse me, I’m off to fix a squeaky hinge with a can of WD-40 and a little elbow grease (another DIY adventure awaits).
Mending the Latch and Plate Hole
Imagine this: you’re about to leave the house, but your door won’t latch properly. Don’t panic! Before you call a locksmith, give these DIY fixes a go. Trust me, you’ll feel like a master craftsman when you’re done (I once fixed my grandmother’s door this way, and she still talks about it!).
When a door latch doesn’t go in all the way, it’s likely due to a misaligned latch and strike plate. The first step is to fix the latch plate. Place a small piece of painter’s tape over the latch area, then use a utility knife to gently widen the hole so the latch sits properly. A great tip I got from a friend is to use lipstick on the latch to see where it makes contact with the strike plate. Apply the lipstick, shut the door, and voila! You’ll see where the latch and plate need adjustments.
Now, if your door is sagging, try tightening the hinge screws. If that doesn’t work, you might need to shim the hinges. Just slip a thin piece of cardboard or plastic between the hinge and door jamb. Remember to check for any mortise issues while you’re at it. Adding a screw can help secure the hinges further.
Moving on to the mortise. If your latch still struggles, it might be due to the mortise not being deep enough. Use a sharp chisel to remove a small section of the wood around the mortise until the latch sits flush. Fill in any stripped screw holes with wood filler and wait for it to dry. Be patient, as this may take a few hours. Once dry, sand down any excess filler and, if needed, stain the area to match the rest of the door.
Finally, grab a round file or half-round file to smooth out the edges of the latch hole on the strike plate. This will help it glide effortlessly into the hole. Remember to work with metal files for metal plates, not just any old file – it makes a world of difference.
And there you have it: a seamlessly fixed door latch without a call to the locksmith. Feels great, doesn’t it? (You can thank me later.) So, next time you find yourself in a pickle with a stubborn door latch, give these easy solutions a whirl.
Repairing Broken Mechanisms
Imagine arriving home after a long day, ready to relax, only to find out your door latch won’t go all the way in! Fear not, getting that stubborn latch back in working order is simpler than you might think. Follow these quick and easy steps to solve the problem and ensure you never face this frustrating situation again.
First things first, you’ll need a screwdriver to get started on fixing that broken mechanism. Begin by removing the screws holding the doorknob in place – it’s not a bad idea to keep them neatly on a nearby surface (trust me, I’ve lost a few screws in my time, and it’s best to keep them organized!). Once the screws are out, gently pull the doorknob from the spindle.
In some cases, a misaligned spindle could be causing the latch to malfunction. Inspect the spindle for any signs of wear or damage. If it appears to be in good shape, try repositioning it and reattaching the doorknob. It’s fascinating how the smallest adjustment can make a world of difference.
However, if you notice that the spindle is the issue, you might need to replace it. You can find a new spindle at your local hardware store or online – just ensure it’s the correct size and type for your doorknob.
With the spindle fixed and the doorknob reattached, give it a test run by turning the knob and checking if the latch is now fully retracting. If all goes well, congratulations! You’ve successfully repaired your door latch and can now go back to enjoying your evening (maybe you could even reward yourself with a cold beverage – you’ve earned it).
Repairing a door latch with a broken mechanism is no match for you and your trusty screwdriver. Just remember, sometimes the smallest adjustments can make the biggest difference, and with a bit of patience and persistence, you’ll be back to a fully functional door in no time.
Dealing With Damages and Rust
Picture this: you’re running late for an important appointment, and your door latch suddenly decides to act up, refusing to go all the way in. Frustrating, right? Don’t worry – we’ve got your back. Let’s dive into the world of damage and rust, and see how we can tackle this pesky problem head-on.
First order of business: adresing the damage. Like that time I tried to fix my cousin’s bike (don’t ask), damage can sometimes be easy to spot – but not always. Issues inside the mechanism may be harder to identify. Replacing the entire latch might be the quickest solution, but consider inspecting it first and, if possible, lubricating the parts with a good-quality lubricant like Tri-Flow.
Now, let’s tackle rust, the pesky cousin of damage. Just like unwanted weeds in the garden, rust can creep in and cause your door latch to malfunction. Here is a quick rust-busting routine to get you back on track:
- Inspect: Start with a close examination of the latch. Check for visible rust or buildup that could be interfering with its smooth action.
- Clean: No one likes to scrub a rusty door latch (been there, done that), but it’s a necessary evil. Grab a brush or an old toothbrush to remove loose rust and debris.
- Vinegar magic: It turns out vinegar isn’t just good for seasoning your salad! Soak a cloth in white vinegar, and wipe down the latch to dissolve any remaining rust.
- Dry and grease: After you’ve worked your vinegar magic, make sure to dry the latch completely. Moisture is the enemy here. Once dry, apply a thin layer of grease to keep things running smoothly.
And there you have it – a hassle-free, friendly approach to dealing with damage and rust on your stubborn door latch. I know you’ve got more pressing things to do, so I hope this helps you lock and unlock your doors with ease. You’ve got this!
Maintaining Door Latches
Imagine this: You’re rushing out the door, but your door latch doesn’t go in all the way. Frustrating, right? Don’t worry. Maintaining your door latches is a simple task that will save you from unnecessary headaches and add a sense of urgency to your daily routine (plus, it’s way more fun than dealing with a malfunctioning door!).
First off, let’s talk lubrication. Door latches, like any other mechanical device, need periodic lubrication to keep them working smoothly. So, grab a suitable lubricant (such as silicone spray or graphite powder) and apply it to the latch mechanism and the keyhole. This will not only make the latch slide more easily but also prevent unnecessary wear and tear on the door hardware.
Now, here’s a fun fact: Latches can sometimes become misaligned, causing the latch bolt not to go in all the way. In this case, you might need to re-install the door latch, ensuring proper alignment and functionality. To do this, remove the door knob (or lever), unscrew the latch from the edge of the door, and take note of any signs of misalignment or damage. Once you’ve identified the issue, adjust and re-install the latch correctly. You’ll be amazed at how smoothly your door will close once again.
Finally, let’s not forget about the importance of regular check-ups. As the old saying goes, “An ounce of prevention is worth a pound of cure.” Take the time to examine your door latches at least once a year, looking for any signs of wear and tear or issues that might need attention. A little bit of effort in maintaining your door latches today can save you many headaches and door slams tomorrow.
So, next time you’re in a hurry and your door latch is acting up, remember these easy maintenance steps to keep it working like a charm. Happy door-closing!
Final Thoughts
No more frustrating doors – it’s time to put an end to doors that just refuse to latch properly. If you’ve found yourself struggling with this common issue, let’s dive right into some effective solutions.
First things first, inspect the latch and strike plate for misalignment. You can try the popular lipstick test to identify the source of the problem. Remember, a properly working door latch relies on perfect alignment for smooth operation.
Consider door settling as another culprit. Houses settle over time, causing latches and strike plates to lose their original positions. Widening the latch opening might be necessary in these cases – just remember to remove a small amount of metal and test it frequently to avoid overdoing it.
Cleaning and lubrication can go a long way, too. Dismantle the knob and latch, and give those parts some much-needed care. Opt for quality lube like Tri-Flow or WD40 – your door will thank you for this small act of kindness.
Speaking from personal experience, a door that doesn’t latch properly can drive you up the wall (and out of your mind). But with a bit of patience and these handy tips, you’ll be opening and closing like a pro in no time.
Don’t forget the psychological hooks and the sense of urgency – addressing your door latch issue is a must, and there’s no time like the present. So grab your toolbox, take a deep breath (perhaps a light chuckle as well), and show that stubborn door who’s boss. Your home will be safer and more functional, fostering an environment where door latches work in perfect harmony. Now that’s something worth striving for!
Next Steps
Want to join others who are creating the most amazing home redesigns & renovations and get more tips, tricks and hacks on how to make your home the best it can be?
Join my brand new free private Facebook group, Remodel Reality to connect with other people like you to make your space the best!


