When you’re hanging heavy objects on walls (like that expensive LED TV you just bought), it’s important to screw into studs for maximum support. But for beginners, finding and screwing into studs can be a daunting task.
Not all studs are created equal, with different types of wood and metal studs used in construction. Each type has its own characteristics and requires specific tools and techniques for screwing into them.
In this comprehensive guide, we’ll cover everything beginners need to know about screwing into studs, including how to locate studs, different types of studs, and tips for successful screwing.
By the way – before we get too far along here, if you want to connect with other homeowners, DIYers, and builders and get more great ideas for your home to make your space the best join my free private Facebook group, Remodel Reality here.
Different Types of Studs
In this section, we’re going to discuss the two most common types of studs used in construction: metal studs and wood studs. We’ll walk you through the differences between these two materials and provide helpful tips on how to screw into each type. So, let’s dive right into it!
Metal Studs
Metal studs, also known as steel studs, are becoming increasingly popular in commercial construction and residential homes due to their sturdiness and resistance to rot and termites. They are lightweight, and you can easily install them. However, working with metal studs requires proper tools and techniques to avoid damaging the material or nearby electrical wiring.
When screwing into metal studs, it’s essential to drill a pilot hole first. A pilot hole will ensure proper screw placement and reduce the risk of damaging the stud or screw
A suitable drill bit for metal studs is a self-tapping screw, which can effortlessly create threads as it drills into the stud.
Make sure to use a power drill with variable speed settings and apply steady pressure. Be cautious of electrical wires and mark the screw placement to avoid hitting any concealed utilities behind the wall.
Wood Studs
Wood studs, on the other hand, are more traditional building materials found in residential construction. They are easy to work with, and understanding how to screw into wood studs is vital for successful home improvement projects.
Before drilling into a wood stud, it’s a good idea to locate the center of the stud to ensure a secure and stable connection. You can use electronic stud finders or the tap and listen method (hollow sound indicates no stud, while a solid sound indicates a stud behind the drywall). You should also be cautious of electrical wires and water pipes within the wall cavity.
Unlike metal studs, wood studs do not typically require pilot holes. However, if you’re using large wood screws, drilling a small pilot hole will help prevent wood splitting. Use coarse-thread screws with a length that ensures at least 1-inch penetration into the stud for a secure connection.
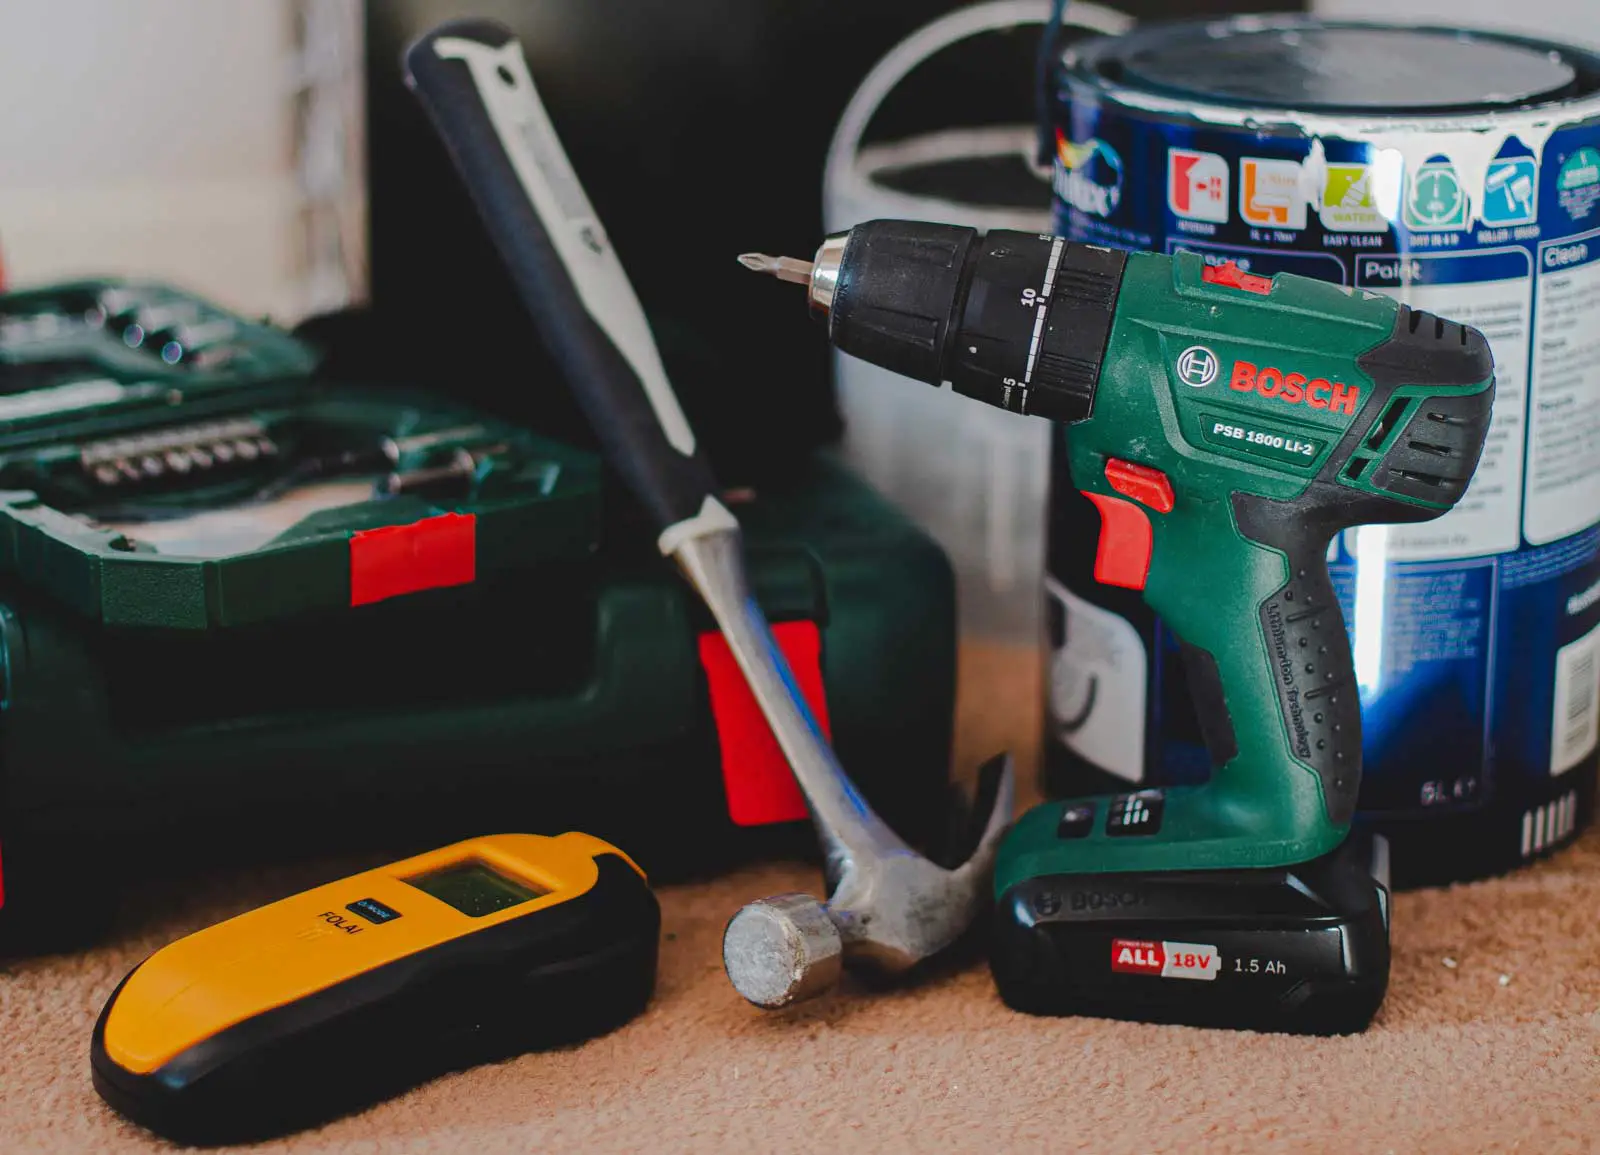 Tools and Materials Needed
In this section, we’ll discuss the essential tools and materials you’ll need for screwing into studs effectively. Having the right equipment on hand will make your job easier and ensure a successful outcome. Let’s start by exploring some of the primary tools you’ll need.
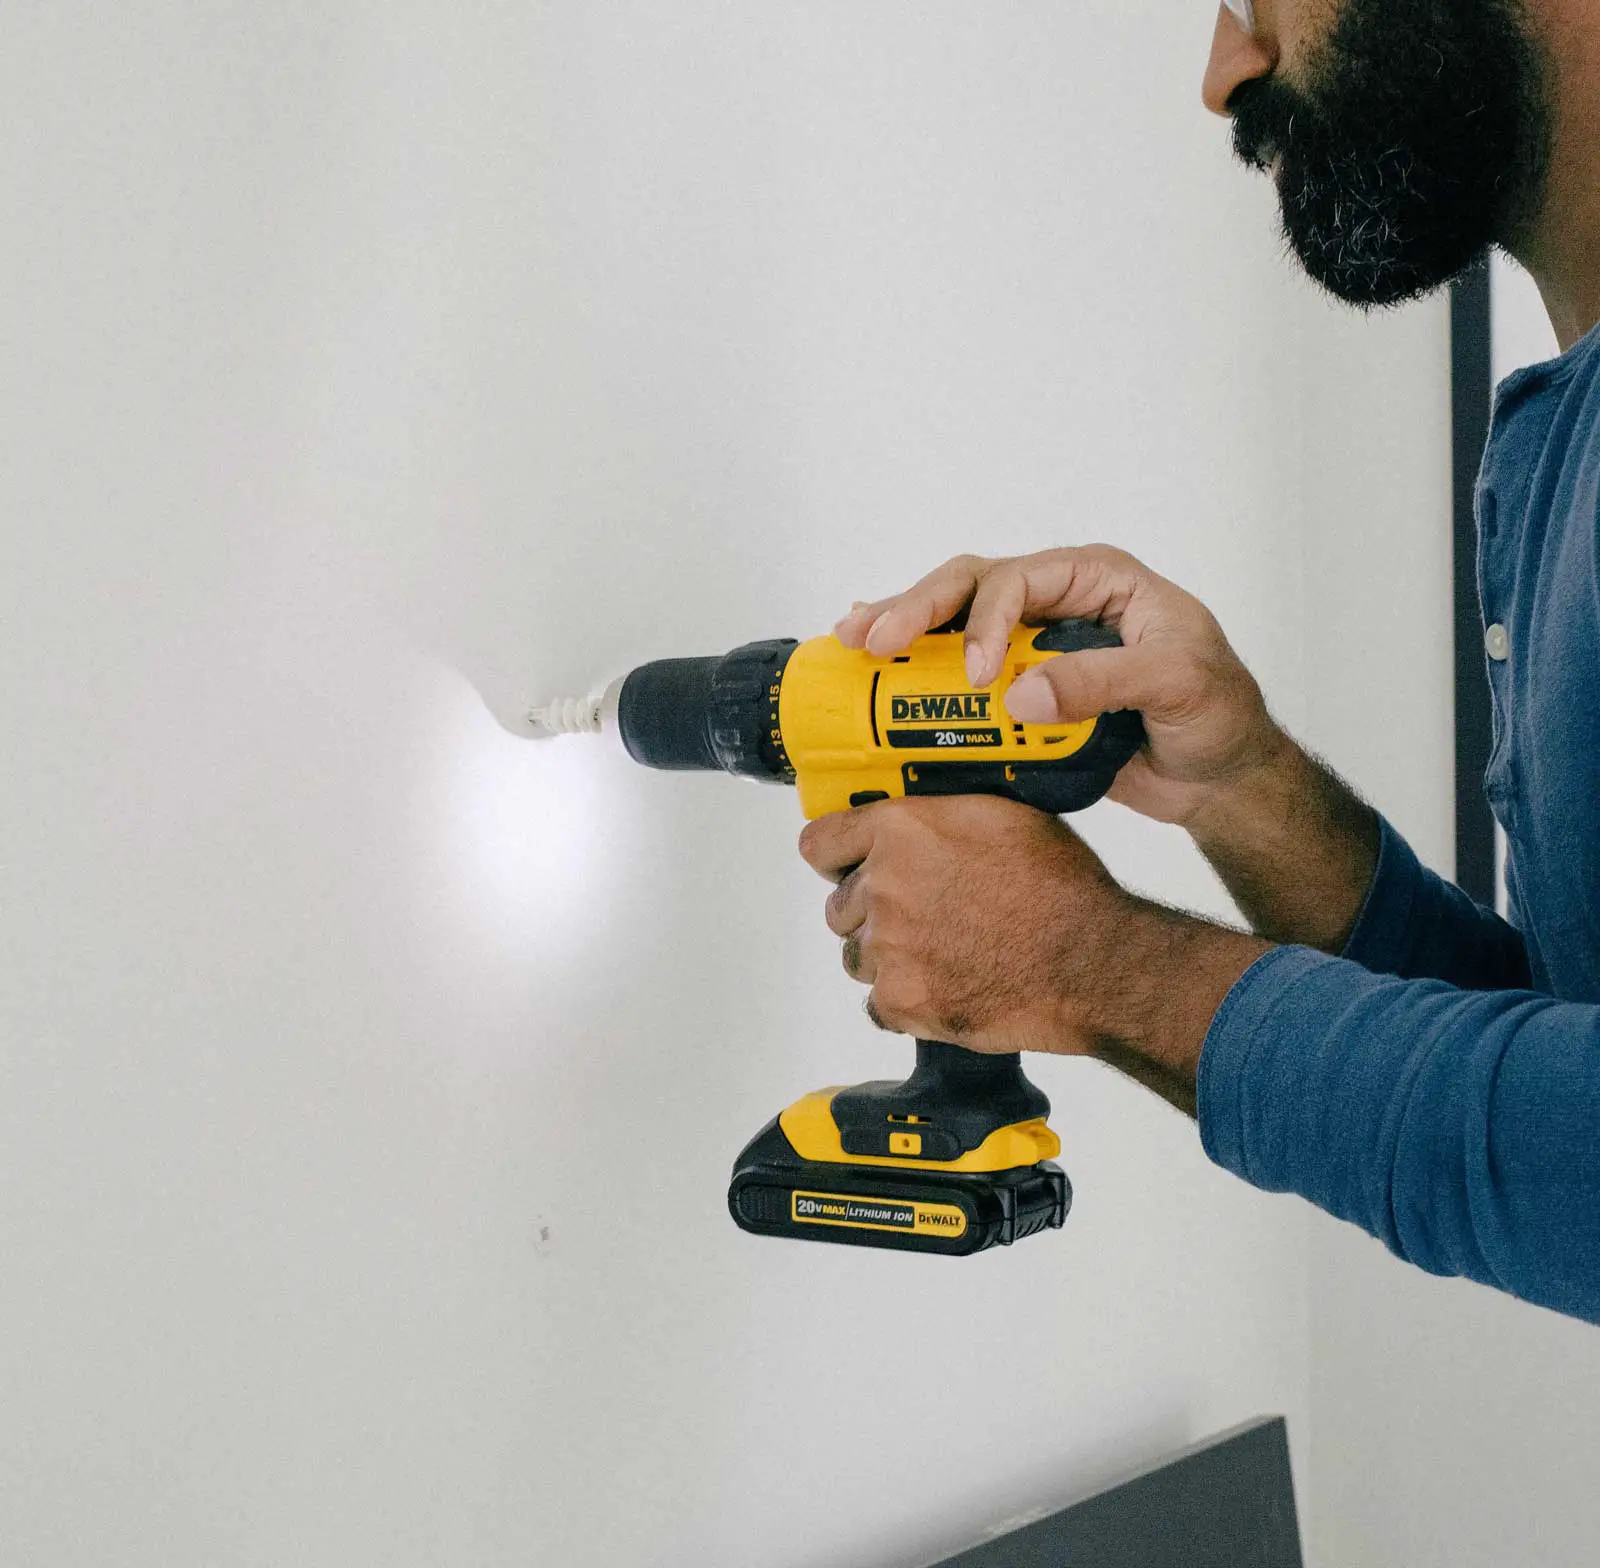
Power Drill
A reliable power drill is critical for creating clean holes in your wall materials and studs. This versatile tool will provide clean and efficient results for a sturdy anchor.
Drill Bits
You’ll need appropriate drill bits for both wood and metal studs, each designed to create accurate and clean holes in the material. The size and type of the drill bit should match the screws you plan to use.
Screws
Choose screws with the proper length and size for the material being drilled. For example, wood studs will require wood screws, while metal studs need self-tapping screws. They should be long enough to provide a secure connection through the wall material and into the stud.
Drywall Anchors
Drywall anchors are a helpful addition for situations where you can’t directly screw into a stud. They provide extra support to keep screws securely fastened to the wall material.
Stud Finders
Locating wall studs is crucial for successful screwing into studs. Both electronic and magnetic stud finders are available to help you easily locate studs behind your wall’s surface.
Tape Measure
A tape measure will help you with accurate measurements and positioning of screws. This essential tool ensures that screws are placed in the right location and evenly spaced along the length of the stud.
Now that you have a clear understanding of the necessary tools and materials for screwing into studs, you can confidently tackle your home improvement projects!
How to Locate Wall Studs
Locating wall studs is an essential skill for tackling home improvement projects. In this section, we’ll provide practicing tips on using electronic and magnetic stud finders, tapping the wall, and measuring from outlets or other fixed points. We want you to feel confident about finding studs in your own space!
Electronic Stud Finders
Electronic stud finders locate studs by detecting changes in wall density and material.
To use one, first determine how high on the wall you want to find a stud, and then calibrate the stud finder according to the manufacturer’s instructions.
Move it horizontally along the wall until it detects the edges of the stud, and mark the location with a pencil (Lowe’s).
Avoid drilling near electrical wires or plumbing to prevent damage to your home.
Magnetic Stud Finders
Magnetic stud finders, unlike electronic ones, use magnets to identify metal objects in the wall, such as nails or screws in studs.
Pass the magnetic stud finder over the wall until you feel a strong pull towards the metal object. Mark the location with a pencil, and you’ve successfully found a stud. Magnetic stud finders can be simpler to use, but they may not be as precise as electronic ones in locating the edges of the stud.
Tapping the Wall
If you don’t have a stud finder, you can still locate wall studs by tapping the wall with your fingertip.
Start by tapping wherever you want to find a stud, then slowly move to the right or left. As the tapping sound becomes more solid, you’re approaching a stud; if it sounds hollow, you’re moving away from one.
Once you’ve found the stud, measure 16 inches to locate the next one, and tap to verify its position.
Measuring from Outlets or Other Fixed Points
Another method for finding studs is measuring from outlets or other fixed points on the wall. Generally, wall studs are placed 16 inches apart, though they can be 24 inches apart in older homes. Outlets and switches are usually attached to studs, so using a tape measure, calculate the distance from the outlet to the desired location of your screw, and mark it with a pencil. This isn’t foolproof, but it’s a helpful starting point for locating studs.
 Drilling into Wall Studs
Drilling into wall studs is an essential skill for any DIYer or homeowner. In this section, we will cover the basics of drilling into both wooden and metal studs, discussing the right tools, techniques, and safety precautions to ensure successful and safe installation of your screws. Let’s get started by selecting the right drill bit for the job.
Selecting the Right Drill Bit
Your choice of drill bit will depend on whether you’re drilling into wooden or metal studs. For metal studs, a metal drill bit should be used, while for wooden studs, a standard wood drill bit will suffice. Keep in mind the length of the screw you plan to insert, as this will help determine the proper drill bit size for your pilot hole.
Pilot Holes
Pilot holes are essential for ensuring proper screw alignment and preventing damage to the stud material. The best way to create a pilot hole is to use a small drill bit to make an initial hole in the center of the stud. Once your pilot hole is drilled, you can move on to drilling the appropriate-sized hole for your chosen screw.
Drilling Technique
When drilling into wall studs, it’s important to maintain steady pressure and a straight, even angle. Right-angle drills can be helpful for ensuring that holes are square to the stud face, especially for larger holes. Make sure to drill the hole to the appropriate depth for the length of your screw and ensure the screw head will sit flush against the wall.
Safety Precautions to Avoid Electrical Wires and Water Pipes
One of the primary concerns when drilling into wall studs is the existence of electrical wires and water pipes hidden behind the wall. To avoid a potentially dangerous situation, it is crucial to use an electronic stud finder or a magnetic stud finder to help you locate wires and pipes. Additionally, it’s a good rule of thumb to avoid drilling near outlets and switches, as this is where electrical wiring is most likely to be present.
Remember to always choose the correct drill bit, create pilot holes, use proper drilling techniques, and exercise caution when dealing with hidden electrical wires and water pipes. Happy drilling!
 Mounting Cabinets and Shelves
In this section, we will discuss the essentials of mounting cabinets and shelves. We will cover a variety of methods, including using drywall anchors, screws and toggle bolts, and understanding the proper screw length and type. These techniques will ensure that your cabinets and shelves are securely mounted and safe for use.
Drywall Anchors
Drywall anchors are useful when you need to mount something heavy, but are unable to locate a stud. They provide additional support to your screws to help prevent them from pulling out of the wall. Brown Box recommends using a 2.5″ wood or deck screw when mounting into a wooden stud, and using an anchor when attaching directly to drywall. Different anchor types have varying strengths, so make sure to select an appropriate anchor for the weight you need to support.
Screws and Toggle Bolts
Screws and toggle bolts are versatile options for mounting cabinets and shelves to both wooden and metal studs. Screws provide a strong connection, while toggle bolts are ideal for heavy loads in hollow walls. According to the Family Handyman, using 1×4 boards painted to match your shelves and 8d finish nails to secure them to the studs will ensure a strong and stable installation.
Proper Screw Length and Type
Choosing the correct screw length and type is essential for a successful mounting project. Screw length is determined by the thickness of the material being mounted, as well as the depth of the stud. For wood studs, a wood screw is a good option, while sheet metal screws are preferred for metal studs. It is important to drill a pilot hole before inserting the screw, as this will help prevent splitting and damaging the materials.
When mounting cabinets and shelves, remember to follow these guidelines and use the appropriate hardware to ensure a safe and secure installation. With these techniques, you will be well on your way to a successful home improvement project.
Best Practices for Drilling into Studs
When it comes to hanging items on your walls or completing home improvement projects, understanding how to drill into studs effectively is critical. In this section, we will discuss some tips and tricks to ensure the job is done right, keeping your walls secure and your projects looking professional.
As you read through this section, you’ll discover how to find the center of a stud, avoid drilling near potential hazards like electrical outlets, and using pilot holes to help with better control during the project.
Finding the Center of the Stud
Locating the center of a stud is essential for a secure and strong connection between the screw and the wood or metal stud. Using an electronic or magnetic stud finder, align it with the area you want to drill and it will help you locate the stud. Once detected, mark the edges of the stud with a pencil, then find and mark the center to make sure you drill into the solid part of the stud.
Avoiding Drilling Near Electrical Outlets and Other Hazards
Drilling into studs close to electrical outlets, water pipes, or other hazards hidden within your walls poses a danger you should avoid. Remember, the electrical wires may run through the center of studs near outlets or switches, so exercise caution when drilling in these areas. To help minimize the risk, use a specialized wire or pipe detector. This will alert you to any potential obstacles and help you avoid drilling into hazards that might be unseen.
Drilling Pilot Holes for Better Control
When screwing into wood or metal studs, drilling a pilot hole is a good practice to follow.
A pilot hole, slightly smaller than the screw diameter, helps the screw head to grip the walls better, avoiding damage due to splitting or cracking.
Choose the appropriate drill bit size, either for wood or metal, and start drilling at a slow speed, gradually increasing the speed as you go deeper into the stud.
Pilot holes provide an easier and more controlled approach to anchoring screws into studs, ensuring a professional and clean finish to your project.
Using these best practices for drilling into studs will make your projects secure, professional, and safe. Keep these tips in mind as you prepare to tackle your next installation or home improvement endeavor. Happy drilling!
Drilling Holes in Metal Plates
Drilling holes in metal plates can be a daunting task for many. However, it is essential in various applications. Let’s explore some challenges associated with this process and how to overcome them using the right tools and techniques.
Challenges of Drilling Metal Plates
One significant challenge you might face when drilling metal plates is that metal is harder than materials such as wood or plastic. The hardest part? Choosing the appropriate drill bit to cut through the metal efficiently without damaging the drill or the metal plate itself.
Inefficient drilling may also cause deformations in the metal, such as warping or bending. Not to mention, overheating is a common issue when working with metal due to the high friction levels involved.
Tools and Techniques for Drilling Metal Plates
Having the right tools makes a world of difference in achieving clean, precise holes in metal plates. Use a power drill with a medium amount of torque and sharp drill bits made of titanium, cobalt, or carbide to produce the cleanest possible hole.
You may want to think about using a center punch to create an indentation on the metal plate before drilling to prevent the drill bit from wandering. Lubricating the drill bit with cutting fluid or multipurpose oil can reduce friction and heat buildup, extending the lifespan of the drill bit (Family Handyman).
Tips for Preventing Metal from Warping or Bending While Drilling
To prevent warping or bending of the metal plate during the drilling process, following these tips can be quite helpful:
- Secure the metal plate firmly using clamps or a vice to keep it in place and provide a stable working surface. The question is: why not use some old-fashioned elbow grease to keep that metal plate from moving around?
- Make sure the drill bit is sharp and specifically designed for drilling metal. A dull or wrong drill bit can damage both the metal and the drill.
- Maintain appropriate pressure and speed when drilling. Applying too much force or using too high a speed can cause the metal to heat up and warp. Let’s face it: rushing through the process may ultimately cost you more time and effort to fix any potential damage.
- Drill a pilot hole with a smaller bit before using the final size drill bit. Think about it: it helps with better and precise drilling.
- Lubricate the drill bit with cutting fluid or oil to reduce friction and heat, as mentioned earlier.
Mastering the art of drilling holes in metal plates requires patience and the right equipment, but with the tips and techniques provided here, you should be well on your way to accurate and efficient drilling. What does that mean for you? Better results, increased productivity, and improved overall satisfaction in your projects!
Nail Plates for Protecting Electrical Wires
When it comes to keeping the electrical wires safe and secure in our homes, nail plates play a critical role.
What Nail Plates Are and How They Protect Electrical Wires
Nail plates, also known as wire protection plates or safety plates, are flat pieces of metal installed on wooden studs to help protect electrical wires from getting punctured by screws or nails. They are typically made of 16-gauge steel and cover the area where wires pass through the studs (source). This safety measure is essential because puncturing an electrical wire during installation or renovations can lead to fire hazards, electrocution, or damage to your electrical system.
In essence, nail plates act as a shield to keep electrical wires safe from accidental damage.
Guidance on Correct Placement of Nail Plates
The placement of nail plates is crucial for their effectiveness in protecting wires. According to the National Electrical Code (NEC), any wire running parallel to a framing member, such as a stud or joist, requires protection if it’s closer than 1.25 inches to the edge of the stud (source). Nail plates should be positioned on the stud over the area where the wire runs, ensuring full coverage of the wire itself.
However, sometimes the wire is farther from the edge, and it’s not always necessary to use nail plates. In a 3.5-inch wooden stud, for example, you can drill a one-inch hole in the center of the structure and still meet the NEC 1.25-inch safety distance (source).
To avoid any surprises while drilling, start by creating a small pilot hole, only as deep as the drywall. You can then use a piece of wire or the tip of a screwdriver to feel for any hidden electrical wires or pipes behind the hole (source). Remember, safety first!
When it comes to home electrical safety, nail plates are like the unsung heroes of wire protection. Their strategic placement on studs will help you avoid costly and dangerous accidents – because let’s face it, no one wants to deal with electrocution or a house fire.
Choosing the Best Drill Bits for the Job
When it comes to screwing into studs, using the right drill bit makes all the difference. To help you decide, let’s dive right into the data by discussing the different types of drill bits for various materials, their benefits and drawbacks, and suggest the best option for different projects.
Different Types of Drill Bits for Wood, Metal, and Other Materials
Drill bits can be divided into categories based on the material they’re designed for. For wood, the most common types are twist bits and spade bits. Twist bits use a pointed tip and fluted sides to remove waste, while spade bits are paddle-shaped for creating wide holes, making them ideal for rough woodworking (Family Handyman).
As for metal, specialized metal drill bits are required. These are typically made of high-quality steel, such as HSS (High-Speed Steel), cobalt, or carbide. Cobalt and carbide drill bits are known for being more durable and resistant to wear (Grainger KnowHow).
Benefits and Drawbacks of Each Kind of Drill Bit
Twist bits are the best option for general use on wood, plastic, and thin metal, thanks to their versatility and ability to create clean holes. However, they might not be the best choice for drilling larger holes in wood. Spade bits, on the other hand, are ideal for rough woodworking but may be less durable.
Metal drilling bits, such as cobalt and carbide variants, come with their share of pros and cons.
Cobalt bits are known for their durability and strength, making them an excellent choice for drilling into harder materials like stainless steel.
Carbide bits are even tougher than cobalt, but they tend to be more brittle and prone to breaking in certain situations. In other words, you need to be extra careful when using them.
Suggesting the Best Option for Different Projects
For most projects involving screwing into wooden studs, twist bits and spade bits are your best bet, as they’ll create precise holes in wood without much hassle. Keep in mind, though, that spade bits should be reserved for rough woodworking where precision isn’t crucial.
When dealing with metal studs, cobalt and carbide drill bits offer the strength and durability needed to penetrate tough materials. However, be sure to use a steady hand and appropriate speed to avoid breaking these types of bits, especially when working with carbide drill bits.
Different Lengths and Sizes of Screws
When it comes to screwing into studs, choosing the right length and size of screws is crucial for a successful result. In this section, we will explore how to choose the right screw size and length, the importance of matching screw size to wall material thickness, and guidance on determining the correct screw length for a secure connection.
How to Choose the Right Screw Size and Length
When selecting screws for a project, it’s essential to consider the material thickness you’re screwing into (the wall material or lumber) and the load the screws need to support. For instance, The Handyman’s Daughter suggests using a #9 or #10 screw that is 2 ½” long for 2×4 lumber. Let’s dig a little deeper into the factors that influence your choice:
- Material being fastened: Thicker and denser materials may require longer and more robust screws.
- Load-bearing requirements: Heavier loads, like mounting wall cabinets, may need longer screws with higher strength ratings.
- Fastening type: Screws come in various types, such as wood screws, drywall screws, and deck screws. Choose the one most suited to your project.
In other words, it’s crucial to match the screw size and length to the specific task and material requirements.
Importance of Matching Screw Size to Wall Material Thickness
Using the right screw size for the wall material thickness is essential for a secure and lasting connection. For instance, Garage Made Simple advises adding 2 ¼” to the thickness of the wood piece being mounted on a 2×4 wood stud to get the appropriate screw length. It’s that simple. But why is this so important?
- Too short: If the screw is too short, it may not penetrate deep enough into the stud, resulting in an unstable connection.
- Too long: Conversely, a screw that’s too long may protrude through the other side of the stud or even cause damage to the wall.
Matching the screw size to the wall material thickness ensures a strong and secure connection without causing damage.
Guidance on Determining the Correct Screw Length for a Secure Connection
Once you’ve figured out the right screw size for your project, determining the correct length is the next step. The general rule of thumb is to choose a screw length that will allow the screw to pass completely through the first material and most of the way through the second material without poking out the other side (The Spruce Crafts).
Here’s another way to think about it: If you’re screwing into end grain (like in wood), aim for at least two inches of thread in the board. And for greater stability, use screws with a slightly longer length when fastening heavier objects. Ultimately, selecting the right screw length ensures a secure connection and reduces the risk of project failure. So, choose wisely, and you’ll be on your way to a successful screwing-into-studs experience.
Using Magnetic Stud Detectors for Finding Studs
When it comes to finding studs hidden behind your walls, magnetic stud detectors are a valuable tool. Let’s dig a little deeper and learn how they work, how they differ from other types of stud finders, and some tips for effectively locating the edges and center of studs.
How Magnetic Stud Detectors Work
Magnetic stud detectors function by using powerful magnets to detect metal nails or screws anchoring the studs to the drywall. When the magnet is drawn to a ferrous material, it typically indicates the presence of a stud (source: Stud Finder Review). In other words, these finders rely on the magnetic field created by ferrous metals in the wall rather than electronic sensors to locate studs.
Differences from Other Types of Stud Finders
Compared to electronic stud finders, which detect changes in density or electrical signals within the wall, magnetic stud detectors have a simpler design and narrower focus. However, they may not be as versatile in detecting non-magnetic metals, as well as other hidden objects like live wires (The Spruce). On the bright side, magnetic finders tend to be more affordable and easier to use for quick and straightforward tasks.
Tips on Using a Magnetic Stud Detector to Locate the Edges and Center of Studs
Getting the most out of your magnetic stud finder requires some tricks and strategies (think about it). To start, glide the magnet in a zig-zag pattern across the wall, and when it sticks, mark the spot where you found the metal. Work methodically, 16 inches apart from one edge of the wall, since many studs follow this spacing (K&J Magnetics). To locate the edges and center of a stud:
- Find at least two or three screws or nails within the same vertical line to confirm the presence of a stud.
- Identify clues on the wall’s surface, such as outlets or molding, that may hint at a stud’s location.
- Use a probing pin, if provided with the magnetic stud finder, to further verify the stud’s edges and center by exposing or adjusting the pin as per the manual.
In my experience, practice makes perfect. With a little patience and the right techniques, you’ll be screwing into studs like a pro using magnetic stud detectors!
Drilling Large Holes in Studs
Drilling large holes in studs can be a challenging and necessary task when working on various home improvement projects. In this section, we will discuss the challenges of drilling large holes in studs, the tools required for the job, and guidance on avoiding damage to the stud while drilling.
Challenges of Drilling Large Holes in Studs
One of the significant challenges when drilling large holes in studs is maintaining the structural integrity of the stud itself. Drilling too large or too many holes can weaken the stud, leading to potential damage and safety issues(source). Another challenge is preventing damage to any wires or pipes within the wall. These obstructions can complicate the drilling process and may require special care and considerations.
Tools for Drilling Large Holes
When drilling large holes in studs, it is essential to use the right tools for the job. A right angle drill with hole saw bits is recommended for boring large holes in wood studs (Family Handyman). For metal studs, utilize metal drill bits and anchors when attaching items to the wall (Hello Practical). Using the appropriate tools can help ensure a clean and accurate hole while reducing the risk of damaging the stud.
Guidance on Avoiding Damage to the Stud While Drilling
In order to avoid damaging the stud while drilling, follow these tips:
- Center the hole within the stud to ensure there’s enough material on either side of the hole to maintain the stud’s strength.
- Take into account the depth of the hole and avoid drilling too deep. For wooden studs, it is recommended to drill 1 inch into the stud for a secure hold (Hello Practical).
- Avoid drilling at eye level where wires or pipes may be present. Make sure to follow the necessary code regulations for your area to prevent issues.
- Take your time and make gradual progress when drilling. If using a hole saw, clear the sawdust regularly to help prevent overheating and reduce friction.
Tips for Drilling into Exterior Walls
Drilling into exterior walls can be an intimidating prospect for beginners, especially when it comes to navigating different types of studs. While the process may seem daunting, there are some tips that can help make the task easier and ensure a successful outcome.
Challenges of Drilling into Exterior Walls
Drilling into exterior walls comes with its own set of challenges. First and foremost, you’ll encounter various materials such as wood, insulation, and brick (to name a few).
You may be wondering, “how do I know where the stud is located?” This is a common concern because drilling in the wrong spot can lead to costly mistakes. (Thankfully, you’re not alone in this.)
Tools for Drilling into Exterior Walls
When it comes to drilling into exterior walls, choosing the right tools is essential. Using a stud finder is a game-changer—it will help you locate studs and avoid making unnecessary holes.
Furthermore, use a drill bit that’s slightly smaller than the screw size (this makes screw insertion easier). For metal studs, opt for metal drill bits; for wood, use regular wood drill bits.
Guidance on Avoiding Damage to the Wall
Avoiding damage to the wall is a top priority. To minimize mistakes, start by drilling small pilot holes. This helps you confirm the stud position without causing too much harm if you accidentally miss the spot.
Believe it or not, drilling at least 1-1/2″ onto any wall’s surface when installing screws or anchors should generally keep your pipes and cables safe (DIY Stack Exchange).
Finding the Center Point of the Stud
Let’s face it: pinpointing the stud’s center point can be a stressful task. However, using a stud finder alongside the “knocking method” (tapping the wall to hear differences in sound) can help you identify the stud edges.
Let me explain: Once you have the stud’s approximate location, mark the placements of the edges. The center point lies between these markings. Remember, finding the center point helps you achieve a more secure hold without damaging your wall.
In essence, drilling into exterior walls requires patience, the right tools, and accurate techniques. Armed with these tips, you’re on your way to mastering exterior wall drilling (and maybe even enjoying the process!). Keep practicing, and soon you’ll be the go-to expert amongst your friends and family.
Using Right-Angle Attachments for Drilling in Tight Spaces
When you need to drill into a stud, but the space is too tight to do so with a standard drill, right angle attachments are an ideal solution. Right angle attachments are attachments that attach to your drill and sit at a 90 degree angle, allowing you to access even the most hard-to-reach areas.
Challenges of Drilling in Tight Spaces
Drilling in tight spaces can be quite challenging. Limited maneuverability and obstructed areas can make it difficult to position your drill properly.
Imagine trying to get your drill into a tight corner or between closely spaced studs. Frustration, right? (I know it did for me.)
Benefits of Using Right-Angle Attachments
Thankfully, there’s a solution: right-angle attachments. These handy gadgets can make drilling in tight spaces so much easier. And as if that is not enough, they also save you time and effort.
With a right-angle attachment, you can transform your regular drill into a compact tool that can access hard-to-reach spots (subtle or not-so-subtle).
Guidance on Using Right-Angle Attachments Effectively and Safely
Now, here’s the best part. Using a right-angle attachment is simple. Just follow these steps:
- Attach the right-angle attachment to your drill.
- Align the bit with the screw or hole you want to work on.
- Apply steady pressure while maintaining control over the drill.
- Make use of the chuck’s built-in magnets to secure the attachment in place.
Of course, safety is essential. Keep these tips in mind:
- Wear protective gear, like safety goggles and gloves.
- Ensure the area is well-lit.
- Be mindful of nearby obstacles and objects that may interfere with the drilling process.
Now that you’ve got the tools and guidance, tackling those tight spaces should be a breeze. Think about it, with right-angle attachments, you’ll overcome the challenges and make your drilling projects more efficient. So, go ahead and give it a try. You’ll thank yourself later. (Thankfully, he didn’t ask me to do it for him.)
Avoiding Live Wires While Drilling
When drilling into a wall stud, it’s vital to be careful so you can avoid any dangerous live wires. To prevent these hazards, it’s first important to understand the different types of studs that you might encounter.
Dangers of Drilling into Walls with Live Wires
Drilling into walls with live wires poses serious risks, such as electric shock, fires, and damage to your home’s electrical system. These hazards can lead to injury, property damage, and costly repairs (source).
To avoid these dangers, it is crucial to locate and avoid live wires when screwing into studs.
Guidance on Locating and Avoiding Live Wires
One practical approach to detect live wires is by using stud detectors or voltage detectors. These tools can help you identify electrical wires behind walls or near studs, but they can only detect live wires (source). To maximize their effectiveness, turn on the electricity in the area where you’re drilling.
Furthermore, consider the positioning of wires in your walls. Wires typically run through the middle of studs, and if they’re close to the surface, they might be protected by metal plates to prevent accidental punctures.
While drilling, pay attention to the drill bit’s depth. You can wrap a bit of tape around the bit to mark the thickness of your drywall, giving you a visual indication of when to stop drilling (source).
Importance of Turning off Power Before Drilling
Despite using the right tools and techniques, there are no guarantees you won’t encounter live wires. To minimize risks, always turn off the power before drilling. This simple precaution can help keep you and your home safe.
In conclusion, avoiding live wires while drilling is essential to prevent potential hazards. By using appropriate tools, following guidance, and turning off the power before drilling, you can significantly reduce risks and ensure a safe drilling experience. Let’s face it: safety should never be an afterthought!
Using Wall Plugs for Extra Support
When attaching something to a wall, the use of wall plugs can provide extra support and stability. Wall plugs are small plastic objects with ribs or ridges that create a tight grip when inserted into a hole in the wall. Depending on the size and type of anchor being used, wall plugs come in different sizes and materials to accommodate various types of screws and bolts.
What Wall Plugs Are and How They Provide Extra Support for Screws
Wall plugs, also known as drywall anchors, are hollow and self-expanding screw attachments designed to create a stronger connection between a screw and a wall. Made of plastic or similar synthetic material, wall plugs are used when screwing directly into studs isn’t sufficient to support heavy objects.
When wall plugs are inserted into a pre-drilled hole, they expand as the screw is tightened, providing additional support and grip against the wall. This prevents the screw from loosening or the object being hung from falling over time (You know that feeling, right?).
Guidance on Choosing the Right Wall Plug Size and Installing Them Properly
Selecting the correct wall plug size is crucial. As a general rule, match your power drill bit to the size of the wall anchor. This ensures a proper fit and maximum support. To choose the right wall plug size, follow these steps:
- Identify the object’s weight and choose the appropriate anchor type.
- Match the screw size to the anchor.
- Select a drill bit that’s the same diameter as the wall plug.
Now, let’s get to the best part – installation! Once you’ve chosen the right wall plug size, follow these steps to install it properly:
- Mark the location where the object will be hung.
- Drill a hole that’s slightly shorter than the length of the wall plug.
- Insert the plug into the hole.
- Insert the screw through the object’s mounting hole and into the plug, tightening it securely.
And there you have it! Properly installing wall plugs ensures a stable and strong connection, giving you peace of mind knowing that your hanging treasures and objets d’art will stay securely in place. Remember, safety first! (Hey, we’ve all been there.)
The Wall Trick for Finding Dead Center
When it comes to screwing into studs, finding the dead center of the stud is crucial. And here’s a neat trick that can help you with that.
Explanation of the Wall Trick and How It Helps Find Dead Center of Stud
The wall trick involves using a lamp to cast a shadow on the wall, which will reveal the silhouettes of nailheads or drywall tape (and the stud behind it) This Old House. The best part? You don’t need any fancy tools, just a simple lamp will do the trick.
By finding the shadows of these nailheads or tape, you’ll also find the stud location. And with the stud located, it’s much easier to find the dead center for screwing into the stud effectively.
Guidance on Using the Wall Trick Effectively and Safely
Now for the other part of the story; here’s how you can use the wall trick safely and effectively:
- Remove the lampshade from the lamp.
- Turn on the lamp and hold the bulb 10-12 inches away from the wall. Ensure your hand doesn’t block the light.
- Move the lamp along the wall, and pay attention to the shadows. Look for the silhouettes of nailheads or drywall tape.
- Once found, note the location and look for additional studs nearby.
Remember to be careful while handling the lamp, especially if the bulb gets hot. And let’s face it, practice makes perfect. So, don’t hesitate to try this trick a few times until you feel confident in your ability to identify the dead center of a stud.
Why is this important? Finding the dead center of a stud ensures that your screws will be secure and that your installed item won’t come loose, causing potential damage.
So give the wall trick a try, it can be your secret weapon for finding and being able to anchor into into studs with precision.
Using Auger Bits for Heavy-Duty Drilling
When screwing into studs, particularly for heavy-duty applications, the type of drill bit you use can make a big difference in the performance and efficiency of your project. One option worth considering is the use of auger bits for heavy-duty drilling.
Benefits of Using Auger Bits for Heavy-Duty Drilling
Auger bits offer several advantages over traditional twist bits or spade bits when it comes to drilling into wood studs. First, they typically have self-feeding tips and large, heavy-duty flutes, which make them suitable for drilling through wood, even wood with nails in it.
This means that you can achieve a clean, professional-looking result with less effort and in less time. (How cool is that?!?)
Additionally, because they create less friction when drilling, auger bits can also minimize the risk of your drill overheating, providing a safer and more efficient experience.
Guidance on Choosing the Right Auger Bit Size and Using Them Effectively and Safely
Like any tool, it’s essential to choose the right size of auger bit for your project. This doesn’t just mean selecting the correct diameter for the hole you wish to create; it also means taking into consideration factors such as the thickness of the material you are drilling into and the specific needs of the job at hand. Let’s face it; no one wants to waste time or damage their work by using the wrong bit size.
As you select your bit, keep these helpful tips in mind:
- Remember that larger auger bits may require a more powerful drill to provide sufficient torque, so make sure your drill is compatible with the bit size.
- Start with a smaller pilot hole, especially in dense or hardwoods. This will help guide the larger auger bit and prevent wandering as you drill the main hole.
- Always follow proper safety procedures such as clamping your workpiece securely, maintaining a stable stance, and using safety gear like goggles and gloves.
With a little consideration and care, you can achieve great results when drilling into studs using auger bits. It’s that simple.
Using Bit Extensions for Deep Drilling
Drilling into studs is a common task in construction and DIY projects. Sometimes, you need to drill deeper holes, and that’s where bit extensions come into play.
Explanation of Bit Extensions and How They Help Drill Deep Holes
Bit extensions are accessories that you attach to your drill, allowing you to extend the reach of your drill bits (you guessed it!). These extensions grant you the ability to drill deeper holes with ease, making them perfect for tasks where standard drill bits simply won’t cut it.
For example, drilling into corner stud assemblies can be quite challenging, especially if you’re limited by the length of your drill bit. By using a handy bit extension, you can overcome this obstacle and execute deep drilling like a pro.
Guidance on Using Bit Extensions Effectively and Safely
Here’s the deal: when using bit extensions, there are some best practices to keep in mind to ensure your drilling remains effective and safe.
- Choose the right extension for your needs: Different lengths and types of bit extensions cater to different tasks. Make sure you select the one that suits your project requirements.
- Secure the connection: To avoid accidents and imprecise drilling, it’s crucial to ensure that both the extension and the drill bit are tightly secured in place.
- Work at the proper speed: Remember that the added length of a bit extension will affect the balance of your drill. Take your time and work at a controlled pace to maintain stability.
- Safety gear is a must: Wear appropriate safety gear, like goggles and gloves, to prevent injuries while drilling.
The question is: are you ready to drill deeper? With the right bit extension in hand and these tips up your sleeve, there’s nothing stopping you from conquering those hard-to-reach spots in your next project.
Fine-Thread Screws for Delicate Projects
Fine-thread screws are an excellent choice for delicate projects such as installing drywall on metal studs or working with veneered plywoods and coated sheet materials like melamine. In this section, we’ll explore the benefits of using these screws and provide guidance on selecting the right size and using them effectively and safely.
Benefits of Using Fine-Thread Screws for Delicate Projects
When you’re dealing with delicate surfaces, fine-thread screws come to the rescue.
They have small spaced grooves that can drill through surfaces like metal studs or hardwood without causing damage.
Additionally, some fine-thread screws, like Quickscrews’ Funnel Head screws, have double serrations and very fine teeth to cut into surfaces without tearing them up. This makes them ideal for projects where precision and a clean appearance are essential.
Guidance on Choosing the Right Fine-Thread Screw Size
Selecting the proper size screw is crucial for a successful project. Consider the thickness of the materials you’re working with and the depth the screw needs to penetrate to secure the components.
Think about it: using screws that are too long can result in damage, while those that are too short may not provide adequate holding power.
When working with drywall, for instance, ensure your screw is long enough to penetrate the metal stud without crushing the edge.
Keep in mind that, in general, the screw should be no less than 1/4 inch from the edge.
Using Them Effectively and Safely
Working with fine-thread screws requires proper technique and attention to detail. Here’s how:
- Position the screw correctly: Aim for a 1/4 inch distance from the edge to avoid crushing.
- Pre-drill holes: This step can help prevent splitting delicate materials, ensuring a cleaner finish.
- Use the appropriate tool: Employing the right screwdriver or drill bit will help you avoid slipping or damaging the screw head.
- Drive slowly and steadily: Maintain a consistent speed to prevent stripping the screw threads or causing surface damage.
By following these tips and choosing the right fine-thread screws, you’ll be set for success in your delicate projects. But remember, always practice safety measures and double-check your work for the best results.
Drilling into the Side of a Stud
As a DIY enthusiast, you might have encountered situations where drilling into the side of a stud became necessary. In this section, we’ll discuss the reasons for drilling into the side of a stud and how to do it effectively and safely.
Explanation of When Drilling into the Side of a Stud Is Necessary
Drilling into the side of a stud may be required for various reasons. For instance, you might need to install a heavy object on your wall, and you can’t find a stud precisely where you want it. (I know it did for me) In such cases, you’ll have to drill into the side of a nearby stud to provide maximum support and stability.
Another situation might be when you need to run wiring through your walls. Drilling into the stud’s side allows you to create the necessary channels for your wires without weakening the stud’s entire structure.
Guidance on How to Drill into the Side of a Stud Effectively and Safely
Before you begin, gather the necessary tools such as a drill, drill bits, screws, and a stud finder (or the good ol’ knocking method).
Here’s how:
- Locate the stud: Use a stud finder or the knocking method to identify the stud’s location within your wall. Mark the spot where you plan to drill. (That’s what she said — Michael Scott)
- Choose the right drill bit: Based on the type of stud (wood or metal), select the appropriate drill bit for the job. Drill pilot holes before using a screw to prevent wood splitting or metal distortion.
- Drill slowly and steadily: Start drilling slowly until the drill bit has passed through the drywall and entered the side of the stud. Maintain consistent pressure without pushing too hard. (Think about it)
- Double-check everything: Once you’ve drilled into the side of the stud, ensure that the hole is perfectly aligned and the screw is properly secured.
Drilling into the side of a stud can be a tricky process, but it’s essential for certain projects. And as if that is not enough, with the right tools and the proper technique, you can complete the task effectively and safely.
Next Steps
Want to join others who are creating the most amazing home redesigns & renovations and get more tips, tricks and hacks on how to make your home the best it can be?
Join my brand new free private Facebook group, Remodel Reality to connect with other people like you to make your space the best!