Wood paneling was a popular interior wall choice from the 1950s-70s, but now it’s outdated and, unless you’re into that retro vibe, replacing it with drywall is a fantastic option for updating your space.
Good news: the cost of replacing wood paneling with drywall isn’t as high as you might think! But just how much will it cost?
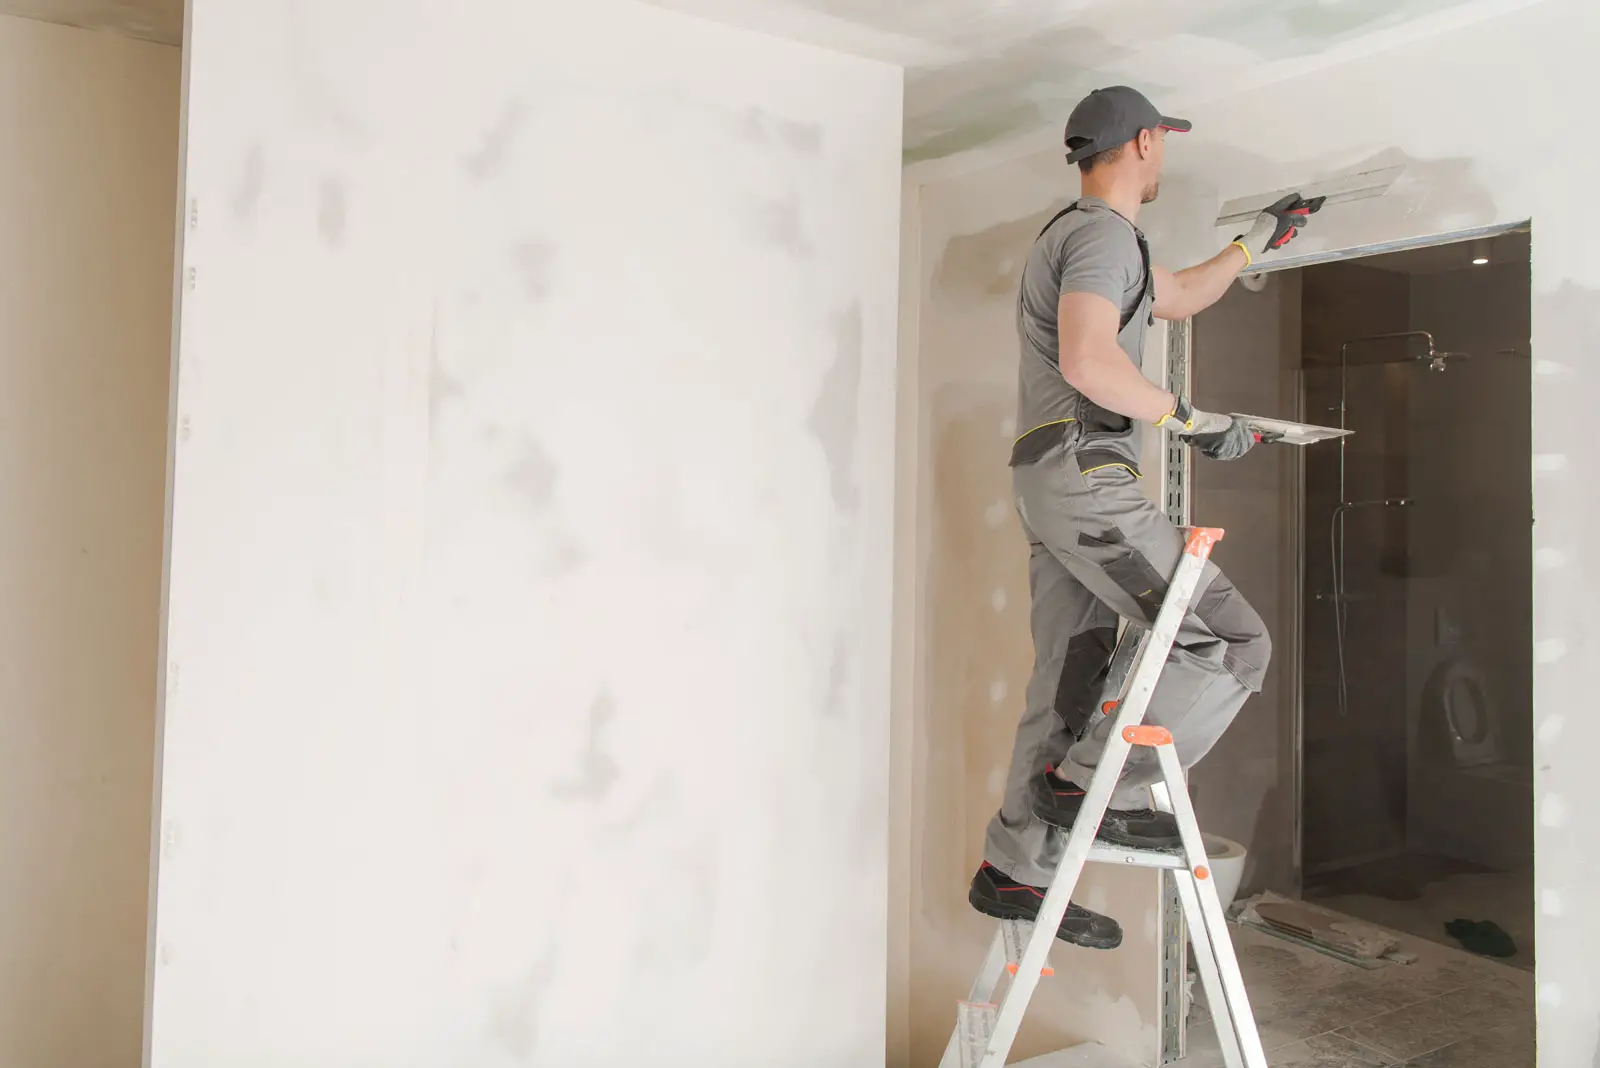
The cost to replace wood paneling with drywall can vary depending on factors such as the size of the project, location, condition, and finish options of the walls, as well as labor costs. On average, the cost can range from $2 to $4.50 per square foot, with labor costs averaging around $60 to $100 per hour.
What’s involved in replacing wood paneling with drywall?
How long does it take?
Should you DIY or hire a contractor?
In this article, I’m going to tell you everything you need to know about replacing wood paneling with drywall. From budgets to materials needed to installation costs, I’ll give both the highs and lows of what it will cost.
By the way – before we get too far along here, if you want to connect with other homeowners and builders and get more great ideas for your home to make your space the best join my free private Facebook group, Remodel Reality here.
 Cost Considerations: Labor, Demo, & Other Expenses
In my grandmother’s house, where I spent a lot of time growing up, the family room was fully walled in that old-school 70s wood paneling. All 4 walls of that room, from floor to ceiling were that old school wood paneling, complete with the huge console TV on the floor that me & my sister used to lay in front of.
Whenever I think of wood paneling I think of that family room.
My grandparents passed years ago, and whoever has that house now has, no doubt, replaced that paneling.
A few years ago when we were looking to buy a house, one that we looked at (that we really liked!) had a lot of that wood paneling too. My wife and I knew that if we bought that house the first thing we’d have to do would be to replace that paneling.
So I feel your pain when it comes to those old rooms that have that old paneling. Unless you’re setting up a fully retro 50s-70s vibe, with all the retro furniture, complete with the Don Draper personal style, skinny tie and all, you’re going to want to update your house with something that’s more modern, and hopefully a little more timeless in terms of look and feel.
Before you just start ripping out that old 70s paneling, it’s important to understand the costs associated with the project because it’s more than just buying new drywall.
The amount that it will cost you in the end depends on a variety of factors including the size of the room, ceiling height, and complexity of the task at hand.
If you’re working with a contractor, you’ll have to factor in labor costs, in addition to materials like drywall tape & mud, nails & screws, joint compound and all the other necessary supplies.
It’s also important to bear in mind that unless your existing walls are completely straight, precise measurements will need to be taken which means there may be some additional corrections and adjustments put in place before cutting the first piece of drywall to ensure it fits perfectly.
 Average Cost Of Replacing Wood Paneling With Drywall Per Square Foot
Replacing wood paneling with drywall typically costs between $2 to $4.50 per square foot, but this price can vary depending on a number of factors.
When it comes to replacing wood paneling, the size of the room is one of the most important factors, as larger rooms will require more materials and labor, and thus cost more than a smaller room.
How Room Size Impacts Project Cost
For instance, many ceilings for homes built in the 60s and 70s are 8 feet. That’s great for being able to stack two 4×8 sheets, but if you’ve got a ceiling that’s 9 or 10 feet that will substantially increase the amount of material you’ll need.
When it comes to the total cost of a wall installation, size and ceiling height are important factors to consider, but there are others as well.
The complexity of the job is one of the major aspects that can influence how much you’ll pay for your project. The more intricate the task is, the more time, materials, and labor it will require.
For example, if you’ve got to replace wood paneling around doorways or windows, that means things will get more a lot more complicated, you’ll end up with more waste, and spend more time working around these features.
In addition, if there’s already some damage to the wall before installing new drywall, this damage must be addressed and repaired first. It could be wood rot, or studs that are damaged, that were damaged during the removal of the old paneling.
Similarly, if you’re dealing with solid wood or groove paneling on an existing wall, that material must be taken out before having new drywall installed and that process takes far longer compared to sheetrock which comes in uniform sheets. In other words, these types of procedures can increase the overall cost of your project.
Factoring in Additional Costs for an Accurate Project Estimate
When replacing wood paneling with drywall, there are a few extra costs you need to be aware of.
Unless you’re going the DIY route, one of the biggest expenditures will be labor, which can cost anywhere from $60 to $100 per hour. You may also have to pay an additional $15-40/hour for the removal of old paneling and other labor costs such as joint compound, corner bead or skim coat.
While these costs will add to the overall price of the project, they’re essential if you want your drywall walls to look good and be done right. You may also have to factor in leveling or patching existing walls prior to starting any panel replacement work too.
This can increase your labour costs substantially so it’s always best to check with a professional beforehand. Allowing for all of these items can ensure your remodel job looks great and lasts over time.
Building Codes and Permits: Navigating Legal Requirements
Before you start any drywall installation project, it’s important to consider the potential costs associated with building codes, permitting, lead paint, and home inspectors.
For example, if your home was built before 1978, it could possibly contain lead paint that needs to be removed and disposed of properly – an extra expense that can quickly increase the overall cost of the project.
In addition, if your city or county requires you to get permits, you’ll have to pay to pull those permits and may need a contractor who is familiar with those codes which in turn means that you may have to pay more for their services.
Inspections to get approval for those permits are an expense as well. Home inspectors may have to be called in who will charge a fee for their work.
Don’t forget about other items like new outlet covers, switch plates, etc. either – you probably don’t want your 70s outlet covers and switch plates on your newly installed drywall. They’re relatively inexpensive but forgetting to account for them can put a dent in your budget.
 Material Options
There are many drywall materials to choose from. It’s important to understand what the best options are for your drywall project, as well as the other building materials you may need and the various styles and types of drywall available.
When it comes to the material itself, it is important to consider how much insulation and soundproofing you want for your walls.
Drywall sheets are available in a variety of different thicknesses, so depending on your needs and desired level of insulation will determine which type works best for you.
Additionally, many newer versions of drywall are really helpful with reducing noise. This type of board consists of two layers that channel, absorb and disperse noise more effectively than regular drywall, making it a great choice for spaces where sound carries more easily (such as garages or open plan spaces).
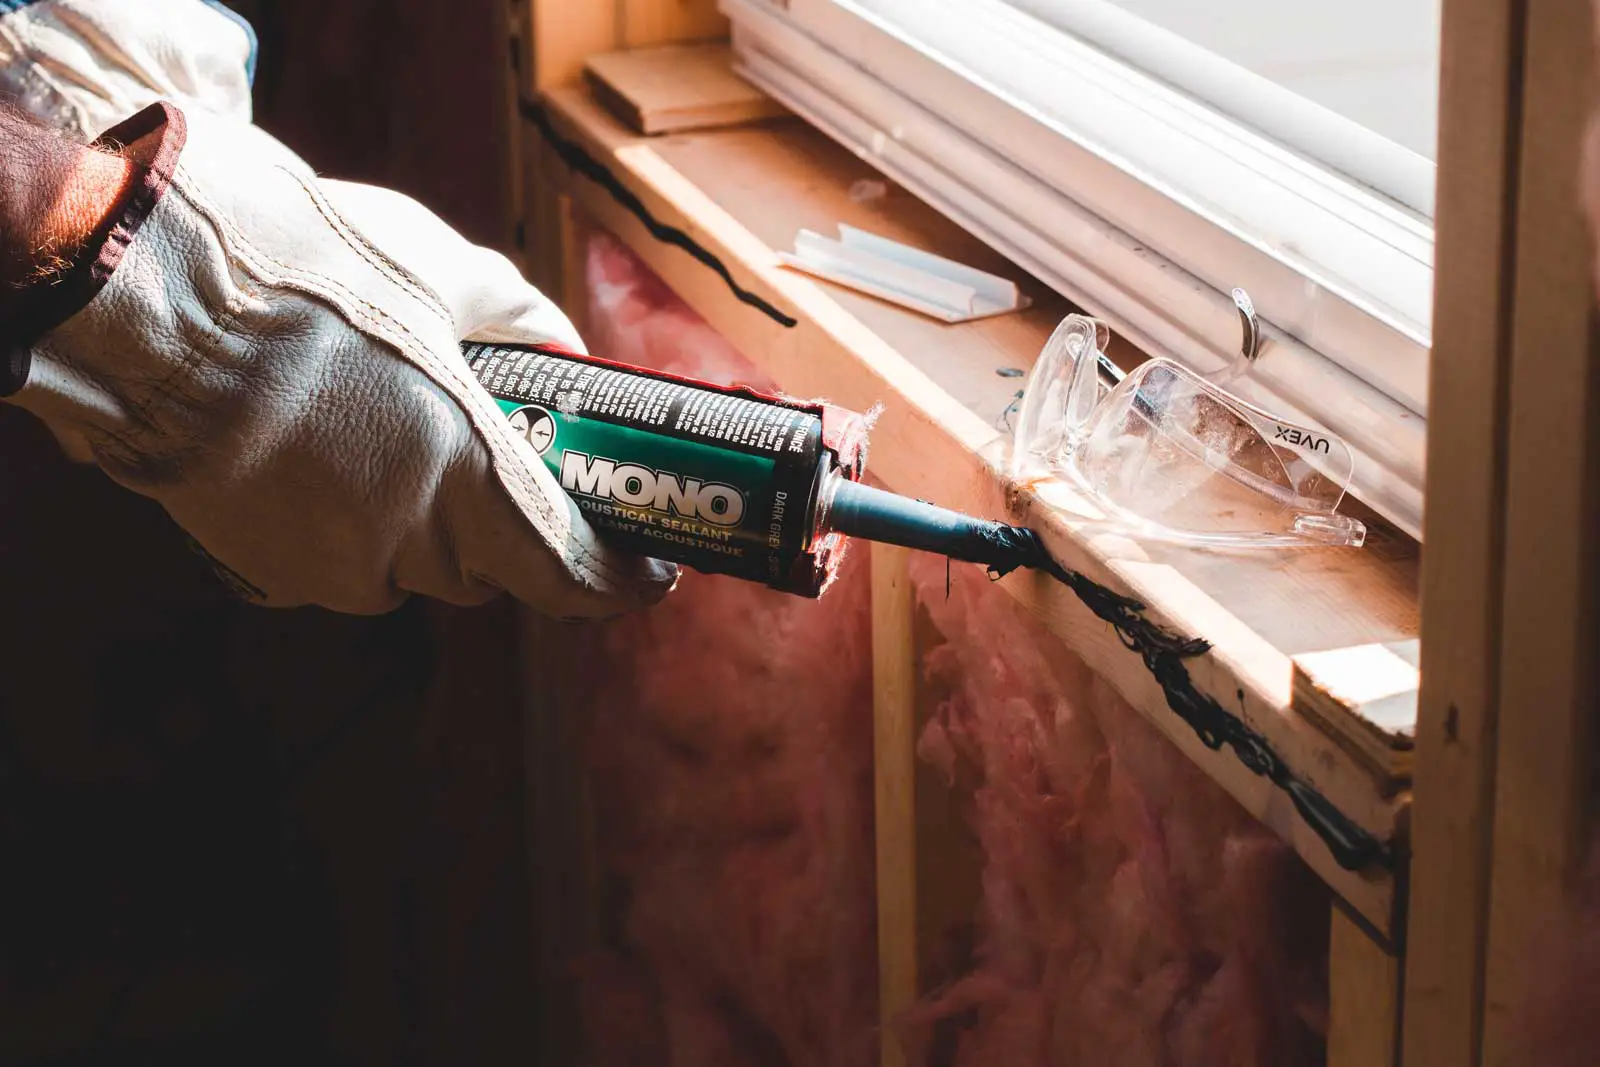
You’ll also need to factor in the necessary adhesives when selecting a material, like adhesive spacers and drywall screws.
There are numerous style options when it comes to drywall including lightweight fiberglass board material for ceilings or premium gypsum wallboard panels designed especially for wet locations like bathrooms or kitchens.
By understanding the different kinds of materials available and their respective benefits when used in certain contexts you can make better decisions when choosing a type of drywall that meets both your aesthetic and functional demands.
Different Types of Drywall For Your Remodeling Project
When you’re thinking about what type of drywall to use for your project, the most common choice is standard gypsum-based drywall.
This type of drywall is popular because it’s affordable, easy to install, and works well for most jobs. If you’re working on a project that requires extra protection against moisture, like in a bathroom or kitchen, then moisture-resistant drywall may be the best option. This kind of drywall has a water-resistant core that can withstand high humidity levels without getting damaged.
If you’re looking for a more eco-friendly option for your project, there’s also eco-friendly drywall available. This type of drywall is made from recycled materials and is a great choice if you want to reduce your environmental impact. Not only is it better for the planet, but it can also help improve indoor air quality since it doesn’t contain harmful chemicals.
It’s important to note that there are other types of drywall available as well.
For example, if you need soundproofing capabilities in your space, there are special types of drywall designed specifically for noise reduction. And if safety is a concern, fire-resistant drywall can help protect your home or building from potential fires.
When it comes to drywall panels, there are a variety of thicknesses available.
The most common thicknesses are 1/2 inch and 5/8 inch, but thicker panels can also be found for those who want added durability or soundproofing.
Thicker drywall may be necessary in areas where the walls are likely to experience where noise reduction is important. For example, if you’re installing drywall in a home theater or recording studio, thicker panels may be necessary to prevent sound from leaking out.
In addition to traditional drywall panels, paneled walls are another option for those looking for easy installation. Paneled walls are pre-manufactured wall panels that can be easily installed with minimal effort. They come in a variety of styles and finishes to match any aesthetic.
For those who want the look of wood paneling but prefer a more modern style, there is actually modern wood paneling is also available!
This type of paneling offers an updated, contemporary look and feel while still providing the warmth and texture of traditional wood paneling. It’s a great choice for anyone who wants to update their space without sacrificing style.
When choosing which type of drywall to use, consider the specific needs of your project and choose the material that will work best for you. Don’t be afraid to ask questions and do some research before making your final decision.
 Other Materials You Might Need
When you’re planning to replace wood paneling with drywall, it’s important to know that there are other building materials that might be necessary for the job.
Depending on the specific needs of your project, you may need to add or replace wall studs to properly support the new drywall panels. Wall studs are vertical framing members that provide structural support for your walls and can help ensure that your new drywall stays securely in place.
In addition to wall studs, you may also need cement board for added durability and support in areas like showers and bathrooms.
If there are gaps or holes in your walls that need to be filled before installing the new drywall, wood filler can come in handy. Wood filler is a putty-like substance that can be used to fill in small cracks or holes in wood surfaces. This can help create a smooth surface for your new drywall to be installed on and will ensure that the final result looks seamless.
All of these building materials are essential to ensuring that your new drywall is properly supported and installed. Whether you’re working on a DIY project or hiring a professional contractor, it’s important to make sure you have all the necessary materials before beginning any work.
 The Replacement Process
The easiest way to do to remove the wood paneling is by cutting into the edges of the panels, then prying them away from the wall backing and pulling out any nails or staples that may have been used for installation.
Next, it’s important to assess the condition of your wall – do you need to make any repairs before installing new drywall? Be sure to compare your wall’s condition with current building code requirements as well as other safety and energy efficiency standards when making your evaluation.
It’s also essential to keep in mind that each project will have its own unique set of conditions and difficulties that must be taken into account in order for replacement efforts to be successful. Depending on these factors, it can take anywhere from a few hours up to a day or two just for removal. Once done removing old materials, adding insulation and filling any gaps before finally installing new drywall boards can add several more hours onto the job – but once completed, you’ll find satisfaction in knowing that you updated your home yourself.
Removing Old Wood Paneling
There are a few tools that will make the process of removing your old wood paneling a lot easier. The most essential tools are a pry bar, heat gun, and putty knife. These three items will help you quickly and efficiently remove the paneling without causing damage to your existing walls.
First, start by using the pry bar to remove any trim that may be holding the paneling in place. This might include baseboards, crown molding, or any other decorative elements. Be sure to use caution when removing trim so as not to damage it, as it can often be reused.
Next, use the heat gun to loosen the adhesive that’s holding the paneling in place. Hold the heat gun a few inches away from the wall and move it back and forth over each section of paneling for a few minutes until it feels warm to the touch. Once heated, use your pry bar to gently pull the paneling away from the wall.
After all of the paneling is removed, there may be some leftover adhesive or debris on your walls. Use a putty knife to scrape away any remaining adhesive or debris carefully. Take care not to gouge or scratch your walls while scraping.
It’s important to note that while this process is relatively quick and simple, taking proper precautions is essential in order not to damage existing walls. Be sure to wear gloves and safety goggles while working with tools like a pry bar or putty knife. Additionally, take care not to overheat areas with the heat gun as this can cause damage if left unchecked.
Evaluate The Condition Of the Existing Wall
Before installing new drywall, it’s crucial to assess the condition of the existing wall. This will help ensure that your new drywall is installed correctly, and that it lasts for many years to come.
If the existing structure is in good condition, you can install new drywall directly over it. This is a relatively straightforward process.
However, if there is damage to the existing wall, this needs to be addressed before installing new drywall.
Damage to drywall or plaster walls can occur due to a variety of reasons, such as water damage, impact damage, or age-related wear and tear. If there are holes or cracks in the existing wall, these should be patched up using spackle or joint compound. Wait for the spackle or joint compound to dry completely before sanding it down so that it’s smooth and even.
In some cases, more extensive repairs may be required. For example, if there is significant water damage or mold growth on your walls, you may need to remove damaged sections of drywall entirely and replace them with fresh panels.
It’s also important to check for any structural issues with your walls before installing new drywall. This might include inspecting studs for signs of rotting or warping and ensuring they’re properly aligned and spaced apart. Addressing any structural issues now will help prevent future problems down the line.
Overall, assessing the condition of your existing walls is an essential step in replacing them with new drywall. By taking care of any necessary repairs beforehand and checking for structural issues, you’ll set yourself up for success when installing your new drywall panels.
Addressing Complex Problems
When it comes to replacing wood paneling with drywall, the complexity of the job can have a significant impact on the costs, the time it takes to complete the project, and the level of finish needed to achieve a flat surface.
If your existing paneling is made of solid wood or groove paneling, removing it will be more difficult and time-consuming than if it were made of thinner materials.
Removing thicker panels requires more effort and care to avoid damaging the underlying structure. In some cases, you may need to use specialized tools like a reciprocating saw or circular saw to cut through the wood before removing it.
In addition, achieving a smooth, flat finish when installing the new drywall depends on several factors such as experience level and quality of materials used. For example, if you’re not an experienced DIYer, achieving a perfectly smooth finish may take longer than someone who has done this type of work before.
To achieve a smooth finish, you may need to apply one or more skim coats over your newly installed drywall. A skim coat is essentially a thin layer of joint compound applied over the entire surface of your walls. This helps fill in any minor imperfections and creates an even base for painting or wallpapering.
Estimating The Time Needed
When replacing wood paneling with drywall, the size of the room will obviously have a significant impact on how long the project takes to complete. For smaller rooms, such as a bathroom or closet, you may be able to finish the project in just a few days. However, for larger areas like living rooms or bedrooms, it could take a couple weeks to complete.
In addition to size, the complexity of the job and level of finish needed also play a role in determining how much time and effort is required. If your existing walls are damaged or uneven, you may need to spend additional time and labor addressing those issues before installing new drywall. This could include patching holes or cracks with spackle or joint compound and sanding them down until they’re smooth.
The level of finish needed to achieve a flat surface is another important factor to consider. Achieving a perfectly smooth surface requires more time and skill than simply hanging drywall panels. You may need to apply one or more skim coats over your newly installed drywall to fill in any minor imperfections and create an even base for painting or wallpapering.
When working on larger or more complex projects, it’s often best to work with a professional contractor who has experience installing drywall. They’ll have access to specialized tools and techniques that can help speed up the process while ensuring high-quality results.
It’s also important to take proper precautions when removing existing wood paneling to avoid damaging the underlying structure. This includes using appropriate tools such as reciprocating saws or circular saws if necessary, being careful not to cut into studs or electrical wiring behind the walls.
Hiring a Professional vs. DIY
You have two choices in this situation; you can either complete the project yourself as a DIY, or hire a professional contractor to do the job for you. It’s important to understand that each option has its own unique benefits and drawbacks, so you have to consider your own situation carefully before deciding which route is best suited for your needs.
Completing a DIY drywall installation can save you money, and is an excellent way to gain valuable experience and improve your skills in woodworking and basic construction. It does however require commitment, patience and precise measurements, as well as high-quality tools and supplies.
Hiring a qualified contractor may prove more expensive than undertaking the work yourself but has its advantages; contractors are experienced professionals who know exactly how to get the job done correctly with minimal struggles along the way. Furthermore, they are usually licensed, insured and certified specialists who carry out all types of construction-related repairs including carpentry, masonry and plumbing tasks in addition to wall installation.
Moreover, while smaller projects such as installing drywall can often times be completed without help from a general contractor, larger or more complex projects should always include professional guidance. General contractors are experts when it comes to managing multiple tradesmen during a remodel or renovation project and oversee every aspect of construction from planning layout through completion.
DIY = Saving Money
When it comes to home improvement projects, taking a DIY approach can be a great way to save money. Instead of hiring a professional contractor and paying for their labor costs, you can tackle the project yourself and keep more money in your pocket, and it can actually be a fun experience!
For smaller projects, like updating a single room or a small space like a closet or pantry, a DIY project can be completed in just one weekend. This means that you can enjoy the benefits of your new space without having to wait weeks or even months for contractors to finish the job.
In addition to saving money and time, taking on a DIY project can also be a satisfying, rewarding experience. You’ll have the satisfaction of knowing that you did the work yourself and created something beautiful and functional. It can also be an opportunity to learn new skills and gain confidence in your abilities.
However, it’s important to remember that not all home improvement projects are suitable for DIYers. Some projects require specialized tools, knowledge, and expertise that only professionals possess. For example, if you’re replacing wood paneling with drywall, you may need access to specialized tools like reciprocating saws or circular saws to cut through thick panels. Additionally, achieving a perfectly smooth surface when installing drywall requires skill and experience.
Before starting any DIY project, it’s important to assess your own skills and capabilities honestly. If you don’t have experience with certain tasks or lack access to necessary tools, it may be best to hire a professional contractor instead.
DIY Disadvantages
While DIY projects can be a great way to save money, they do have some potential disadvantages to consider. One major downside is that they can take longer and require more effort than anticipated. This is especially true for larger rooms or spaces that require more work.
For instance, if you’re replacing wood paneling with drywall in a large living room, the project could take several weeks to complete. You may need to spend additional time removing existing paneling and addressing any underlying issues before installing new drywall. This could include patching holes or cracks, sanding down uneven surfaces, or even reinforcing walls if necessary.
Additionally, if the job requires complex skills like electrical work or plumbing, DIY projects may not be the best option. These tasks require specialized knowledge and experience to complete safely and effectively. If you don’t have these skills, attempting them on your own could result in injury or damage to your home.
Another potential disadvantage of DIY projects is that mistakes can be costly. If you make an error during the installation process or use sub-par materials, it could end up costing you more money in the long run. For example, if you install drywall incorrectly and it starts to crack or peel after a few months, you’ll need to spend additional time and money fixing the problem.
Then there’s the fact that you’ll likely find surprises of one kind or another. Just like you see on the staged shows on HGTV, flaws, rot, termite damage, degradation, water damage or any other kind of unpleasant surprise could potentially be waiting for you when you start uncovering old work, and it could be really challenging to be able to deal with those problems.
Despite these potential downsides, there are ways to mitigate them and ensure a successful DIY project. One approach is to start small and gradually build up your skills over time. Rather than tackling a large project right away, try something simpler like painting a room or installing new light fixtures.
It’s also important to do your research ahead of time and gather all necessary tools and materials before starting the project. This can help prevent delays or setbacks along the way.
Benefits of Hiring A Professional Contractor
On the other hand, if you just don’t want to be bothered with all the details, hiring a professional contractor can be a great option! There are several benefits to working with an experienced and skilled contractor.
One of the biggest advantages is that a professional contractor has the expertise to provide high-quality work. They have likely completed similar projects in the past and know how to address common issues that may arise during the project. This means that you can expect a more polished finished product that meets your expectations.
Another benefit of working with a professional contractor is that they can save you time, particularly for larger or more complex projects. They have access to all necessary tools and equipment and know how to use them efficiently. This means that they can complete the job much faster than if you were doing it yourself.
For example, if you’re planning to remodel your entire kitchen, hiring a professional contractor could save you weeks or even months of work. A skilled contractor will be able to coordinate all aspects of the project, from ordering materials and scheduling subcontractors to managing timelines and budgets.
In addition, working with a professional contractor can also provide peace of mind. They will typically carry liability insurance and workers’ compensation insurance, which means that you won’t be held financially responsible for any accidents or injuries that occur on your property during the project.
However, it’s important to note that hiring a professional contractor does come at a cost. You’ll need to pay for their labor costs as well as any materials or supplies needed for the project. In some cases, this may make DIY projects more appealing from a financial standpoint.
The costs of hiring a contractor to do the job can add 20% or more to the total cost of the project. However, it’s important to take into account the extra time and effort that you’ll save by not having to do the job yourself.
The Significance of Hiring a General Contractor for Larger or More Complex Projects
If we’re being honest, we don’t always want to do this kind of work ourselves so hiring a general contractor may be your best bet. Here’s why:
General contractors have extensive experience managing larger projects, including those involving commercial buildings or historic homes. They can oversee the entire project from start to finish, ensuring that everything runs smoothly and efficiently. This includes coordinating with other subcontractors as needed, such as electricians, plumbers, and carpenters.
In addition to their project management skills, general contractors can also help ensure that the project stays within budget and on schedule. They have experience estimating costs and timelines accurately, which can help prevent unexpected delays or expenses down the road.
For example, let’s say you’re planning to replace wood paneling with drywall in your living room. While it may be tempting to tackle this as a DIY project to save money, keep in mind that larger projects like this can be time-consuming and require more effort than you might expect. Hiring a professional contractor can provide better quality work and save time in the long run.
When it comes to larger projects like whole-home remodels or commercial renovations, hiring a general contractor is even more important. These types of projects often involve multiple rooms or areas of a building and require careful coordination between different tradespeople. A skilled general contractor can manage all aspects of the project seamlessly while keeping everyone on track.
Of course, it’s important to consider the total price when deciding whether to hire a professional contractor for any home improvement project. In some cases, DIY may still be the more affordable option – especially if you already have experience with similar projects.
Ultimately, whether you decide to tackle your home improvement project yourself or hire a professional contractor depends on several factors: the size of the job, your level of experience with similar projects, and your budget. But for larger or more complex projects where precision and efficiency are key, working with a skilled general contractor is likely your best bet!
Next Steps
Want to join others who are creating the most amazing home redesigns & renovations and get more tips, tricks and hacks on how to make your home the best it can be?
Join my brand new free private Facebook group, Remodel Reality to connect with other people like you to make your space the best!