Drywall work is notorious for making a mess during installation and repair. Even the most seasoned professional contractor leaves dust behind when they cut, sand, and finish drywall.
Unfortunately, you can’t just sweep away this dust. If it’s mixed up in the air, traditional brooms are useless, and it seems to stick to drywall board like glue. How then do you clean off your walls quickly and effectively?
In this article, I’m going to discuss easy ways to get rid of drywall dust that’s mixed up in the air or settled on surfaces. With my help, your walls will get restored to their original state before you know it!
By the way – before we get too far along here, if you want to connect with other homeowners and builders and get more great ideas for your home to make your space the best join my free private Facebook group, Remodel Reality here.
 Tools and Materials
Drywall dust is an all-too-common problem when you’re doing renovations your home, and the dust can linger on walls long after construction projects or your remodel is complete. Cleaning drywall dust off walls may seem daunting, but with the right tools and materials, it’s a relatively simple task that can be completed quickly and efficiently.
Having the right tools and materials for cleaning your walls will make all the difference. Here are some items you’ll need before you get started:
- Dust masks to protect from inhaling dust
- Cloths for wiping and cleaning
- Vacuum cleaners and attachments for removing dust
- Sandpapers for smoothing walls
- Paint and paint sprayers for finishing
Preparing the Surface
When we were hanging drywall during our remodel for my mom’s new living space the whole area was covered in dust. The only thing that saved it from being on and in everything was the plastic sheeting we had hung up to keep it from drifting all throughout the house. Even then it seemed like it was still everywhere!
When preparing your surfaces for cleaning, there are a few steps you should take to ensure you get the best result possible. Here’s how it’s done.
Cover surfaces to protect from splatters and spills
First off, before you start cleaning, it’s important to protect the surrounding area from any mess by covering anything that could get splashed or spattered. A canvas drop cloth is an ideal way to protect your floor and furniture and it’s reusable too.
Sand walls to create a smooth surface
Sanding the walls is another important step before cleaning, as this creates a smooth surface that can easily be wiped down or painted when you’re finished. The sanding also helps paint stick better to the wall, creating a much more professional finish than not sanding at all.
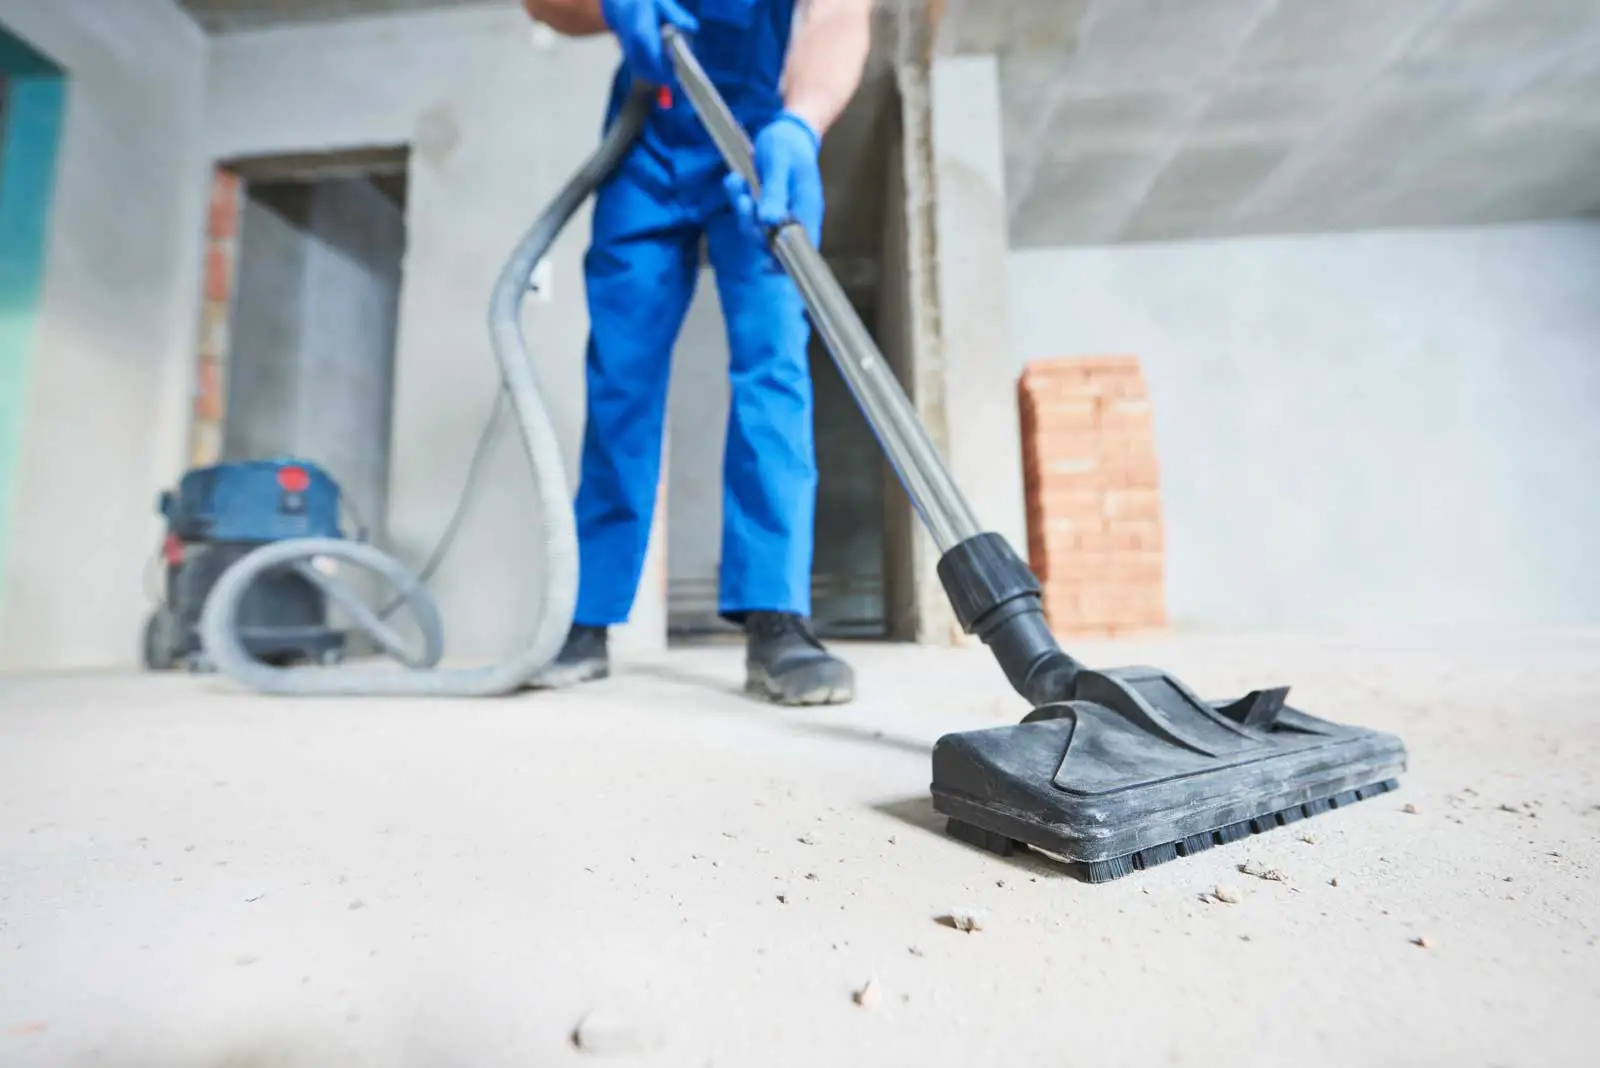
Dust off drywall using a vacuum cleaner with a soft bristle vacuum head
Make sure to vacuum up any drywall dust with a soft-bristle attachment on your vacuum cleaner so that it doesn’t get spread throughout the whole area; using something too stiff or sharp could damage the wall’s surface.
Use a tack cloth to remove any remaining dust
After vacuuming, use a tack cloth to pick up any additional dust, dirt, and debris that was missed before leaving for the next stage of your project safe in the knowledge that you have properly prepped your walls for painting or cleaning.
Cleaning The Walls With Water
Cleaning with water is an effective and simple way to get rid of drywall dust on your walls. To do this, wet a microfiber cloth in cool or warm water and wipe down the walls, starting near the top and downward.
Microfiber cloths work like a charm! They work so well because they’re soft and absorbent, making it easier to lift up the drywall dust while cleaning.
Be sure to rinse and squeeze the microfiber cloth periodically as you are wiping down the walls; this will help keep the dust from spreading which can make your task of cleaning even more challenging.
If there’s an especially stubborn area that won’t come off with just plain water alone, try preparing a soapy solution by adding a few drops of dish soap into the water.
Apply this soapy mixture onto the dirtied wall area with a damp cloth and scrub gently. Once done, go over those same spots again with clean water to remove any traces of soap residue before drying it all off using another clean cloth.
Once finished cleaning up your walls, it is especially important that you give them one last good wipe-down using another dry cloth; this will leave a spotless finish while also preventing water spots or streaks from occurring due to any leftover moisture being present. Following these steps diligently is sure help guarantee that your walls clean and ready for whatever project you have in store for them!
Other Cleaning Methods
If you want to clean drywall dust off your walls, there a few other options you can use. A simple way to start is by taking a clean, soft, dry cloth and wiping down the wall. This works great for light dust and any residue that might be left from recently painted walls.
If there’s heavier dust and debris on the walls, you may want to consider using a vacuum cleaner with a dust brush attachment. These attachments are specifically designed for removing dust without damaging the surface and will help make sure your walls look nice and clean after all the dust has settled.
Another option to think about is applying a coat of paint over the whole wall. Paint is an effective way of sealing in the dust so it doesn’t get into the air.
Make sure you let your walls dry completely before you apply any paint and be especially cautious between each coat so no coating gets mixed with dirt or other particles resting on your walls.
If deep cleaning is required – such as after contractors have completed work in your home – it might be best to hire experienced professional cleaners who have the right equipment and know how to do an immaculate job. Professionals can make sure your home looks spotless when they’re done so that it’s ready for all of next steps in the process.
Cleaning Joint Compound
When you’re doing drywall work, joint compound is an essential part of the process. It’s what you use to fill in and cover the seams between the sheets of drywall, but it can also be a bit of a challenge to clean off. If left behind, it can create a layer of dust that’s hard to remove.
If you’re working with wet or semi-wet joint compound, cleaning it up is relatively easy. All-purpose joint compound is water-soluble, so all you need to do is get a damp cloth and gently rub away any residue from the surface.
You can also soak any tools you were using in hot water for about 10 minutes to make sure all the mud comes off easily. If needed, lightly scrubbing with warm water will help get rid of the remaining residue.
If the compound has dried and hardened though, your job gets a lot tougher. Water won’t do much here so you’ll have to resort to sandpaper or scraping instead.
Depending on how smooth you want your finish to be, go for either 150-grit sandpaper which will give a smoother finish or 80-grit sandpaper if there are tougher areas that need work done on them. If the surface is particularly delicate then gently tap it with a rubber mallet or cloth wrapped hammer before scraping away anything that’s still stuck on with a plastic tool.
To recap: joint compounds come in different states which require different methods for cleaning – wet/semi-wet compound can be cleaned off easily with warm water and some elbow grease whilst dried compounds need more heavy duty techniques such as sand paper and scraping .
By understanding how each type should be handled you can keep your walls clean and looking good in no time.
What have you found that works best for you? Let me know in the comments below!
Next Steps
Want to join others who are creating the most amazing home redesigns & renovations and get more tips, tricks and hacks on how to make your home the best it can be?
Join my brand new free private Facebook group, Remodel Reality to connect with other people like you to make your space the best!