
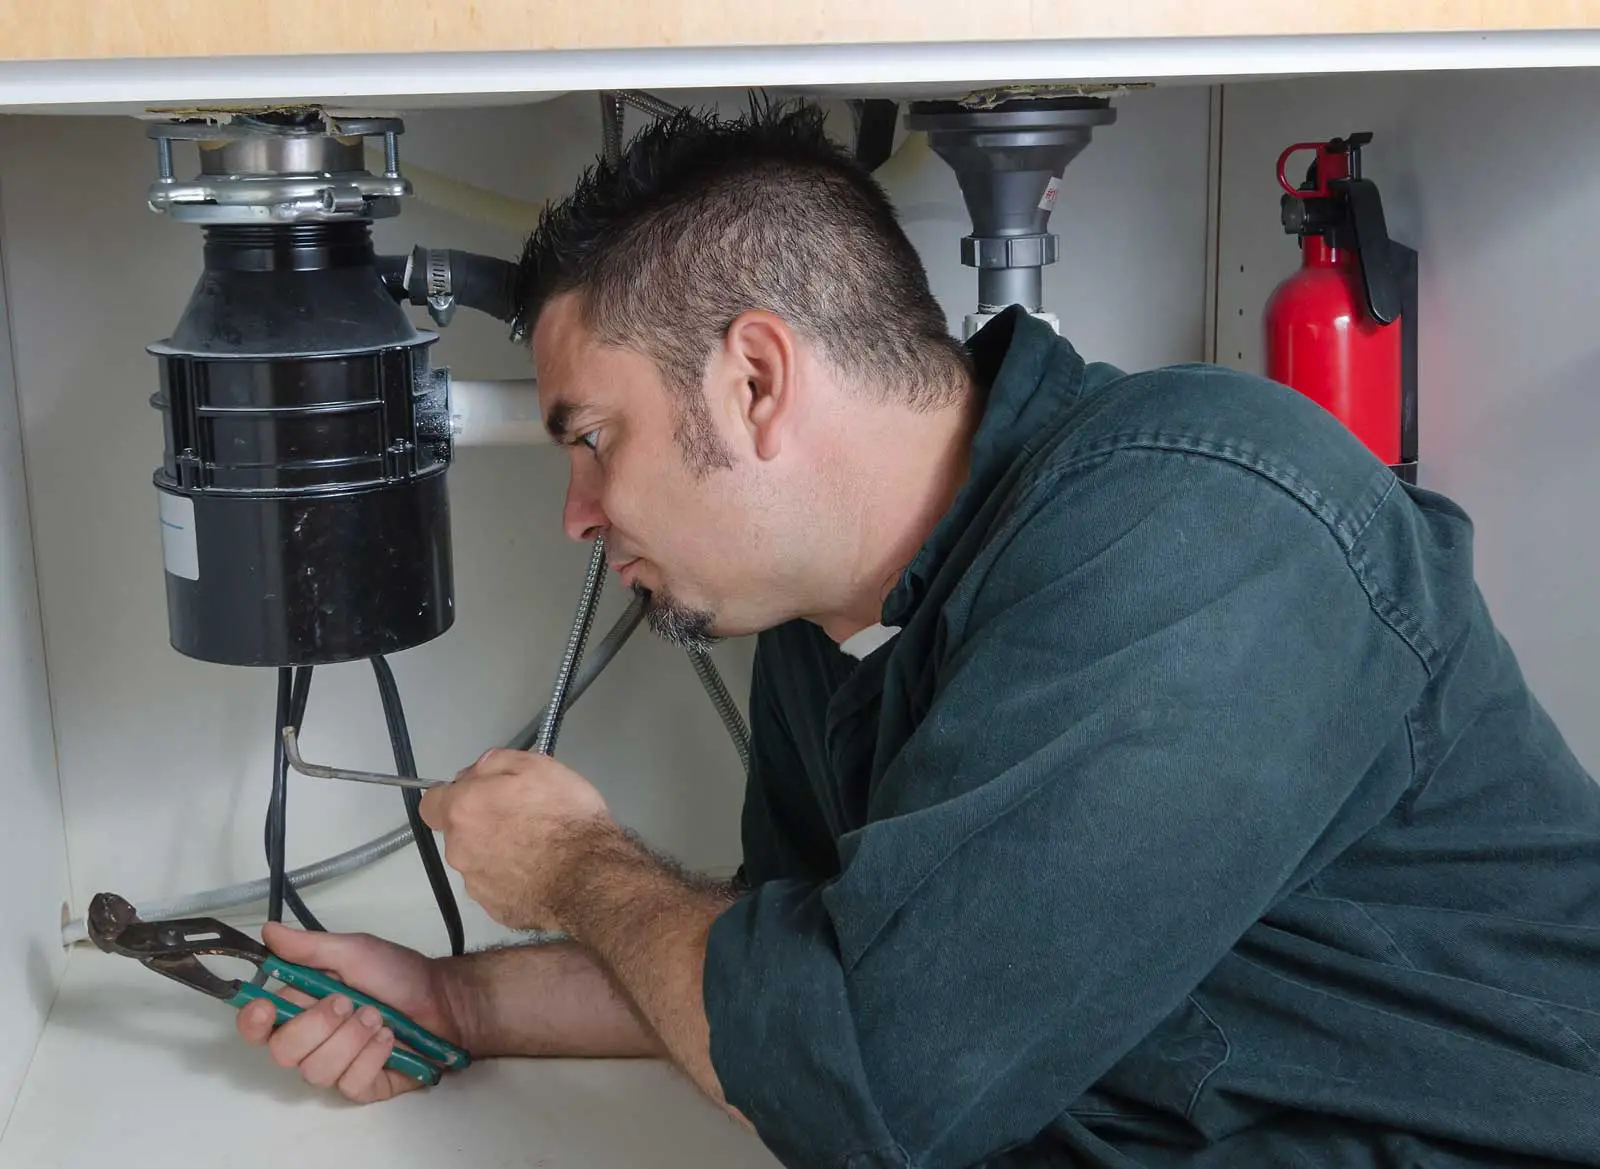
Remodeling a kitchen? Lucky you! But do you know what lies beneath the sink? A whole lot of metal, PVC and water pipes, so make sure you’re up to speed on rough-in plumbing before ripping out your old sink.
Learning how to plumb a kitchen sink is nothing more than just learning the components, connecting them together properly and making sure buttons, levers, and flanges don’t explode when turned one.
One of the biggest parts of our remodel was that we moved our kitchen wall with all our plumbing back about 4 feet. And with that move we had to basically re-do all our plumbing for our kitchen sink and dishwasher (among many other things!).
This article provides step-by-step instructions for tackling a kitchen sink plumbing rough-in for any Do-It-Yourselfer. I’ll explain all the basic tools and materials needed along with detailed instructions to get the project done quickly and properly.
By the way – before we get too far along here, if you want to connect with other homeowners and builders and get more great ideas for your home to make your space the best join my free private Facebook group, Remodel Reality here.
 Demystifying the Kitchen Sink Plumbing Rough In Process
Installing a new kitchen sink may seem like a simple DIY project, but the truth is that it requires an understanding of the plumbing rough in process. As part of this process, it’s important to determine the right height for the drain rough in, as well as how to properly install the P-trap and vent pipe. To help demystify this complex process, we’ve put together a comprehensive guide that covers everything you need to know about kitchen sink plumbing rough in.
What Does It Mean to Rough In A Kitchen Sink?
When it comes to installing a new kitchen sink, many people assume that it’s a quick and easy DIY project. However, the truth is that there are several important factors to consider, particularly when it comes to the plumbing rough-in process.
The plumbing rough-in process involves preparing the area where the sink will be installed by setting up all of the necessary pipes and connections. This includes determining the proper height for the drain rough-in, which is essential for ensuring that water flows out of the sink smoothly and efficiently. If the drain rough-in is too low, water may not be able to flow out properly, leading to clogs and other issues. On the other hand, if it’s too high, you may end up with an unsightly gap between your sink and countertop.
Another crucial component of the plumbing rough-in process is installing the P-trap and vent pipe correctly. The P-trap is a curved section of pipe that prevents foul odors from escaping through your sink drain by trapping a small amount of water in its bend. Meanwhile, the vent pipe allows air to circulate through your plumbing system, preventing suction or pressure buildup that could lead to backups or other problems.
Set the Foundation: Why Roughing In Is The Key to a Successful Plumbing Project
In plumbing work, roughing in plays a significant role as it establishes the precise location of plumbing fixtures such as sinks before finalizing them. This stage makes it easier to modify the piping, drain lines, and ventilation if necessary. The rough-in phase is advantageous since it allows for identification and resolution of any potential issues in the plumbing system before fixture installation. Furthermore, this step guarantees that the plumbing system adheres to international plumbing code standards.
Tips and Considerations for a Successful Kitchen Sink Plumbing Installation
Before we get too far into the details here, let’s start by covering a few tips and “good-to-knows” for roughing in your kitchen sink.
When installing a new kitchen sink, it’s important to consider the placement of the sink and the plumbing that will be used. The first thing you’ll want to do is measure the sink and determine the center of the sink. This will help you place the sink in the right location and ensure that the plumbing is installed correctly.
It’s never a bad idea to consult with a professional plumber who can advise on the best approach for your specific needs if you need input. They can help you choose the right type of sink and ensure that the plumbing is installed properly.
When roughing in the plumbing, you also have to make sure to consider the back wall and outside wall, as well as the floor joists and bottom of the sink. You’ll want to leave enough room for the 4-inch pipes and the drain trap, while also ensuring that there is proper clearance for the rim of the sink.
If you’re working on a new build or new construction, it’s important to adhere to local building codes and regulations, and consider the placement of bathroom sinks and tub spouts.
For DIY projects, the Home Depot is a great resource for finding the necessary materials, including all the piping you need like your P-trap, sanitary tee and other plumbing components.
Bathroom vs. Kitchen Sink Plumbing Rough-In: Is There A Difference?
When it comes to rough-in plumbing requirements, bathroom and kitchen sinks share many similarities, but there are a few minor differences. One of these is that kitchen sinks usually have garbage disposal units that need to be considered during the rough-in process. Another difference is that the minimum clearance required for a P-trap under a kitchen sink is generally greater than that of a bathroom sink.
In addition, the rough-in height for a kitchen sink is typically higher than that of a bathroom sink since kitchen sinks tend to have deeper basins, requiring proper placement of drain lines at the appropriate height for efficient drainage.
What You Need to Know About Your Kitchen Sink Plumbing System
For those looking to install or relocate a kitchen sink, understanding rough-in dimensions, height requirements, minimum clearance distances, drain lines, P-traps, drain traps, vent pipes, backwater valves and plumbing inspections are essential considerations for proper installation of the plumbing system.
Drain lines play a vital role in carrying waste water away from the sink, while P-traps prevent sewer gas from entering your home.
Proper air flow and prevention of drain line clogging is ensured through the use of vent pipes.
Backwater valves are also crucial components that prevent backflow and flooding in case of a sewer backup. It is important to undergo a plumbing inspection before installing any fixtures to ensure compliance with international plumbing codes.
 Kitchen Sink Drain Rough In Height
When installing a new kitchen sink, it’s crucial to consider the proper height for the sink drain rough-in. This refers to the height at which plumbing pipes will be installed to connect the sink drain to the main waste line. Determining the correct rough-in height is essential for ensuring efficient drainage and avoiding future plumbing problems. In this section, we’ll delve into the various factors that need to be considered when determining the rough-in height and how to calculate rough-in plumbing for your kitchen sink.
The Proper Height for a Sink Drain Rough In
It is crucial to determine the appropriate height for a sink drain rough-in to ensure efficient drainage and prevent blockages. The rough-in height for a kitchen sink drain usually falls between 20 to 24 inches, taking into account sink depth and trap size. The International Plumbing Code has established the standard maximum height of 24 inches for the drain line.
Factors to Consider When Determining The Rough In Height
In determining the rough-in height for a sink drain, the height of the sink counter and type of sink play a crucial role. For instance, a 36-inch high countertop with a 7-inch deep sink will require a drain that is 29 inches from the floor. Alongside these factors, it’s important to consider trap size to guarantee efficient drainage.
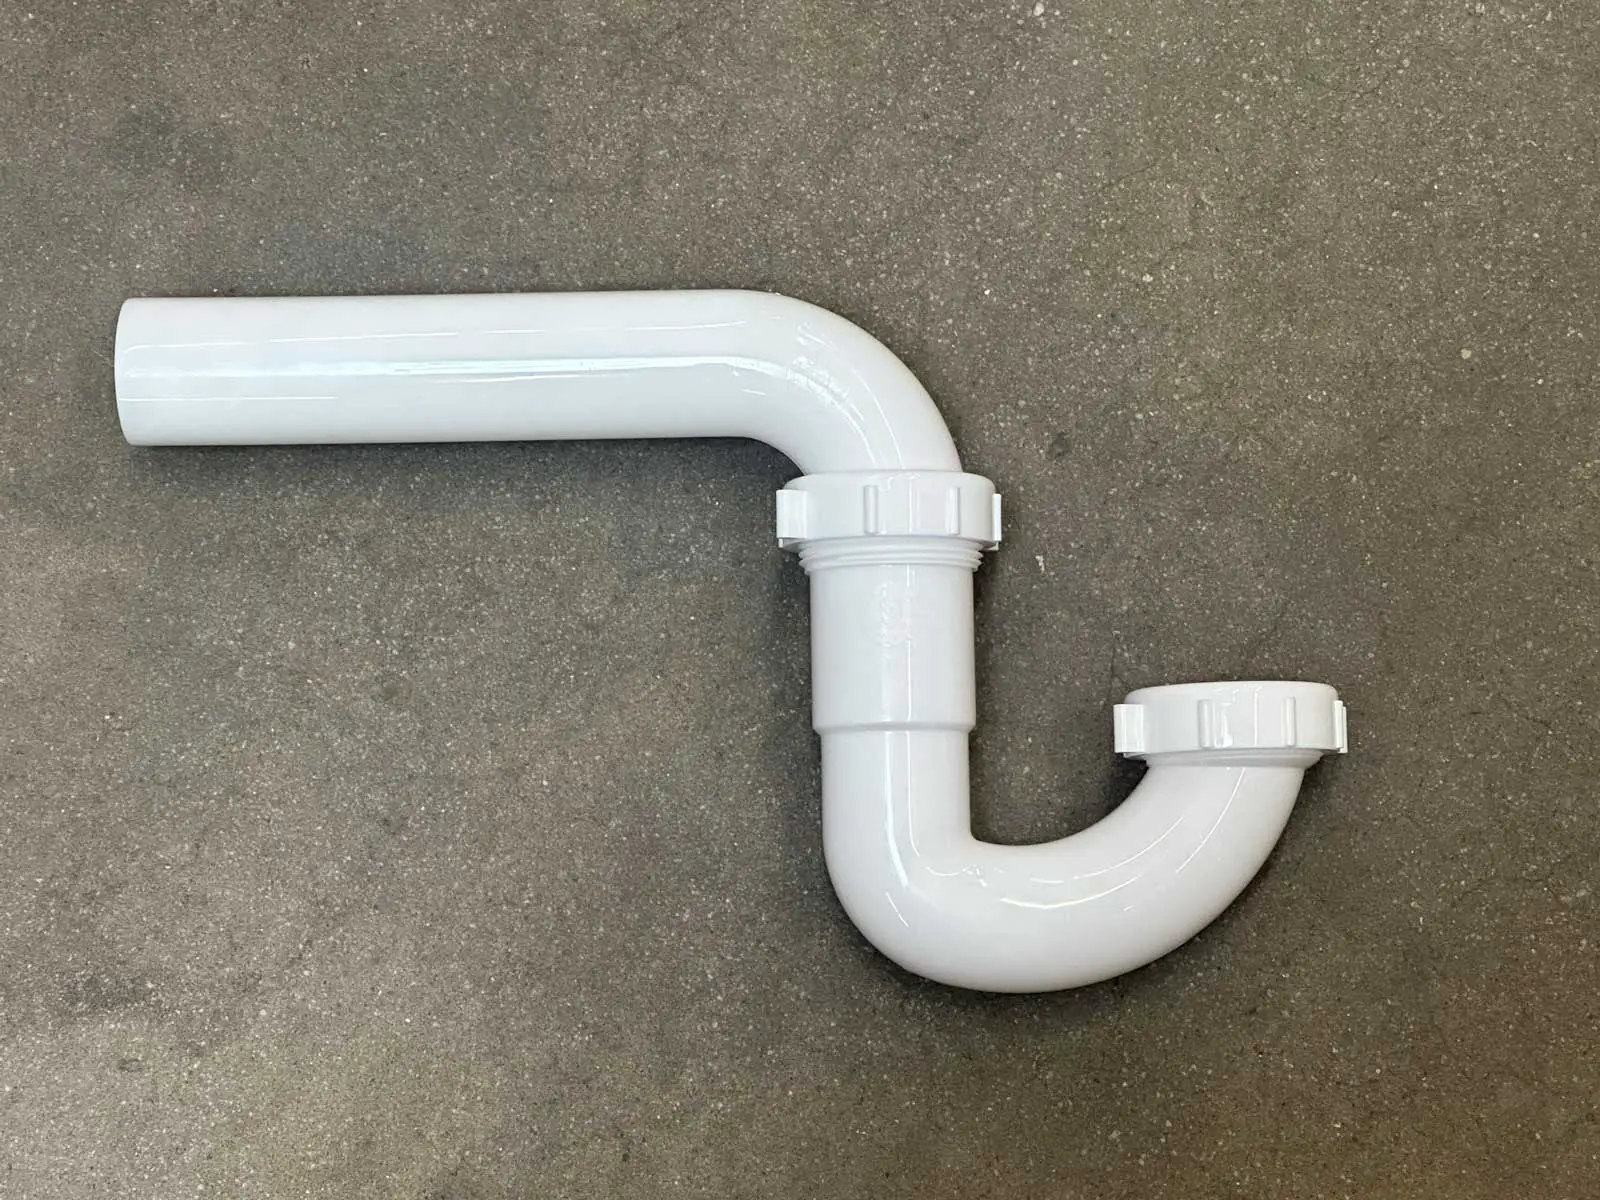 P-Trap Space: The Key to a Smooth-Running Kitchen Sink Plumbing System
When establishing the rough-in height for a kitchen sink drain, it’s absolutely essential to provide sufficient space for the P-trap. The P-trap, which is a U-shaped pipe, plays an important role in preventing sewer gas from entering the home and keeping food particles and debris from blocking the plumbing system. Inadequate space for the P-trap may result in it being mounted under the counter, making it difficult to remove when repairs are required.
Get Your Plumbing Just Right: Calculating Rough In Plumbing Height
To calculate the rough-in height for a sink drain, you need to measure the height of the sink basin, including the thickness of the countertop. Measure the trap’s height and add it to the sink basin’s measurement to get the rough-in height. The type of sink is also a determining factor in establishing its rough-in height. For example, a double-basin sink will require a higher rough-in height than a single-basin one.
It’s also important to consider the width of the sink when determining its rough-in height. If your sink is wider than average, you may need to adjust its rough-in height for proper drainage.
When installing a garbage disposal, it’s crucial to consider its added height and drain assembly to ensure that your rough-in height remains acceptable.
In summary, calculating the correct rough-in height for your kitchen sink drain is essential in preventing blockages and ensuring efficient drainage. To determine your ideal rough-in height, you should consider factors like counter and trap size alongside your sink type. Lastly, leaving enough space for P-trap is vital as it makes repairs and replacements easier.
 Plumbing Your Kitchen Sink Drain Like a Pro: A Step-by-Step Guide
Although plumbing your kitchen sink drain from scratch may seem intimidating, it’s a manageable task with the right tools and knowledge. Here is a step-by-step guide to help you plumb your kitchen sink drain like a professional.
Sink Plumbing 101: Plumbing Your Kitchen Sink from Scratch
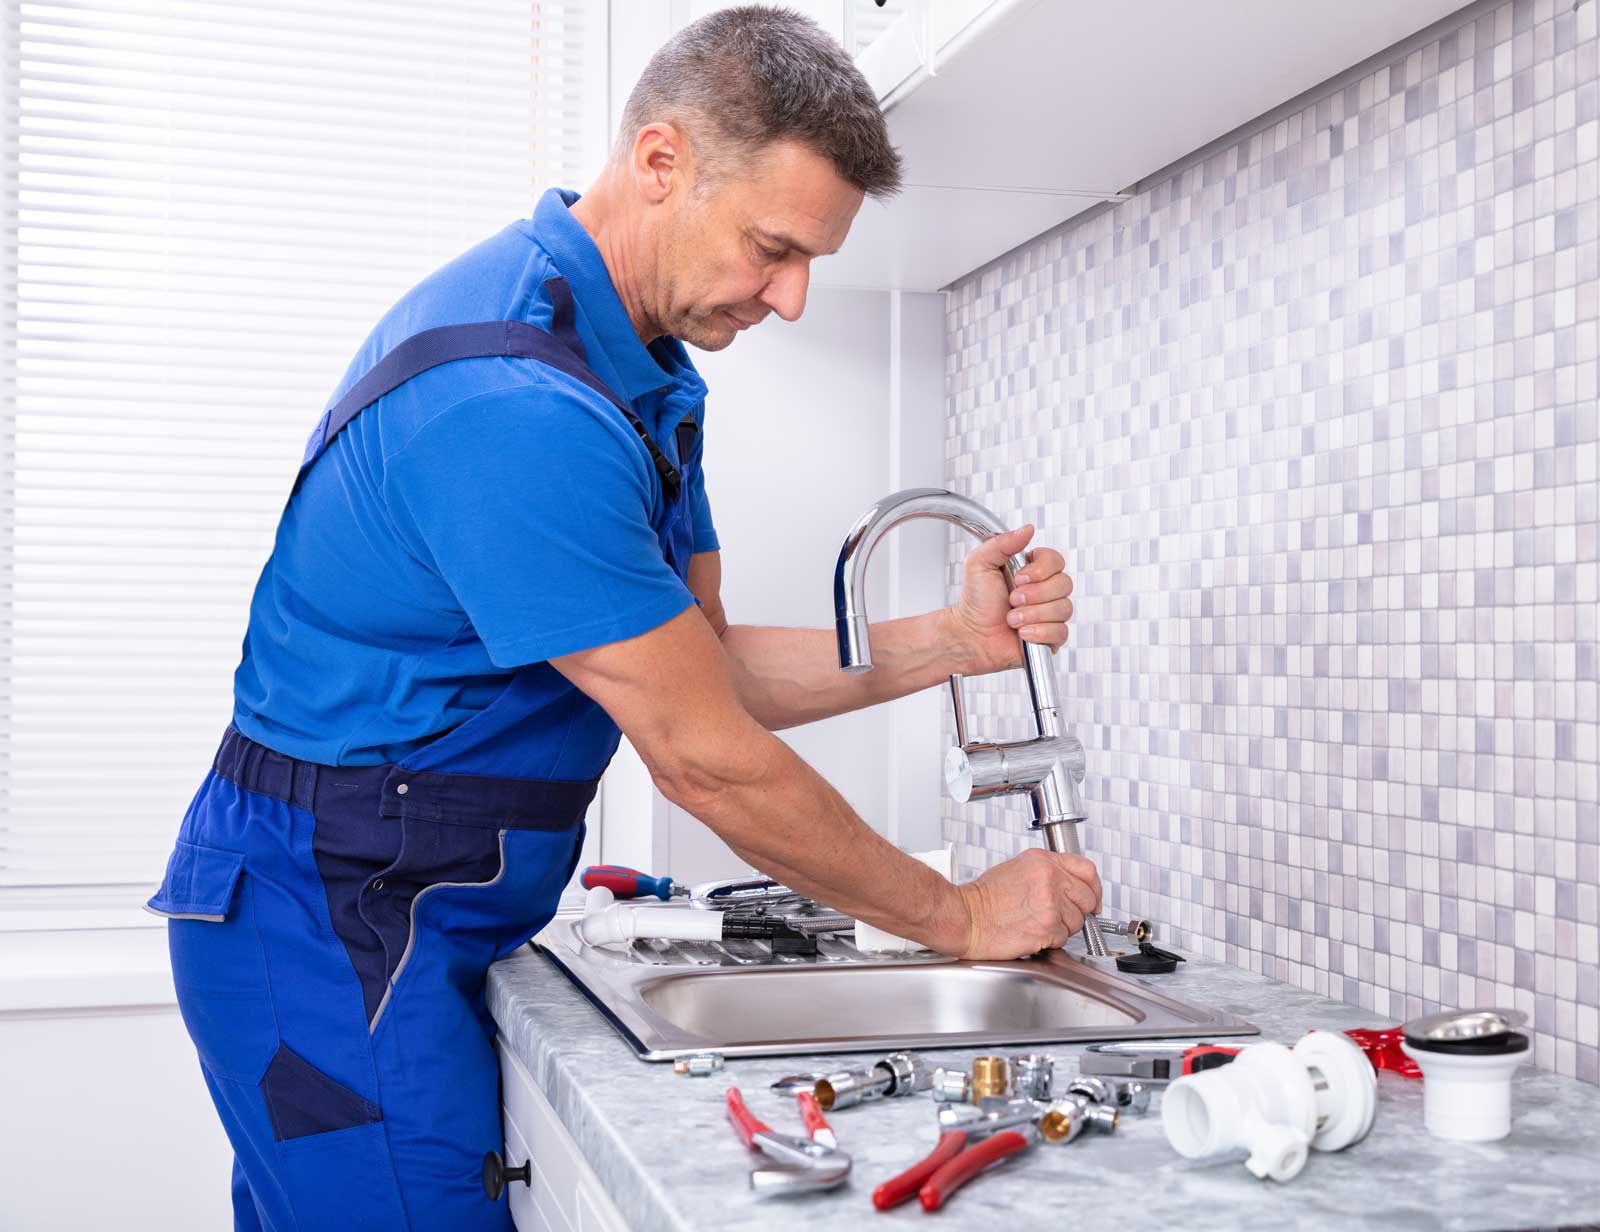
Before plumbing your kitchen sink, the first step is to determine its position and the location of the P-trap. Proper positioning is crucial to ensure efficient drainage. Once you have determined the sink’s location, you can proceed to install the water supply and sink faucet.
 Don’t Start Without Them: Must-Have Tools for Installing Your Sink
In order to successfully plumb a sink, it’s important to have a few essential tools on hand. These include a drill, saw, pipe cutter, PVC cutter, wrench, tape measure, and plumbing glue. Additionally, you’ll need to gather materials such as PVC pipes, trap adapters, coupling nuts, tailpieces, insulation pipe pads and screws.
| Tool | Purpose |
|---|---|
| Adjustable wrench | Tightening nuts and bolts |
| Basin wrench | Reaching and tightening nuts and bolts in hard-to-reach places |
| Pipe cutter | Cutting PVC or copper pipes to size |
| PVC cement | Gluing PVC pipes and fittings together |
| Teflon tape | Sealing threaded connections to prevent leaks |
| Plumber’s putty | Sealing sink strainers and other sink components to prevent leaks |
| Hacksaw | Cutting pipes to size and removing damaged parts |
| Tape measure | Measuring distances and pipe lengths accurately |
| Plunger | Clearing blockages in the sink drain or P-trap |
| Pliers | Gripping and holding parts in place |
| Screwdriver | Tightening or removing screws on sink parts and accessories |
| Stud finder | Locating studs in the wall for securing the sink bracket |
| Level | Ensuring the sink and faucet are installed evenly and level with the countertop |
| Safety goggles and gloves | Protecting eyes and hands from debris and chemicals |
| Basin | to catch any water that may drip from the area you’re working on so it doesn’t ruin your cabinets (learned that one the hard way) |
 A Simple Guide to Install Your Kitchen Sink Drain Using PVC Pipes
To successfully install a sink drain assembly, follow these simple steps:
- Begin by placing the gasket and washer onto the underside of the sink. The gasket and washer serve as protective barriers against leaks.
- Next, attach the tailpiece to the drain assembly before connecting the trap adapter to it. Connect the trap adapter to the PVC pipe and tighten the coupling nut until it is snug.
- Install the P-trap onto the end of the PVC pipe, making sure to tighten that coupling nut for added security. It’s important to install this piece as close to your sink drain as possible.
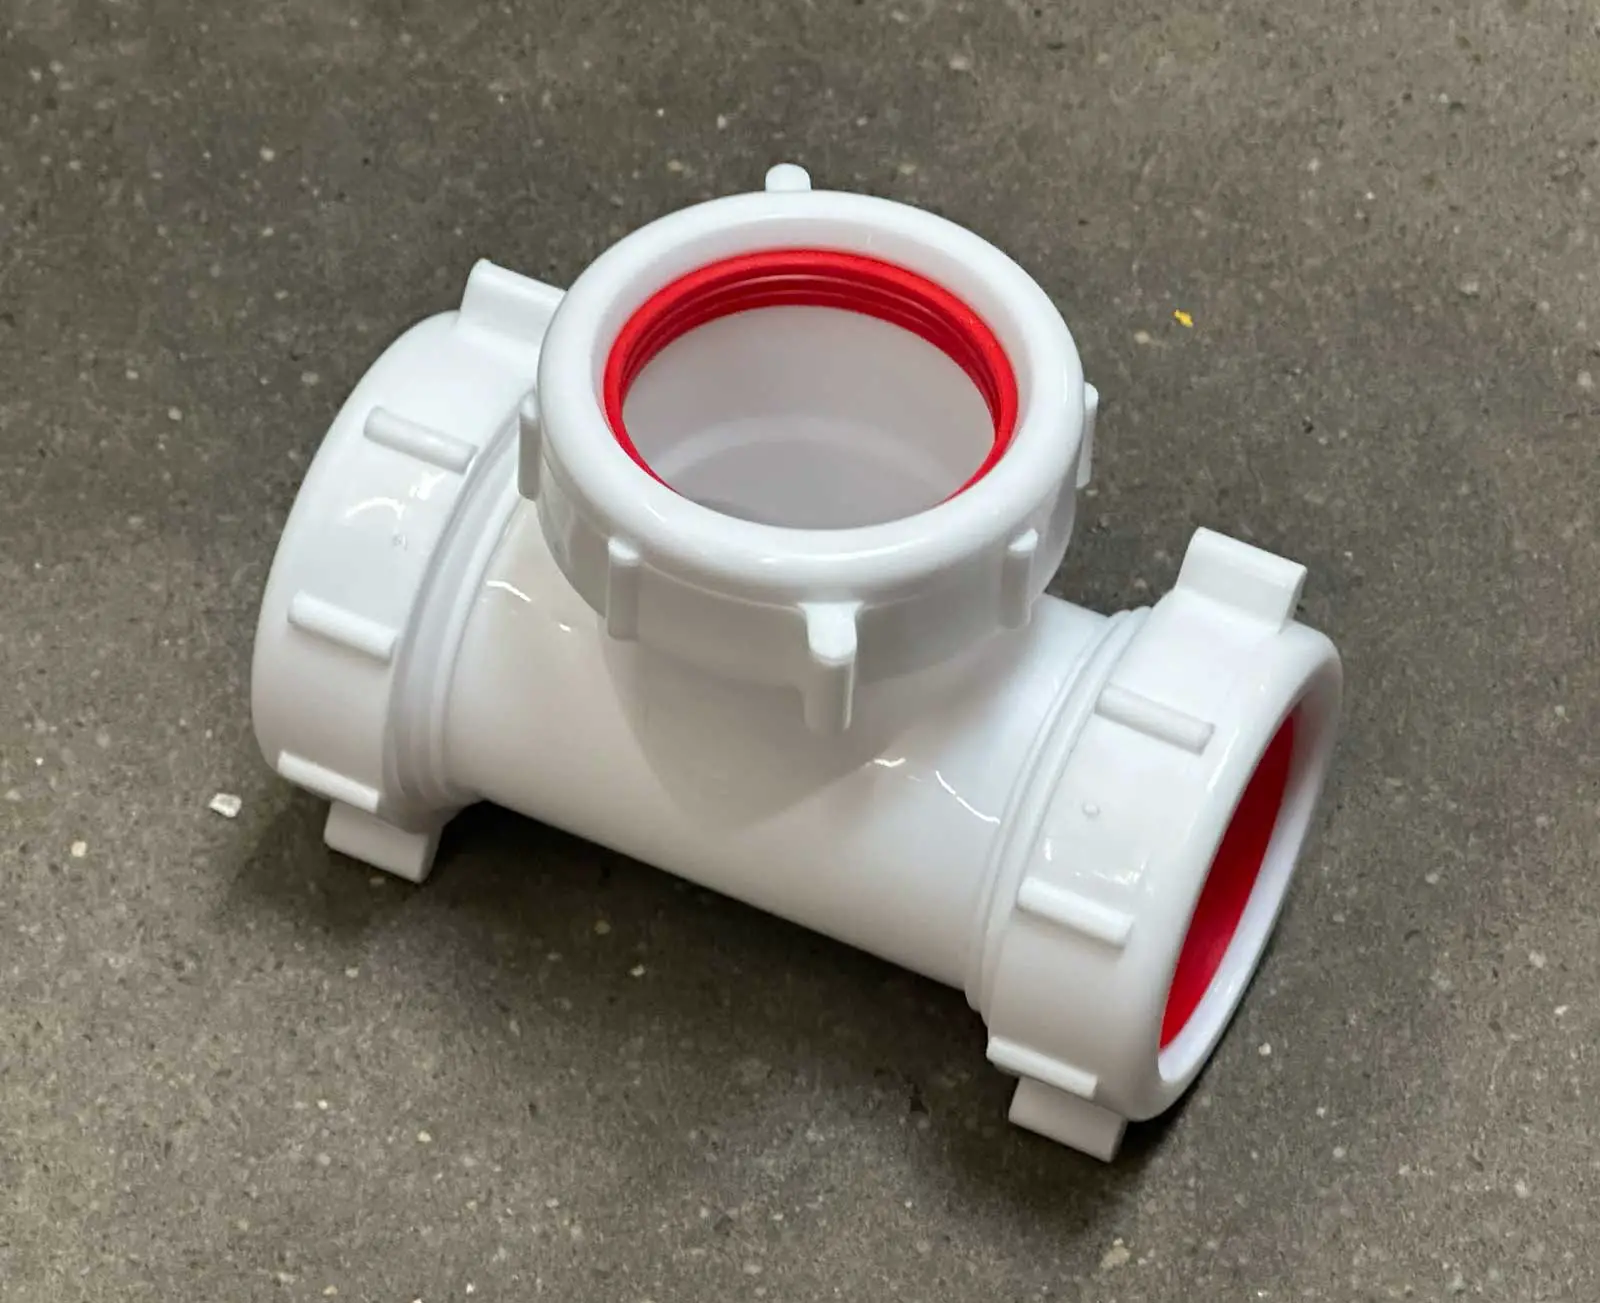
- To install your vent pipe, start by cutting a hole in your wall behind your sink before installing a wall thimble. From there, insert your vent pipe through that wall thimble before connecting it to your P-trap using a tee fitting.
- Don’t forget about insulation pipe pads! Installing these pads around your pipes will help prevent noise and vibration from occurring while water runs through them.
- Finally, check for leaks after completing all these steps and make any necessary adjustments as needed. A leaky plumbing system can cause significant damage if left unchecked for too long.
Remember to place gasket and washer onto sink’s underside, attach tailpiece to drain assembly followed by connecting trap adapter with PVC pipe and tightening coupling nut securely; install P-trap near sink drain; insert vent pipe through wall thimble using tee fitting then finally adding insulation pipe pads around pipes for noise reduction purposes before checking for any leaks and making necessary adjustments along with proper maintenance routine in place to avoid future issues.
Test For Leaks And Make Adjustments: Making Your Kitchen Sink Drain is Leak-Proof
As you near the end of your sink installation, it’s crucial to check for any leaks. Turn on the water supply and let the sink run for a few minutes to ensure there are no leaks present. If you do find any leaks, don’t worry! You can adjust the trap adapter, coupling nuts, tailpiece, or PVC pipe connections to make sure everything is tightened and secured properly.
I’ve found that half the job with any of these DIY jobs is to have the right tools and materials. With the right tools and materials, following these steps will help you achieve professional-grade results in no time!
Common Issues That Can Arise Roughing-in Plumbing For Your Sink
There are several critical factors to consider when undertaking rough-in plumbing for your kitchen sink. Failure to plan adequately can lead to various issues, such as poor pipe placement, incorrect pipe sizing, and inadequate clearance.
Poor Planning
Proper planning is crucial to a successful installation. You must consider the type of sink you’re installing, its location, and the required pipe size. Without a clear plan in place, there’s a risk that pipes may be placed poorly or with insufficient clearance. This can cause problems down the line.
Bad Pipe Placement
Incorrect pipe placement is another issue that can arise during rough-in plumbing. Poorly placed pipes can restrict water flow or even result in leaks due to obstructions or kinks in the line. It’s important to ensure that all pipes are installed correctly and without any potential obstacles.
Incorrect Pipe Sizing
It’s essential to pay attention to proper pipe sizing. Pipes that are too small can hinder water flow, while those that are too large may increase noise levels and add unnecessary costs. Ensuring that all pipes are sized appropriately for your sink and expected water flow will prevent these issues from occurring.
Poor Clearance
Poor clearance can cause restricted water flow, high noise levels, and higher costs in plumbing systems, especially for the sink. If the plumbing isn’t installed with enough clearance, it can lead to a bottleneck in the water flow, causing restricted water flow. If the pipes are not properly supported, they can vibrate which can create a lot of noise. If the plumbing is not installed with enough clearance, it can lead to additional costs, such as having to reposition or modify the plumbing after installation to address these issues.
Leakage
Leakage is a common issue that can occur during rough-in plumbing for your kitchen sink. There are several reasons why leaks may happen – incorrect installation, damaged pipes, or worn-out fittings. Regular inspections and maintenance can help you identify and fix leaks before they turn into more serious problems.
Poor Ventilation
Poor ventilation can also cause issues with your kitchen sink’s rough-in plumbing. Proper ventilation ensures water flows smoothly and eliminates unwanted odors. It’s essential to make sure that the vent pipe is installed correctly without any obstructions in its line of sight.
Improper Backwater Valve
An improper backwater valve can also cause problems during rough-in plumbing for your kitchen sink. The backwater valve is essential in preventing water from backing up into the sink and causing damage. It’s important that the valve is appropriately sized for your sink and installed correctly.
Poor Quality Materials
Using low-quality materials can lead to various issues with your kitchen sink plumbing rough-in. These materials are prone to quick wear and tear, leading to leaks and other concerns. It’s crucial to use high-quality, professional grade materials that are designed to withstand the demands of a residential plumbing system.
Inadequate Testing
Insufficient testing can also be a common issue during rough-in plumbing for your kitchen sink. Testing is vital in identifying any potential problems with the plumbing system and ensuring it works correctly. It’s important to test thoroughly before closing up walls or floors so that you can address any issues before they become more significant problems.
Kitchen Sink Plumbing 101: Answers to Your Top Rough-In Questions
The process of roughing in a kitchen sink can be a little tricky. To assist you further, we’ve provided responses to frequently asked questions related to plumbing rough ins for kitchen sinks.
Q: What is the standard height for sink water lines?
A: Typically, sink water lines are installed at a height of approximately 18 inches above the finished floor. However, this may vary based on your specific sink and plumbing setup. It’s essential to refer to local building codes and the sink manufacturer’s instructions to ensure proper installation.
Q: What is the best piping for kitchen sink?
A: PVC pipe is usually the best choice for kitchen sink drain piping. It’s cost-effective, durable, and easy to work with. Copper or galvanized steel pipes can also be used, but they tend to be more expensive and require specialized tools and knowledge to install.
Q: What are the 4 holes for in a kitchen sink?
A: The four holes in a kitchen sink are typically utilized for a two-handle faucet and a sprayer or soap dispenser. If you opt for a 3-hole sink, you’ll be limited to using only two-handle faucets without any additional accessories. A 2-hole sink is designed specifically for a single-hole faucet and an accessory like a sprayer. If you’re looking for the simplest option, a 1-hole sink has no deck plate and is ideal for use with a single-handle faucet.
Q: What is the rough-in height for sink plumbing?
A: Rough-in height refers to the placement of drain and water supply lines during construction’s rough-in phase. The standard rough-in height for a kitchen sink drain is approximately 22 inches above the finished floor.
Q: Why is roughing in important in plumbing work?
A: Roughing in plays an important role in plumbing because it involves installing necessary pipes and fittings before walls and floors are completed. This makes access easier and allows potential issues to be corrected or alterations made to the plumbing layout more conveniently.
What is the plumbing inspection process for rough-in plumbing?
In general, a plumbing inspection of rough-in plumbing entails an inspector evaluating whether all pipes, fittings, and other components are correctly installed according to local building codes. This inspection usually occurs before any walls or floors are finished so that necessary corrections can be made before they’re covered up.
What is the minimum clearance for a kitchen sink drain?
A minimum clearance of around 2 inches from the bottom of your kitchen sink must exist; this clearance helps prevent clogs while allowing proper drainage.
What is a P-trap?
A P-trap is a critical component of your home’s plumbing system located beneath your sink; it prevents sewer gas and odors from entering your home via your drain pipe by creating a water seal barrier between them.
What is a vent pipe?
A vent pipe allows air into your home’s plumbing system while preventing suction that can slow down or stop water flow; it typically runs from your home’s roof to its main sewage line.
What is international plumbing code (IPC)?
The International Plumbing Code (IPC) comprises standards used by many US state governments when regulating plumbing systems; it covers everything from design/installation of these systems to using specific materials/components while doing so.
Next Steps
Want to join others who are creating the most amazing home redesigns & renovations and get more tips, tricks and hacks on how to make your home the best it can be?
Join my brand new free private Facebook group, Remodel Reality to connect with other people like you to make your space the best!


