
Are you planning a kitchen remodel and considering a backsplash? Installing a backsplash can be a great way to update the look of your kitchen design while protecting your walls from spills and splatters.
But how do you measure the kitchen backsplash correctly? Is there some ‘easy hack’ for that?
To measure the area for your kitchen backsplash:
- Measure the height and the width of the backsplash area.
- Determine the overall square footage of the backsplash area.
- Measure the area of obstacles intersecting backsplash area.
- Subtract the area of obstacles from overall square footage.
The typical backsplash area is approximately 30-40 square feet depending on the kitchen layout.
In this guide, we’ll explore how to measure for kitchen tile backsplash so you can get the perfect fit. We’ll look at what measurements to take, what tools you need, and how to make the measurements step by step.
By the way – before we get too far along here, if you want to connect with other homeowners and builders and get more great ideas for your home to make your space the best join my free private Facebook group, Remodel Reality here.
 Calculations For Measuring A Kitchen Backsplash
In order to figure out your material cost and how much tile you actually need, the first thing you need to do is figure out how much area you need to cover.
Here are the factors to consider when calculating the total square footage of the backsplash area and a simple formula to calculate the amount of tile needed:
Simple formula for calculating the total square footage of the backsplash area
Calculating the total square footage of the backsplash area is a simple formula that requires a couple different measurements.
If your backsplash area consistent in height under your cabinets, then you can simply take the height in inches x the width in inches, then divide by 144 to get the total square feet of the space.
Length (in inches) x Height (in inches) / 144 = total square footage
If there are are varying heights at different places along your stretch of area where you’re putting your backsplash (like if some cabinets are higher or lower than others, or your have a window you’re going most likely need to measure each different space as a different rectangle, then add the total square inches of each section together to get the total square footage. Convert the total square footage to the number of square feet of tile required for the project.
Each rectangle = Length (in inches) x Height (in inches)
(rectangle 1 + rectangle 2 + rectangle 3) / 144 = total square footage
Factors to consider when calculating the amount of tile needed
When calculating the amount of tile needed for a kitchen backsplash, there are a few factors to consider.
The number of tiles needed will depend on the size of each of your tile pieces and the coverage area of the backsplash. Be sure to purchase enough tile to cover the total square footage, including any waste allowance and extra tiles.
Waste allowance and extra tiles
Waste and overage should be factored into the total square footage, and a minimum waste allowance of 10% is recommended.
Cutting tiles to fit around obstacles such as electrical outlets or irregularities in the wall or countertop will inevitably result in some amount of waste.
If the tile is cut incorrectly or breaks during the cutting process, it may not be usable.
By ordering extra tile for kitchen, there will be enough tile available to complete the project even if some tiles are wasted during cutting.
It’s also a good idea to purchase extra tiles to account for any future replacements or repairs so that in the event you need to match up tiles you’ll have spares readily available that match.
| Equation | Use it for: |
|---|---|
| Total square inches = Length (in inches) x Height (in inches) | To calculate the total square inches, measure the length and height of each section and multiply these numbers together. |
| Total square footage = (Total square inches ÷ 144) | To calculate the total square footage, add the total square inches of each section together and divide the sum by 144 to convert square inches to square feet. |
| Number of tiles needed = (Total square footage ÷ Coverage area of each tile) | To calculate the number of tiles needed, divide the total square footage by the coverage area of each tile. |
| Amount of tile needed with waste allowance = ((Total square footage x (1 + Recommended waste allowance)) ÷ Coverage area of each tile) | To calculate the amount of tile needed with waste allowance, add the recommended waste allowance (usually 10%) to the total square footage, then divide the sum by the coverage area of each tile. |
Pro tip: If you run into fractions or decimals during your calculations the best practice is to always round up to the next whole number.
 Steps for Measuring for a Kitchen Backsplash
When it comes to measuring for a kitchen backsplash, precision is key. To get started, the first step is to determine the total square footage of the area that needs to be tiled. This involves measuring the length and height of the wall or surface where the backsplash will be installed and multiplying these measurements to get the total square footage. Don’t forget to measure all walls or surfaces that need to be tiled, including any spaces behind appliances.
However, measuring only the total square footage is not enough for an accurate measurement. Measuring individual sections is necessary, especially for irregular surfaces or those with obstacles such as outlets, switches, or cabinets. Measure each section separately and then add up all measurements to get the total square footage.
For curved or vertical surfaces, there are some tips that can make the process easier. For curved surfaces, use a flexible tape measure and follow the contour of the surface. For vertical surfaces, measure height and width separately before multiplying them together to get the square footage. Also, consider any degree of angle if the surface isn’t perfectly straight.
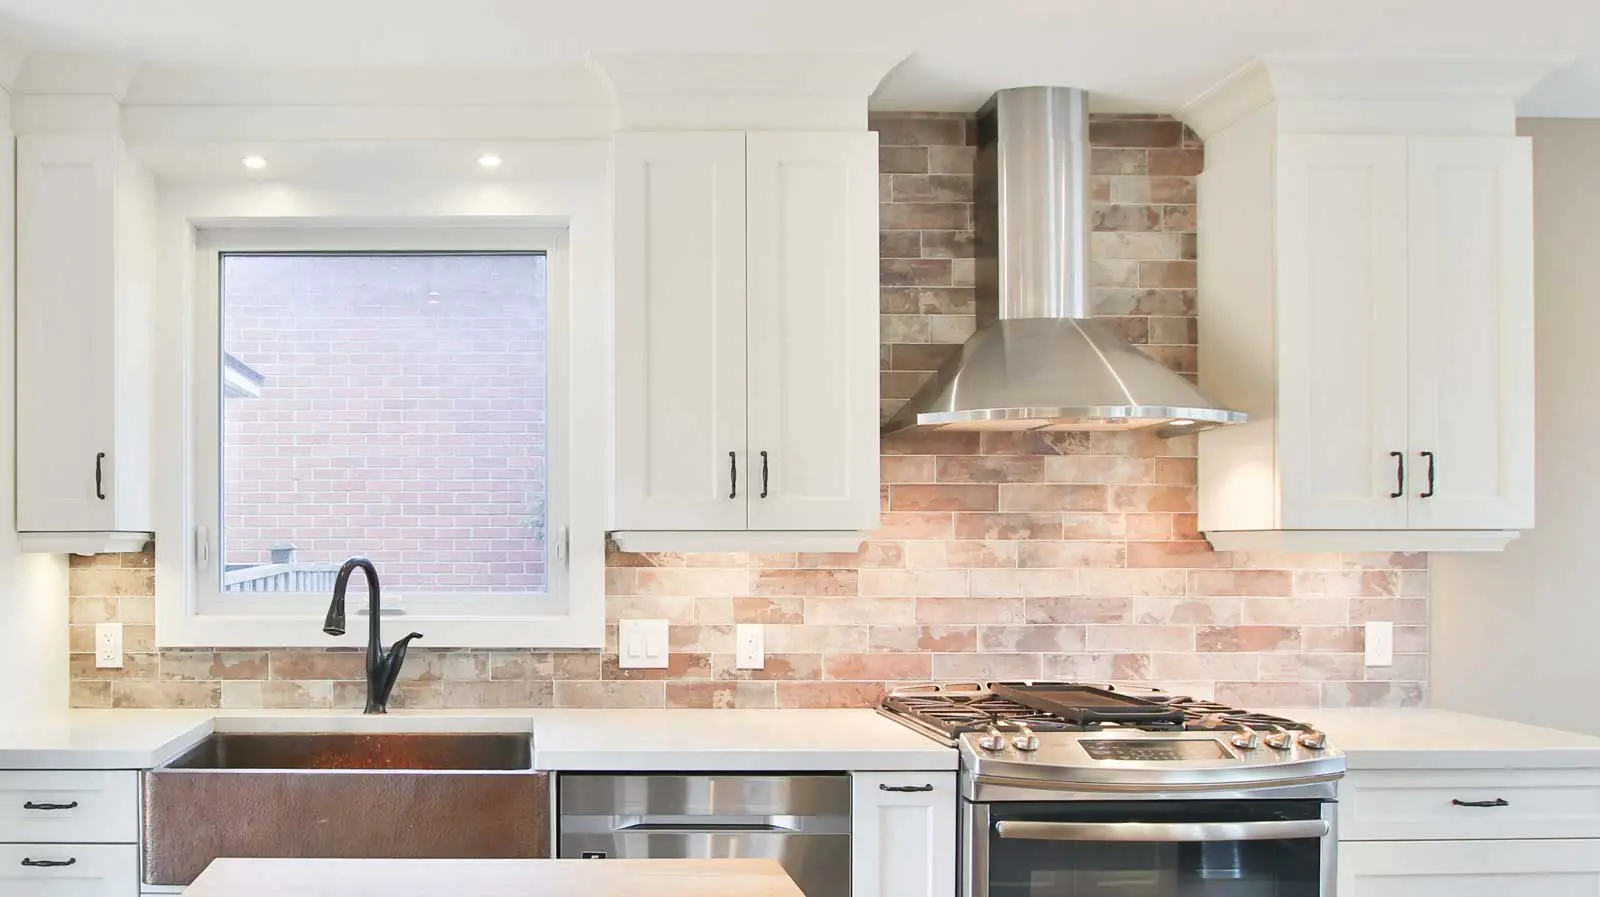
When measuring for a backsplash with upper cabinets, measure the area between the kitchen countertop and bottom of the cabinets where backsplash will be installed. Make sure you measure along its entire length instead of just what’s visible. Additionally, consider thickness when measuring for materials.
It’s important to pay close attention to your measurements because even small mistakes can lead to a poorly fitting backsplash or wasted materials. Keep track of all measurements using paper and pencil and double-check them before ordering tiles. Always round up to nearest whole number when calculating square footage and add 10% – 20% extra allowance for waste material.
 Tools and Materials Needed for Measuring a Kitchen Backsplash
To get precise measurements for a kitchen backsplash, you will require specific tools and materials. Let me provide you with a detailed list of what you need:
Measuring Tape
When it comes to measuring a kitchen backsplash, using a tape measure is crucial. It’s best to use a quality tape measure with a locking mechanism (I’ve at least 3 different tape measures in my toolbox right now). This feature prevents the tape from retracting and losing your measurement before you can record it properly.
Paper and pencil
As you measure each section of the backsplash area, write down the numbers on the piece of paper. Having all your measurements written down in one place makes it easier to refer back to them later during the installation process.
In addition, using the paper to sketch out a rough layout of the backsplash area can be immensely helpful. By sketching out and visualizing how the tiles will fit together, you can identify any potential issues before beginning the installation process. This step allows you to adjust your plan accordingly and ensures you have enough tiles to complete the project without running short.
Tile size and material considerations
When it comes to kitchen backsplash tiles, the most common size for individual tiles is the 3×6 inch tile, also known as subway tile. However, larger sizes such as 4×8 inches and 4×12 inches are becoming increasingly popular for a more modern look. Ultimately, the size of the tile you choose will depend on your personal preferences and the design of your kitchen.
When selecting a tile material for your backsplash, it’s important to consider both style and durability. Ceramic tile and porcelain tile are popular choices due to their versatility in color and design, as well as their resilience against damage from moisture or heat.
Glass tiles offer a contemporary and sleek appearance that can complement modern kitchen styles. On the other hand, natural stone tiles like marble or granite create a rustic look & feel that can add warmth to your space.
For a more simple approach, peel & stick tile are available with adhesive backing that eliminates the need for additional adhesives or grout.
Regardless of which type of tile you choose, make sure to purchase enough tiles to cover the total square footage of your backsplash area while also accounting for any waste allowance or extra tiles needed in case of damage during installation.
Trim pieces and decorative liners
In addition to the primary tiles, trim pieces and decorative liners are optional materials that are great for smaller sections and transitions that can really enhance the overall appearance of your new backsplash. Trim pieces are used to create a neat and polished look around the edges of the backsplash, providing a finished appearance.
Decorative liners can also be added as an extra touch to add color or patterns to your backsplash. These elements can be used as an accent piece or incorporated throughout the entire design for a cohesive look.
When planning your kitchen backsplash design, consider incorporating these optional materials to create a more personalized and unique space. With many different trim and liner options available in various colors, shapes, and sizes, you can easily find ones that will complement your chosen tiles and personal style preferences.
Here’s a complete list of tools & materials you’ll need for your backsplash project.
| Item | Purpose |
|---|---|
| Tape measure | To measure the length, width, and height of the backsplash |
| Paper and pencil | To keep track of measurements and make a rough layout |
| Tile adhesive | A bonding material used to attach the tile to the wall surface |
| Tile spacers | Used to ensure that the tiles are evenly spaced and aligned |
| Grout | A material used to fill the gaps between tiles after they are installed |
| Caulk | A material used to seal the edges of the backsplash where it meets the countertop or other surfaces |
| Trowel | A tool used to apply tile adhesive to the wall surface |
| Tile cutter | Used to cut tiles to size for the edges or corners of the backsplash |
| Level | Used to ensure that the tiles are installed evenly and straight |
| Sponge | Used to clean the tiles and remove excess grout from the surface after it has dried |
| Bucket | Used to mix the tile adhesive and grout |
| Your choice of tile tile | Ceramic, porcelain, natural stone are all options, durable and available in a wide variety of colors and designs |
| Stick Tile | Easy to install tile solution |
| Trim pieces | Used to create a clean and finished look around the edges of the backsplash |
| Decorative liners | Adds a pop of color or pattern to the backsplash |
Design Considerations for Kitchen Backsplash
Since we’re talking about how to measure a kitchen backsplash, it also makes sense to talk about design considerations at this part of the process. When it comes to actually designing your kitchen backsplash, there are a few key design considerations to keep in mind. Here are some factors to consider when selecting tile sizes and materials, determining spacing, and choosing trending design elements:
Trending design elements and ideas
Choosing the perfect kitchen backsplash involves taking into consideration a variety of design options that can elevate the look and feel of your space.
My wife and I went back and forth over what we wanted, and it’s always a great opportunity to practice your conflict resolution and marital negotiation skills when you have different opinions on what the space should look like! (Of course that could be said for the whole remodeling process, but I digress…)
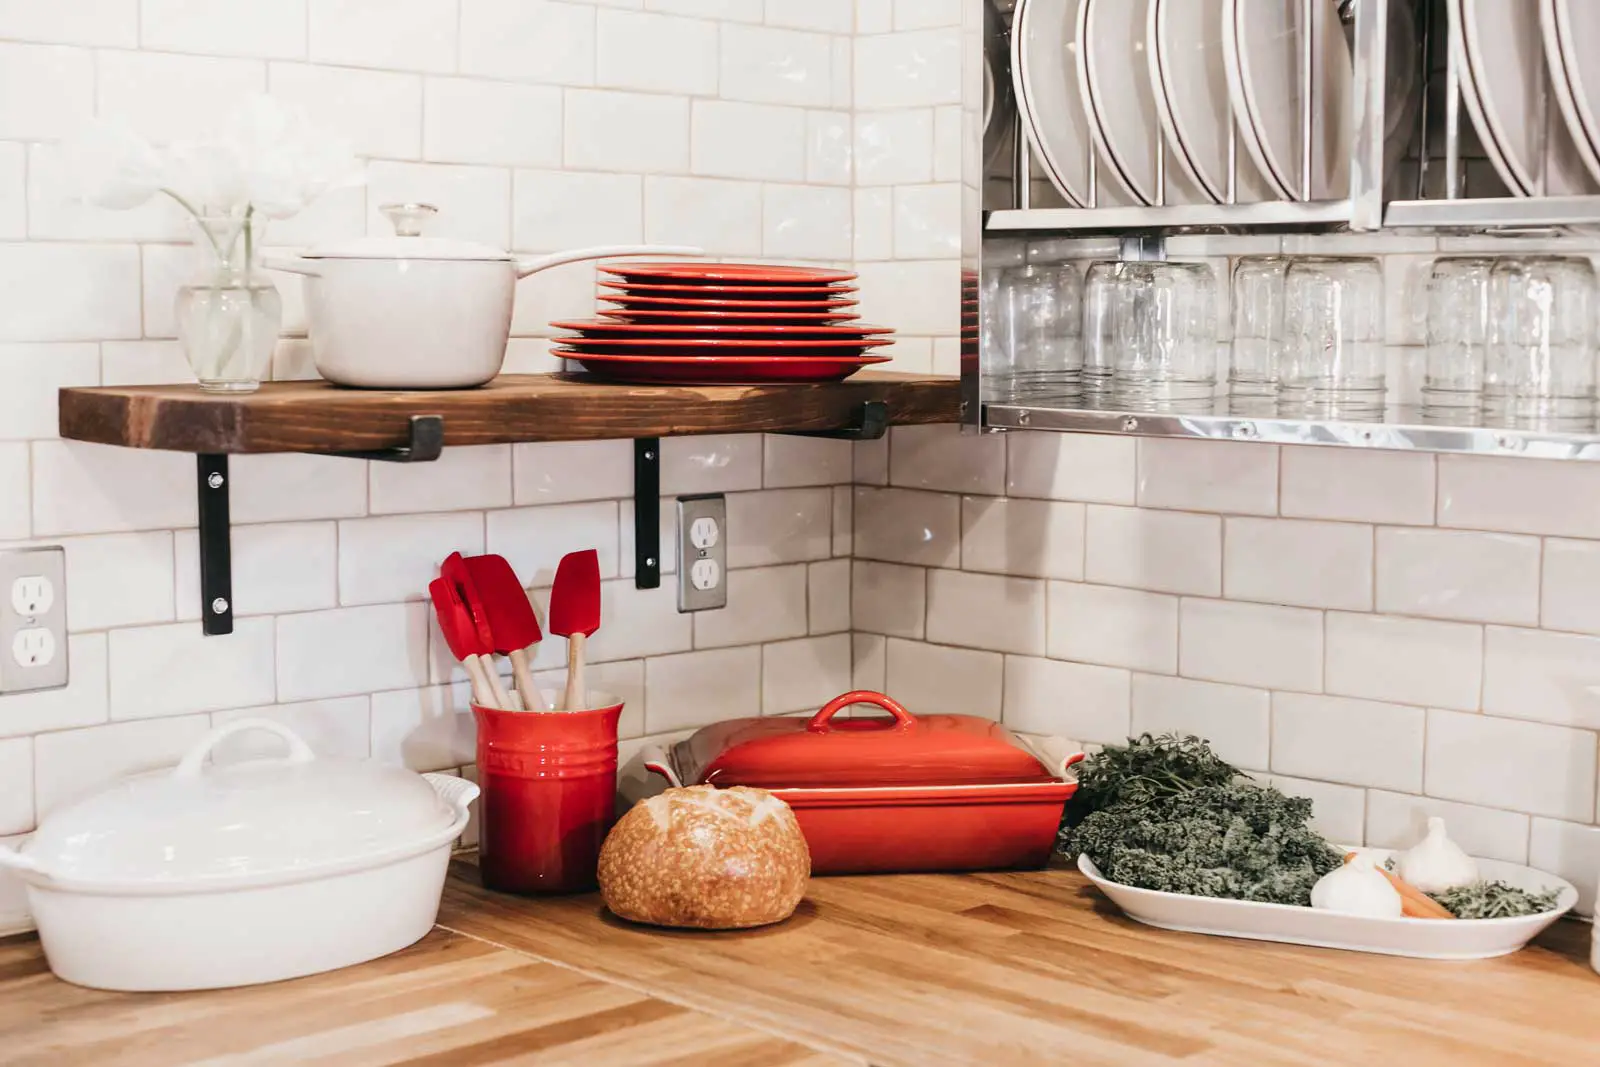
One popular trend is using bold, patterned tiles or handcrafted tiles to create a unique and personalized look that reflects your personality and creativity. For example, white subway tile with black grout is a really popular and bold choice.
Alternatively, flatter, monochromatic or neutral-colored tiles are also popular choices because they serve as a good backdrop or accent color for a modern and streamlined appearance.
Texture is another important aspect to consider when selecting tiles for your kitchen backsplash. Three-dimensional tiles or those with dynamic, textured surfaces can add depth and visual interest to your space, creating a dynamic and eye-catching backdrop in your kitchen.
Tile sizes and materials that work best for backsplash
When selecting a kitchen backsplash, it’s crucial to consider the size and material of the tiles. Smaller tiles like mosaics or subway tiles are popular due to their versatility in creating different patterns and ease of maintenance. They are also easy to clean, making them a practical choice for busy kitchens.
Glass tile is another popular material for backsplashes, as they add a sleek and modern look to any kitchen space. Their reflective properties can create an illusion of more space, making them ideal for smaller kitchens. Additionally, glass is durable and resistant to stains and scratches, which makes it a great choice in high-traffic areas.
For those looking for a classic and elegant look, natural stone tiles like marble or travertine are a great choice.
Handmade tiles can really be exquisite in terms of building a unique look and feel, but just remember, you’re getting what you pay for – these won’t be cheap, especially if you plan on doing the entire space with them.
These materials offer unique patterns and textures that can add character to your kitchen while also being durable and long-lasting.
When choosing a tile material, it’s important to consider the durability and maintenance requirements of each type. For example, natural stone requires regular sealing to prevent staining whereas glass tiles do not require as much upkeep.
Determining the spacing for backsplash
When installing a kitchen backsplash, determining the spacing between tiles is crucial to achieve a polished and professional look.
If you’re like me, and you see something that doesn’t look absolutely symmetrical, you simply cannot unsee it and it’s really annoying. And it’s not like it’s an easy fix once your tile has set, so it’s vital that you get it right to begin with.
The recommended spacing for tiles depends on their size and shape. Smaller tiles typically require less space between them, while larger tiles may need more space to accommodate any variations in size or shape.
Following the manufacturer’s recommended spacing guidelines is always the best way to make sure you’re spacing them correctly. These guidelines will provide you with information on how much space should be left between each tile to accommodate for how they age and how flexible (or inflexible) they are, their susceptibility to different climate conditions and to create a seamless and cohesive look.
The most common sizes for a kitchen backsplash
The size of a kitchen backsplash can vary depending on the layout and dimensions of the space. Typically, the standard backsplash measures three to six inches up the wall as a continuation of the countertop surface. However, four inches is typically the most common height for this type of backsplash.
For those who desire a custom kitchen backsplash, sizes are typically between 10 and 18 inches high, running the entire length of the countertop.
Some homeowners choose to have a full-height backsplash that extends up the entire wall to the ceiling for a more dramatic look.
When choosing the size of your kitchen backsplash, it’s important to consider both function and aesthetics. It’s worth noting that selecting an appropriate size for your kitchen backsplash is crucial not only for its appearance but also for practicality. A properly sized backsplash will protect your walls from splatters and spills while cooking or prepping in your kitchen, making it easier to clean and maintain in the long run.
 Other Design Considerations For Your Kitchen Backsplash
When planning a kitchen backsplash, there are several other considerations to keep in mind beyond just measuring and selecting materials. Here are a few other important factors to consider:
Should the backsplash be lighter or darker than the countertop?
When planning a kitchen backsplash, the color and tone in relation to the countertop is an important aesthetic consideration. There isn’t a hard and fast rule for whether the backsplash should be lighter or darker than the countertop; it ultimately depends on personal preference and the overall aesthetic of the kitchen.
Some homeowners prefer a flatter, monochromatic look with matching countertop and backsplash colors, while others opt for contrasting colors or patterns for a bold statement.
When picking out your colors, it’s important to be able to be able to visualize how your backsplash color and texture is going to work with your countertop material. This will help you to get a good idea of how they’ll look together in different lighting conditions and at different times of day, ensuring that the overall look is what you want.
One tip is to view samples of the countertop material and with samples of the backsplash tile to compare and see how they work together in your kitchen’s lighting conditions. This can help you make a more informed decision and visualize the final result.
How To Plan A Backsplash Layout
If you’re planning a kitchen backsplash installation, taking the time to plan out your layout can help you determine the number of tiles required and ensure a polished and professional look. One important factor to consider when planning your layout is the pattern of the tile.
Tiles can be installed in numerous patterns, including straight or diagonal lines, brick or herringbone patterns, or even more intricate designs like basket weave or Moroccan patterns. When selecting a pattern, it’s important to consider both the size and shape of the tile as well as the dimensions of your kitchen. Choosing a pattern that complements your space will create a cohesive and harmonious design.
Another consideration when planning your layout is whether to include decorative trim or accent tiles. These elements can add visual interest and texture to your backsplash design. Selecting trim that matches or complements your chosen tile will enhance the overall aesthetic appeal of your kitchen.
It’s worth noting that proper planning of your backsplash layout can help prevent issues such as uneven placement or sizing errors during installation. Taking the time to carefully plan out each detail will ultimately result in a cleaner and more polished final product.
The Rule Of Thumb For Backsplash Placement
When deciding on the placement of your kitchen backsplash, it’s important to follow a general rule of thumb. The bottom edge of the backsplash should typically be placed between 15 and 18 inches above the countertop. This height ensures that the backsplash provides ample protection against spills and splatters while still allowing for easy access to the countertop.
It’s worth noting that the specific height and placement of your kitchen backsplash may vary depending on other factors in your kitchen. For example, if you have upper cabinets installed, you may need to adjust the height of your backsplash accordingly. Additionally, other features such as windows or appliances may also affect the placement of your backsplash.
Proper placement of your kitchen backsplash is crucial not only for its practicality but also for its visual appeal. A well-placed backsplash can enhance the overall design aesthetic of your kitchen by creating a cohesive look that complements your countertops and cabinetry. By taking the time to consider the height and placement of your backsplash in relation to other features in your kitchen, you can create a visually appealing and practical backsplash that adds both style and functionality to your space.
When To End Backsplash At The Cabinet Or Countertop
When planning your kitchen backsplash, another consideration to keep in mind is whether you want it to end at the cabinet or continue up to the bottom of your upper cabinets. This decision ultimately comes down to personal preference and the desired aesthetic for your space.
Some homeowners prefer a more streamlined look and choose to end their backsplash at the cabinet. This approach can create a clean and modern feel that highlights other design elements in the kitchen. On the other hand, others may opt for a more cohesive look by continuing their backsplash up to the bottom of their upper cabinets. This creates a more integrated design that ties together all aspects of the kitchen.
Going higher with your backsplash can create a stunning visual impact but may come at a higher price tag due to additional materials and installation required. Alternatively, using a smaller backsplash may be more practical in certain instances and easier on your budget.
 FAQs
FAQs
Q: What is the most common size for a kitchen backsplash?
A: The most common size for a kitchen backsplash is a full backsplash that extends from the countertop to the bottom of the upper cabinets, typically around 18-24 inches in height.
Q: What is the most common kitchen backsplash material?
A: Ceramic and porcelain tiles are the most common materials for kitchen backsplashes due to their affordability, durability, and versatility. However, glass and natural stone tiles are also popular for their aesthetic value.
Q: What is the recommended spacing for kitchen backsplash tiles?
A: The recommended spacing between kitchen backsplash tiles is typically 1/8 to 1/4 inch. The exact spacing will depend on the size of the tiles and the design of the backsplash.
Q: Can you use 3cm thickness for a kitchen backsplash?
A: While 3cm thickness is commonly used for countertops, it may be too thick for a kitchen backsplash. A thinner tile is usually recommended for backsplashes, as it is easier to install and less likely to create issues with the weight on the wall.
Q: What is the most popular kitchen backsplash tile size?
A: The most popular kitchen backsplash tile size is 3×6 inches, which is commonly used for subway tiles. However, larger sizes such as 4×8 inches and 4×12 inches are becoming increasingly popular for a more modern look.
Q: How do you determine the height of a backsplash?
A: The height of a backsplash is typically determined by the distance between the countertop and the bottom of the upper cabinets. The standard height is around 18-24 inches, but the exact height will depend on the size of the cabinets and the design of the kitchen.
Q: Is a 4-inch backsplash out of style?
A: A 4-inch backsplash was a popular choice in the past, but it has become less common in recent years. Many homeowners now prefer a full backsplash that extends from the countertop to the bottom of the upper cabinets. However, a 4-inch backsplash can still be a good choice for some kitchen designs.
Next Steps
Want to join others who are creating the most amazing home redesigns & renovations and get more tips, tricks and hacks on how to make your home the best it can be?
Join my brand new free private Facebook group, Remodel Reality to connect with other people like you to make your space the best!


