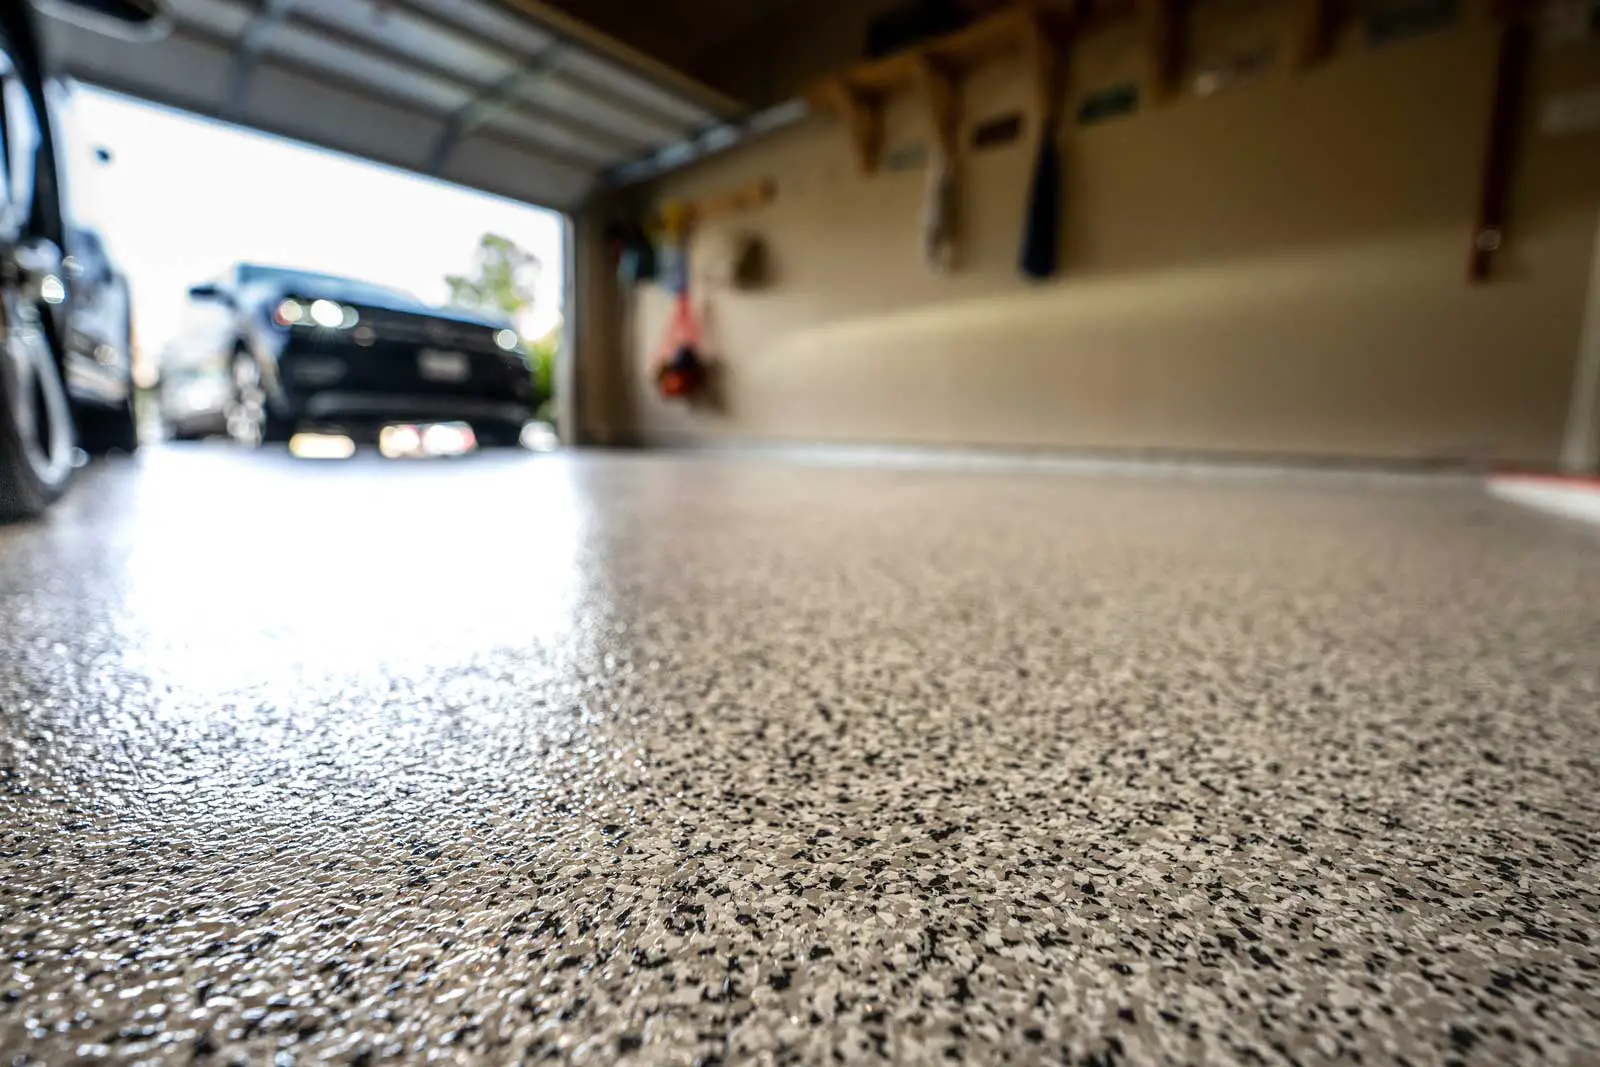
Are you getting tired of the ugly, unstylish floor in your garage or basement? Want to spruce it up with a coat of epoxy resin? That’s a great idea—epoxy floors look amazing are low-maintenance, and stylish.
The drying time for an epoxy resin floor typically takes 12 to 24 hours to dry to the touch and up to 72 hours to fully cure and reach maximum hardness.
Of course, it varies depending on factors such as the epoxy type, thickness, room temperature, humidity, and ventilation.
But what are the factors that affect how long it takes to fully cure?
How do you ensure that your epoxy floor dries evenly and properly?
What factor does ventilation play in the process?
How soon before you’ll be able to use your garage floor again?
In this article, I’ve got all these answers and more for you so that you get the best possible result for your epoxy resin floor.
By the way – before we get too far along here, if you want to connect with other homeowners and builders and get more great ideas for your home to make your space the best join my free private Facebook group, Remodel Reality here.
 Factors that Affect Epoxy Floor Drying Time
If you’re installing an epoxy floor, it’s important to understand the factors that influence its drying time to get the best results. The ideal environment for optimal drying conditions is one with a temperature between 60-90 degrees Fahrenheit and a relative humidity below 60 percent. If you live in an area with high humidity, you may need to use dehumidifiers or air conditioning to reduce moisture levels in order to properly dry your epoxy floor.
Use a Heat Lamp or Space Heater to Speed Up Dry Time
Heat lamps and space heaters can be used to speed up the curing process of an epoxy floor, especially in colder climates. They can increase the ambient temperature and reduce humidity levels, which leads to faster drying times. However, care should be taken when using these tools as they can cause the epoxy to dry too quickly, leading to a weaker bond and poorer overall quality.
Achieving Faster Drying Time with UV Lamps and Curing Ovens
UV lamps and curing ovens are useful tools for achieving faster drying times with an epoxy floor. UV lights emit specific wavelengths of light that can begin the curing process while curing ovens provide a controlled environment for even heat distribution throughout the epoxy. These tools can be particularly helpful in industrial settings where time is of importance.
The Impact of Chemical Reaction and Curing Agent on Drying Time
The type of chemical reaction-curing agent and solid state of the epoxy material itself also affects how long it takes for an epoxy floor to dry properly.
Epoxies usually consist of two parts: resin and a hardener – when these components chemically react with each other they produce heat which helps initiate curing and sets off the drying process.
Different hardeners have varying reaction rates which will further influence the duration of cure times, as will differing solid states within different types of epoxies themselves.
Importance of Considering All Factors to Ensure Proper Drying Time
It’s essential that all factors affecting epoxy flooring’s drying time are taken into account in order for it achieve optimum time for securing a strong bond adhesion that results in durable finish that stands against wear or tear from everyday use over a longer period of time.
 The Epoxy Coating Process
This multi-step process requires care and attention to ensure that each step is completed correctly in order to achieve the desired results. Let’s go over each of these steps so you can ensure your finished project looks perfect!
Prep & Clean The Surface
The first step of the epoxy coating process is cleaning the surface that the epoxy will be applied to. Removing dirt, debris, and even oil residue off the surface is crucial as any contaminants left on it can weaken the bond between the epoxy and surface, resulting in an uneven or flaking finish. Once clean, make sure that the area has been dried as dampness can prevent proper adhesion.
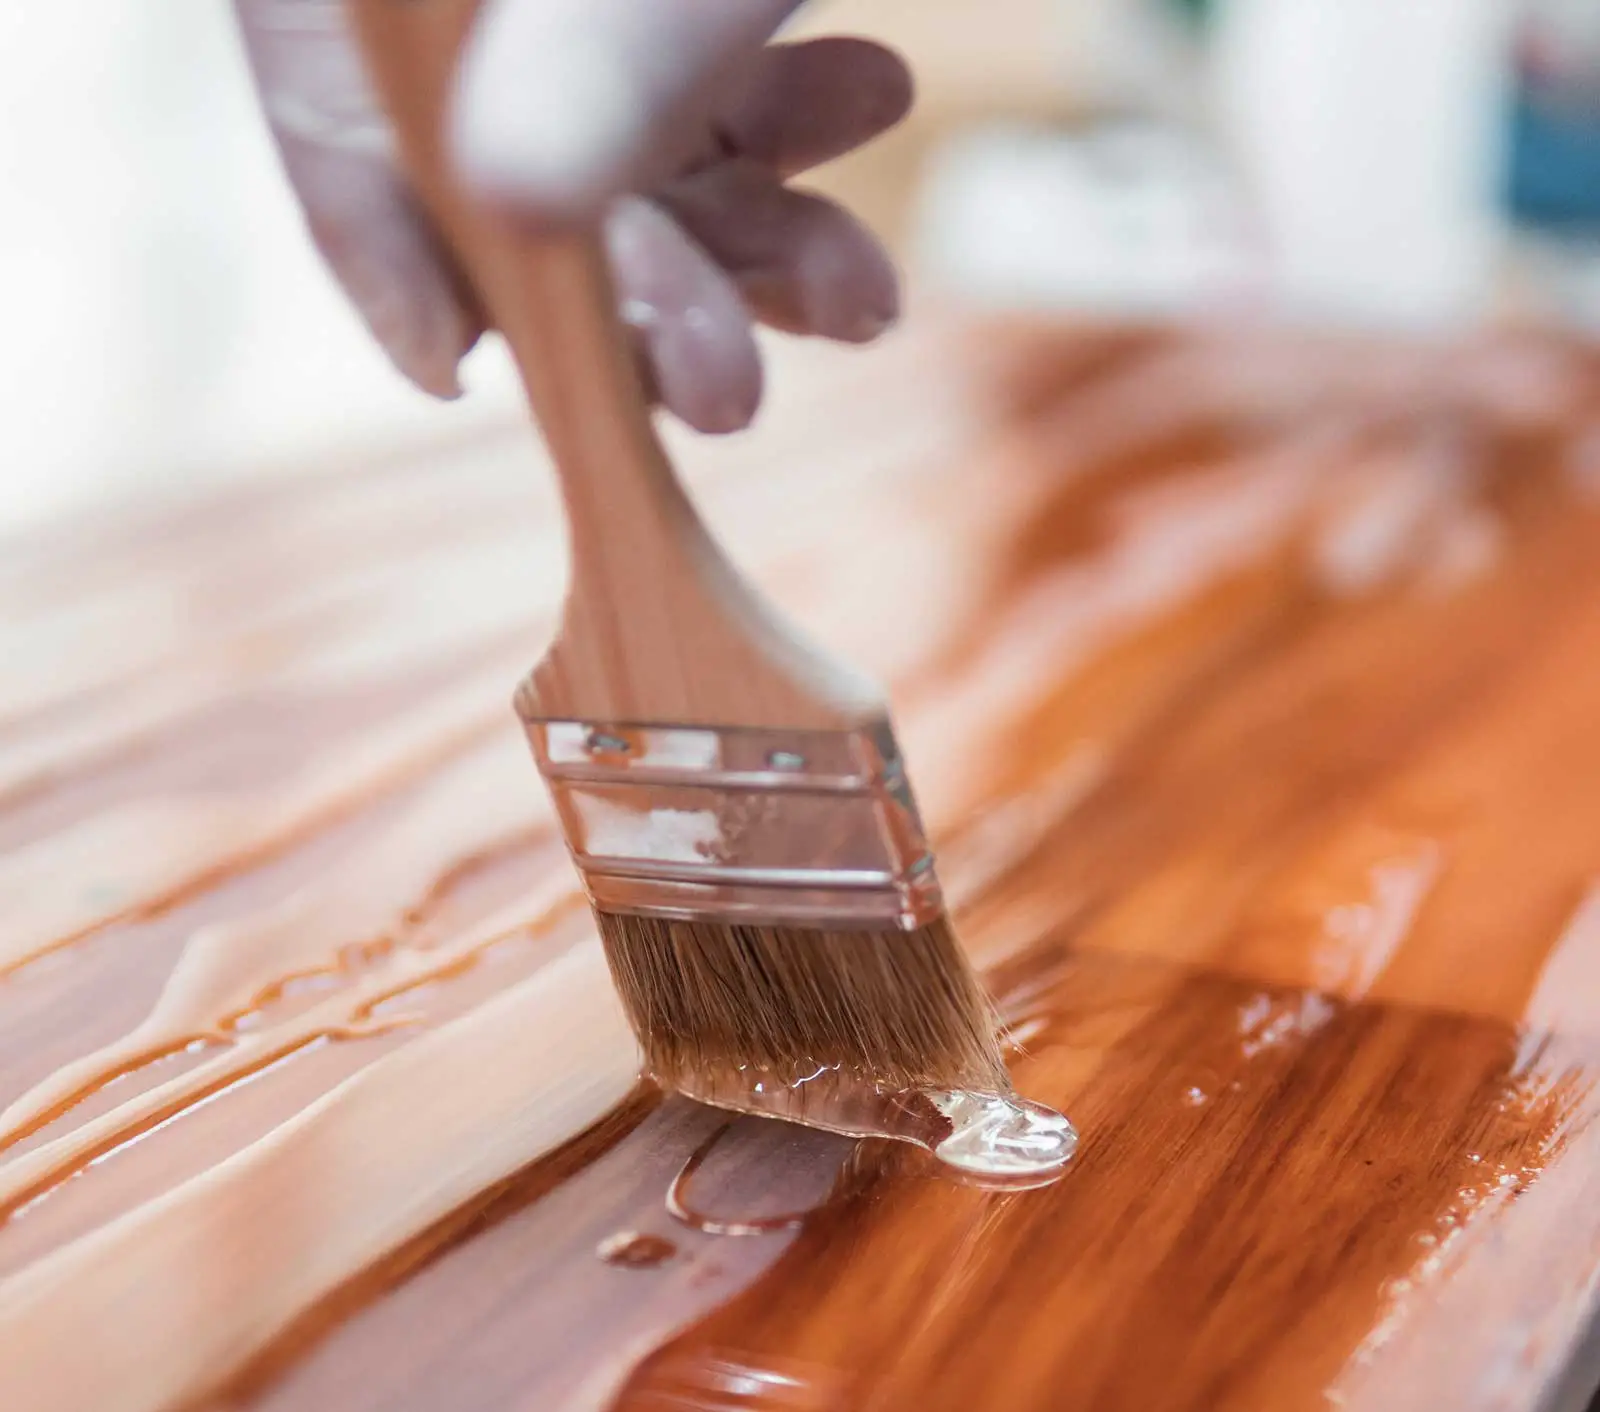
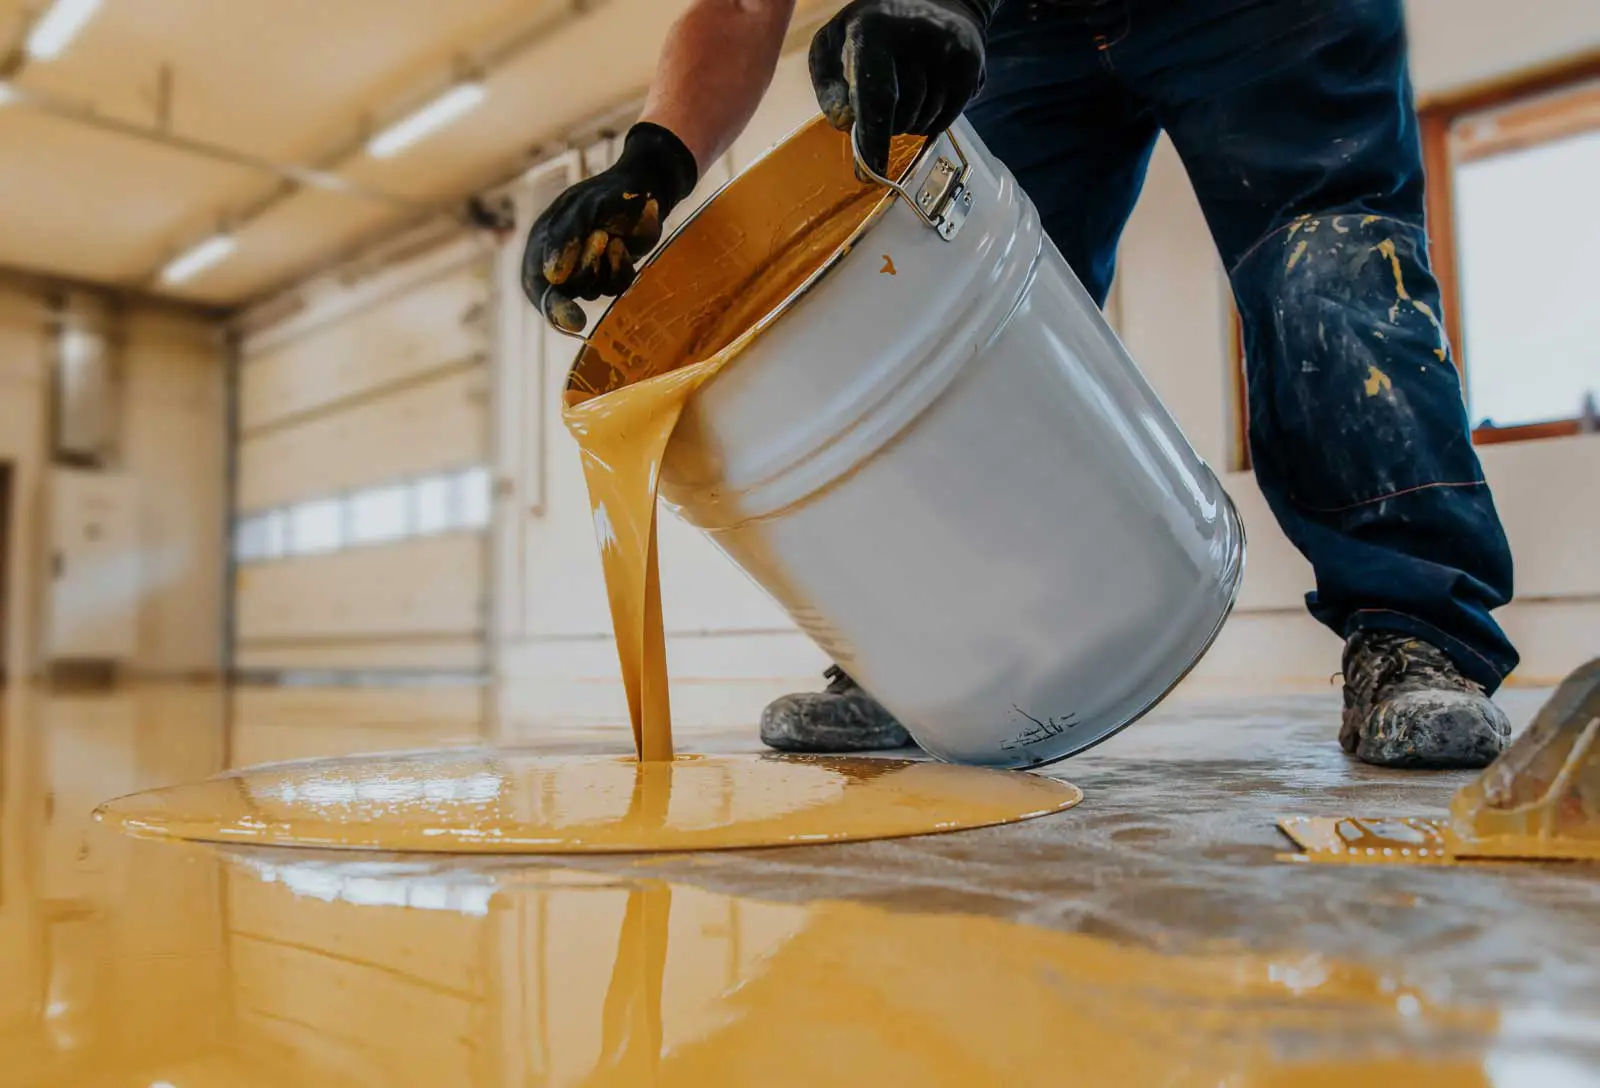
Apply The First Coat
Once cleaned and dried, it’s time to apply the first coat of epoxy. This requires using a roller or brush to evenly spread a thin layer onto the surface. Work slowly and pay close attention to avoid leaving air bubbles trapped in between layers – if this happens let it sit for a few minutes before lightly running something like a putty knife over them to pop them out.
After application, let this first layer dry completely before moving onto the next step of applying a second coat. Depending on factors such as temperature, humidity and type of epoxy being used, drying times can range from hours to days so be sure to plan accordingly when starting this project!
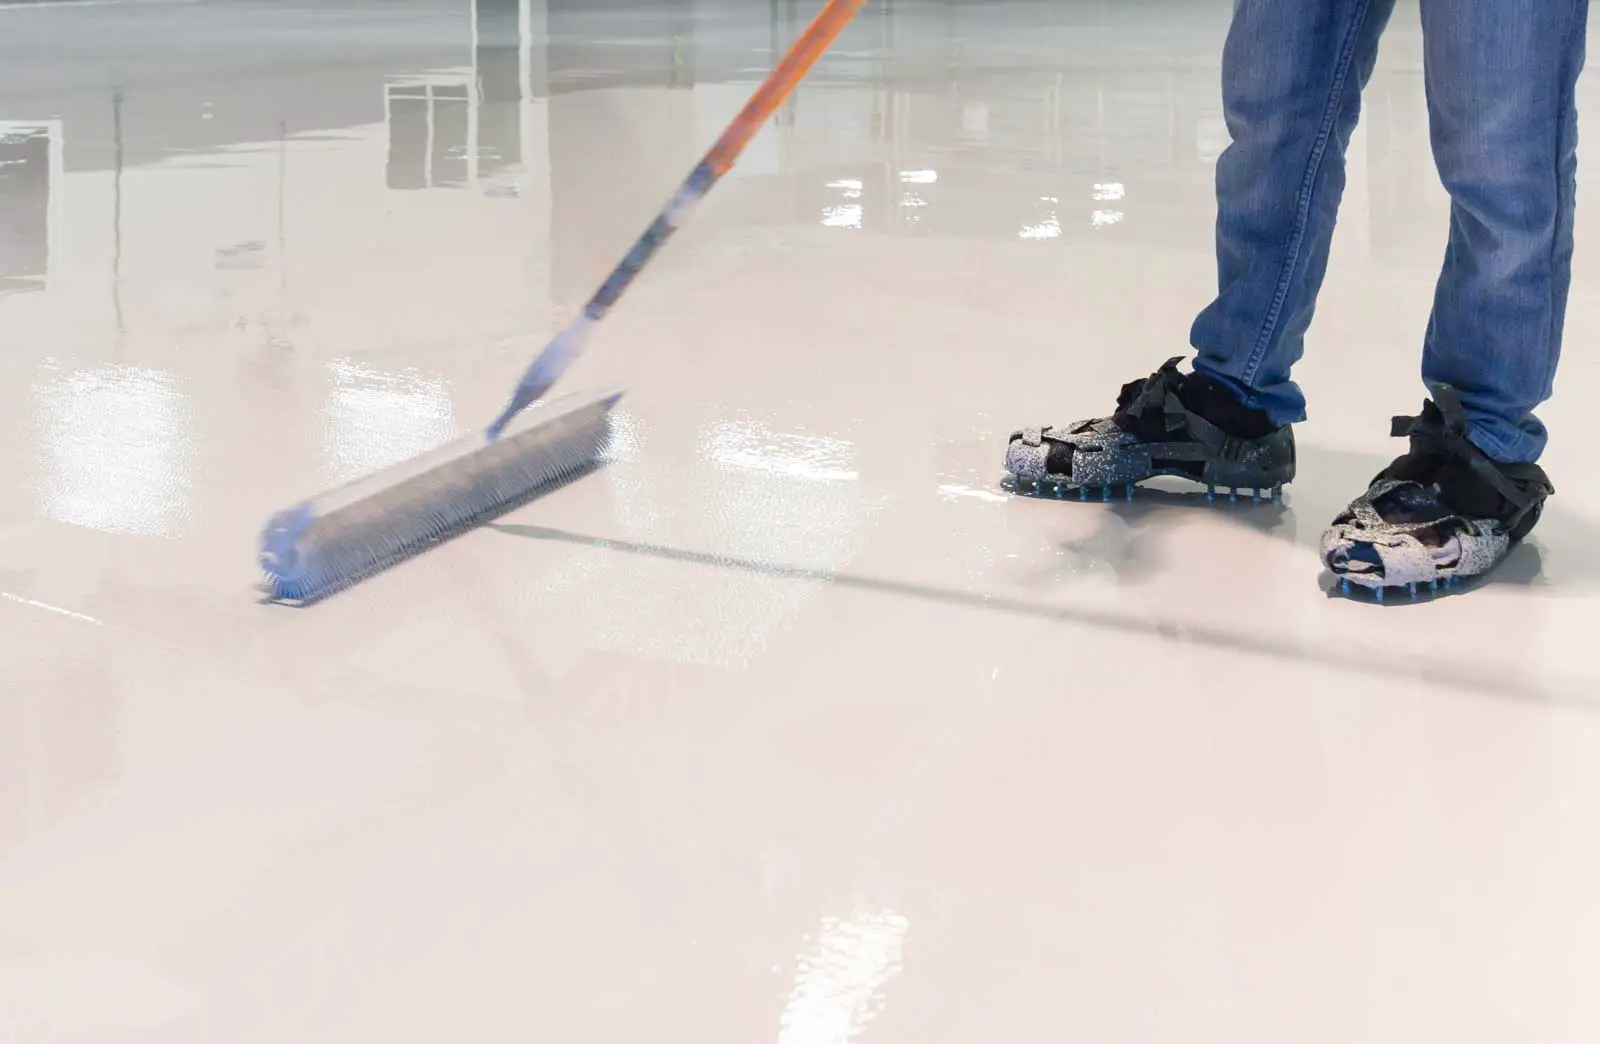
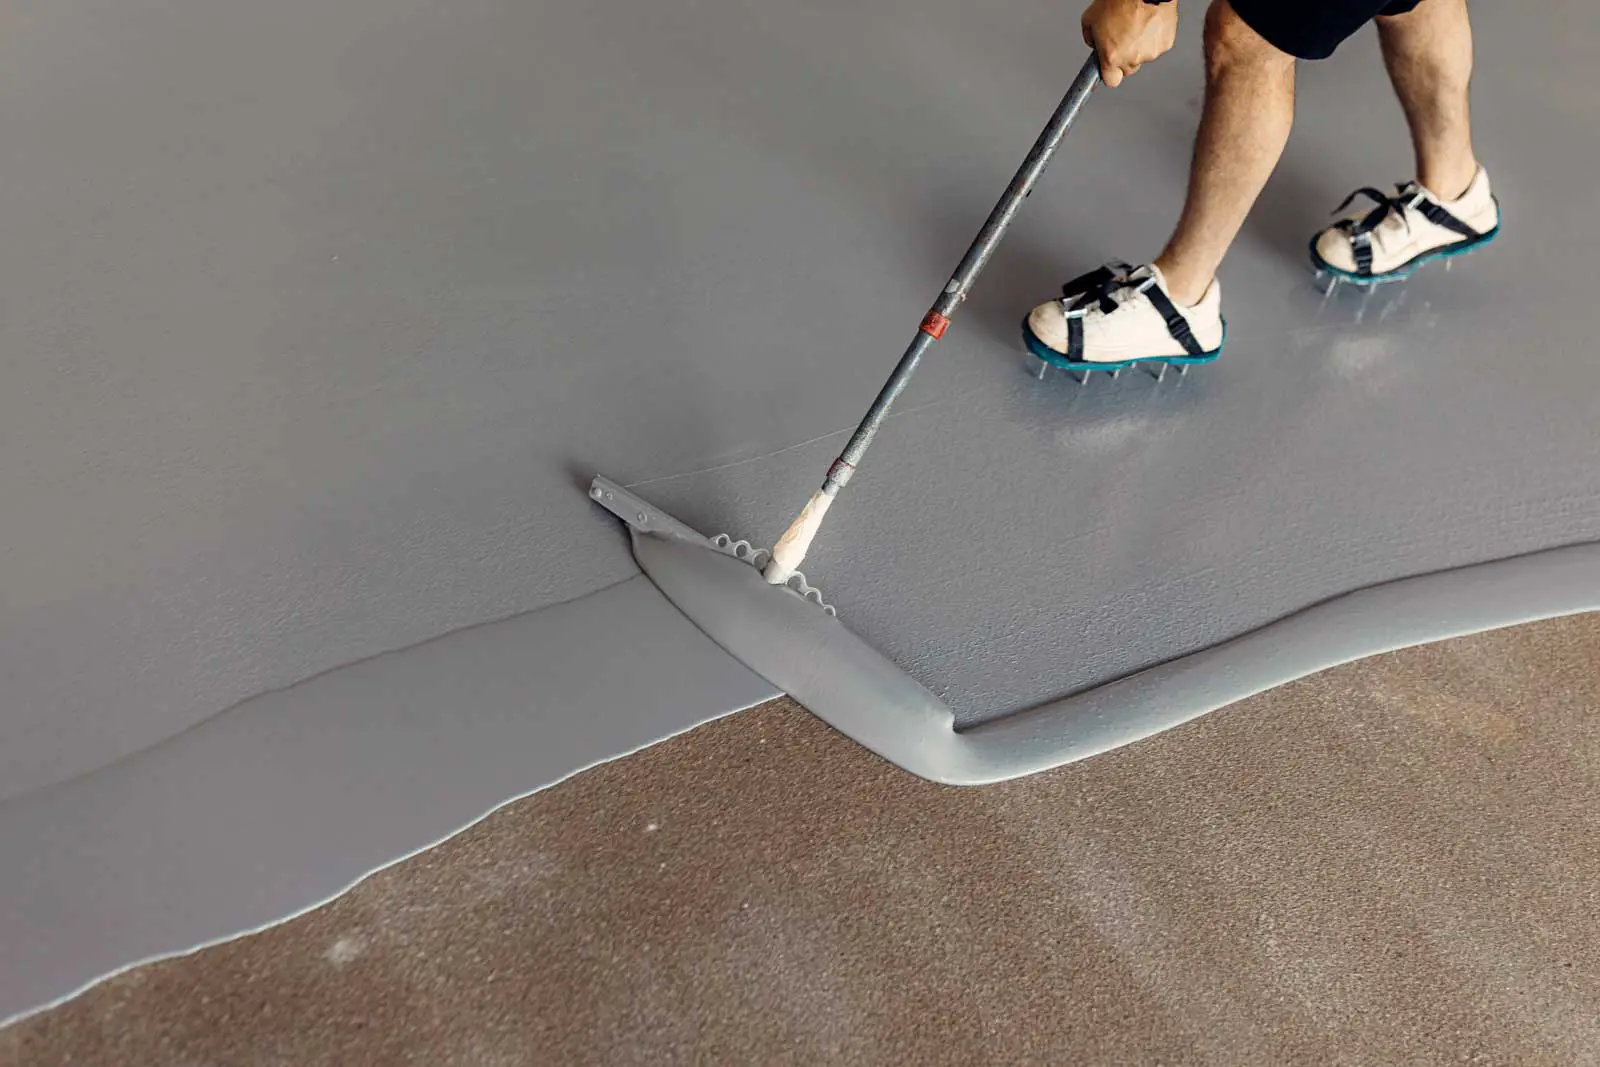
Apply The Second Coat
When ready to apply a second layer on top of existing one do so with same method, covering space with thin even layers while taking all necessary precautions – no pets or people should walk through area until fully dry! Again allow this layer enough time (hours to days) depending on environment conditions mentioned earlier until ready then you have passed one more milestone towards creating an eye-catching finish with good longevity!
Air It Out
We have to wait for entire floor to thoroughly dry before its safe once again walk or step onto our newly finished space! Luckily due care that was taken earlier when selecting our epoxy means we will soon reap fruits of labour by admire durable finished product that looks like its just jumped off store shelf at fraction cost compared usual store bought quality!
 Epoxy Floors Need Time to Dry
This multi-step process requires care and attention to ensure that each step is completed correctly in order to achieve the desired results. Let’s go over each of these steps so you can ensure your finished project looks perfect!
The First Step: Cleaning the Surface
The first step of the epoxy coating process is cleaning the surface that the epoxy will be applied to. Removing dirt, debris, and even oil residue off the surface is crucial as any contaminants left on it can weaken the bond between the epoxy and surface, resulting in an uneven or flaking finish. Once clean, make sure that the area has been dried as dampness can prevent proper adhesion.
Applying the First Coat of Epoxy
Once cleaned and dried, it’s time to apply the first coat of epoxy. This requires using a roller or brush to evenly spread a thin layer onto the surface. Work slowly and pay close attention to avoid leaving air bubbles trapped in between layers – if this happens let it sit for a few minutes before lightly running something like a putty knife over them to pop them out.
Applying the Second Coat of Epoxy
After application of the first layer, let this layer dry completely before moving onto the next step of applying a second coat. Depending on factors such as temperature, humidity and type of epoxy being used, drying times can range from hours to days so be sure to plan accordingly when starting this project!
When ready to apply a second layer on top of existing one, do so with same method, covering space with thin even layers while taking all necessary precautions – no pets or people should walk through area until fully dry!
Allow this layer enough time (hours to days – more on that in a minute) depending on environment conditions mentioned earlier until ready then you have passed one more milestone towards creating an eye-catching finish with good longevity!
Waiting for the Epoxy to Dry
Now with both layers applied we come up against our last step in creating an impressive long lasting finish: drying times! We must wait for entire floor – any accidents during this phase could potentially damage our immaculate vision –to thoroughly dry before its safe once again enter our newly finished space!
Luckily due care that was taken earlier when selecting our epoxy means we will soon reap fruits of labour by admire durable finished product that looks like its just jumped off store shelf at fraction cost compared usual store bought quality!
 How To Ensure Proper Epoxy Floor Drying Time
If you want a beautiful, durable epoxy floor in your home or workplace, making sure it is properly dried and cured is key. There are several steps you can take to ensure proper drying time and get the best end result.
Applying Thin Layers and Avoiding Air Bubbles
One of the most important actions you can take to guarantee successful drying time of the epoxy is applying it in thin layers and avoiding any air bubbles. The thin separate layers will dry much more evenly than a thick layer would, and without air bubbles, the bond between the surface and the epoxy is much stronger.
Properly Mixing Epoxy and Amount of Hardener
You should also be mindful of what’s being used to apply the epoxy- both how much hardener you’re using as per manufacturer specifications along with properly mixing the epoxy mixture before application. If too much hardener is added to the mixture, it will cause it to dry too quickly and be applied unevenly. On top of that, if insufficient stirring prior to application happens then again this could lead to an uneven finish overall.
Preparing the Surface Correctly
In addition, preparing your surface correctly beforehand plays an important role in ensuring full drying time of the epoxy flooring.
Beforehand you have to clean off all dirt and then use oil removers such as lacquer thinners or citrus-based cleaners on any grease marks present on your surface area – missing this step could mean your epoxy not bonding fully with it’s base below it thus having negative effects down the line when trying to ensure long-term functionality of your flooring project.
Also if bumps or unevenness exist on your surface (due to minimal cracks for example), leveling or etching may need to done ahead of time so no disrupting takes place after laying down your epoxy material itself.
Avoiding Heavy Equipment Traffic
Furthermore, heavy equipment movement during this process should also be greatly minimized (or completely eliminated unless absolutely necessary) until after 24 hours – no one wants their newly installed flooring starting out looking like a disaster with unreliable structural integrity compared with that promised by a professional installation crew!
Waiting Before Adding Color Flakes or Clear Coat
Lastly once everything mentioned above has taken place….you may then proceed cautiously towards adding color flakes or a clear coat into order add variety & extra protection but always give due consideration that extra weeks may need to put by should premature flakes begin peeling up sooner than expected due reflecting poor overall preparation prior applying them in first place- Ie make sure all these steps have gone well before reaching final stages!
Overall there several elements involved in successfully installing an epoxy floor & taking specific precautions such as listed above allows for better temperatures being maintained, proper set times being followed, strengthened adhesive bonds happening uniformly…..i.e better assurance of quality backed product coming out at end which able withstand rigors put placed upon it throughout lifetime its use.
Safety Precautions When Working With Epoxy
When working with epoxy, it’s essential to take all the necessary safety precautions. Not doing so could lead to serious skin irritation, difficulty breathing, and a host of other health hazards. So here are some guidelines you should always follow when using epoxy:
First, make sure you’re properly equipped when mixing and applying this powerful adhesive. You’ll want to wear a pair of chemical-resistant gloves, safety goggles designed for chemical splashes, and an approved respirator mask. It’s also important to avoid confined spaces with limited airflow – instead work in a well-ventilated area or outside, where hazardous fumes are less likely to build up.
Avoid Toxic Fumes
Speaking of fumes, never mix more hardener than the amount recommended by the manufacturer; too much can cause the mixture to heat up and release toxic fumes which can make you sick if breathed in. Similarly, never use heat guns or apply epoxy to hot surfaces as this can also be hazardous for your health.
Clean and Functioning Equipment
Lastly, ensure that all tools and equipment used with the epoxy are both clean and functioning correctly beforehand. Any impurities or contamination can weaken the bond formed by the adhesive creating an uneven finish at best – an ineffectual one at worst.
So remember: when working with epoxy it is imperative that proper safety regulations are observed – protect yourself from harm by following these guidelines every single time!
From wearing protective gear in accordance with manufacturer instructions through to avoiding any equipment not pristinely clean – following these safety measures will allow you to work safely and effectively with epoxy every time.
 The Impact Of Humidity And Temperature On Epoxy Curing Time And Quality
When you’re working on epoxy flooring, be mindful of the humidity and temperature in your workspace. These two factors can greatly influence the curing process of your epoxy project, so it’s important to get them just right.
Humidity plays a particularly significant role in epoxy curing. If your humidity levels are too high, the chemical reaction that allows the epoxy to harden slows down, leading to extended drying time.
On the other hand, if your humidity levels are too low, the reaction speeds up and could cause cracking or an uneven surface upon drying. Aim for a sweet spot between 40% and 60%. If you have trouble keeping your workspace at this level of humidity naturally, try using a dehumidifier or work somewhere with a lower overall moisture content.
Temperature Control
Temperature also affects how quickly your epoxy cures as well as its eventual quality. Warmer temperatures lead to faster curing times – but too-warm temperature can result in epoxy that’s brittle and prone to cracking later on (same goes for especially cold temperatures). Maintain consistent temperature by using air conditioning or heating systems to keep things around 75-80°F (24-27°C).
Application Type and Hardener Content
The kind of epoxy application you choose can influence the effect of humidity and temperature even more drastically than usual. For example, thicker applications take longer to cure even under ideal conditions than their thinner counterparts.
Consider both application type and hardener content when deciding how long it will take for your project to set properly – consult with the manufacturer or a specialist if you’re ever unsure about either one!
Concrete Sub-base Preparation
Lastly, be sure to thoroughly prep concrete sub-bases before attempting any type of installation; this is paramount for a successful job!
At the end of the day, maintaining console ambient temperatures and humidities plus using appropriate application mixtures should help ensure successful results when it comes to curing epoxy floors – beautiful surfaces that’ll stand up against heavy foot traffic in years ahead!
The Importance Of Proper Ventilation When Curing Epoxy
Proper ventilation is key when working with the resin. This is because epoxy contains volatile organic compounds (VOCs) that become hazardous fumes when cured. These fumes can cause eye, nose, and throat irritation, headaches, nausea, and dizziness–none of which you want your workshop to experience. So here are some ways to ensure good ventilation during the curing process.
The easiest way to kickstart ventilation is by opening windows and doors in your work area. Not only will this allow fresh air into the space but also help remove any fumes while they’re still being created.
Additionally, it’s a good idea to have fans ready so you can increase air movement and add an additional layer of protection against these pollutants. Position the fans near doors or windows so they draw in new air and push out old air with the VOCs in it.
Exhaust Systems or Fume Hoods
Exhaust systems or fume hoods are another option for better ventilation. Unlike traditional fans, these devices are designed specifically to filter fumes and other pollutants out of indoor spaces. If you’re finishing a basement or want a better look for your garage floors where outside air isn’t always accessible, then exhaust systems come in handy–and they’ll be much more effective than just relying on open windows alone.
Personal Protective Equipment
On top of that, make sure you use all appropriate personal protective equipment such as gloves, safety goggles, or a respirator equipped with a chemical cartridge for filtering out toxic particles from the air around your workspace.
Neither should be skipped; choosing an incorrect type of respirator can result in ineffective protection against the hazardous vapors produced by epoxy resin – meaning there could still be dangerous amounts around you as your project cures.
Proper Curing Temperature and Airflow
At the end of a workday, even if you have done everything right, your workstation may still suffer from an uneven cure due to improper curing temperatures or inadequate ventilation. If large projects are not effectively cured, this can lead to weaker bonds between parts that could put the final product in jeopardy. Even with years of experience, these problems can still occur if preventive measures are not taken.
However, by taking proper precautions and ensuring adequate ventilation while working with epoxy, you can guarantee reliable results and high-quality end products every time!
Common Issues That May Arise During The Epoxy Flooring Process
Epoxy flooring is durable, easy to maintain, and offers a long-lasting finish that adds value to your home. That said, there can be issues that arise during the application process, so it’s best to familiarize yourself with these common problems beforehand and take measures to prevent them or troubleshoot them if necessary.
One issue you might come across is air bubbles. These can form during the mixing process or when applying the epoxy and can result in an uneven finish or weaker bond between the epoxy and the flooring. To help avoid this, make sure to mix the epoxy thoroughly before application and apply in thin, even coats. If air bubbles do form after applying the epoxy, use a heat gun or blowtorch on a low setting to gently remove them.
Another potential problem is an uneven surface; this could be due to an uneven base surface, incorrect mixing of the epoxy components, or incorrect application technique. Before laying down any materials it’s important to ensure that the base surface is clean, smooth and level. Additionally, following manufacturer instructions on mixing and application will help promote an even finish upon curing.
Peeling, Flaking, Discoloration and UV Exposure
In addition to air bubbles and uneven surfaces, peeling or flaking may occur if the epoxy isn’t applied correctly — once again confirming why proper preparation of both materials and techniques are essential for success! Evenly spread out thin layers of material over clean surfaces (free from debris) and make sure each is allowed ample time to completely cure before advancing with another layer of material.
Discoloration and yellowing may also present itself on top of UV exposure — since epoxy isn’t UV resistant itself it will benefit greatly from extra protection. To bolster its durability against strong sunlight rays you should apply a clear UV-resistant topcoat regularly as part of your maintenance routine — but additionally closing your drapes/blinds at night or investing window film could go a long way in mitigating sun damage too!
Moisture
Finally moisture needs consideration because if any moisture remains on top of the floor before going ahead with application then problems such as peeling/flaking and discoloration can arise during curing — without fail check what you’re about to install onto in order for it be washed down first (for removal off dirt/debris )and dried off completely until no trace remains otherwise said risks will always remain present (with etching solutions being available in some more extreme cases).
How To Maintain And Care For Epoxy Floors To Ensure Their Longevity
If you have epoxy flooring, it’s important to maintain and care for it properly to keep it looking great and ensure its longevity. With the right cleaning and maintenance routines, you can help make sure your epoxy floors stay in top shape. Here are a few tips on how to best care for your epoxy flooring:
- Clean regularly. Sweeping or vacuuming up dirt and debris often is key for keeping your epoxy clean and scratch-free. Mopping with a mild detergent or a specifically designed cleaner designed for use on epoxy will also help remove any stubborn stains or spills.
- Avoid harsh chemicals. Harsh chemicals such as bleach or ammonia can cause damage to the surface of your epoxy, so be sure to use only mild cleaners and detergents when cleaning your floors.
- Don’t use abrasive products. Abrasive materials like scrubbers can cause lasting damage to the surface of your epoxy floor, so opt for soft-bristled brushes or non-abrasive cleaners when mopping.
- Add a door mat or rug at the entrance of each room with epoxy flooring – this will help catch any dirt that gets brought in from outside before it has a chance to scratch the floors.
- Be careful when moving heavy furniture across the room – lifting and carrying items whenever possible, rather than dragging them across the floor, is key in preventing scratches and other wear & tear from taking their toll on your beautiful epoxy floors.
- Keep things dry too – water seeping into seam or cracks can quickly cause damage if left unchecked, so be sure to dry up spills immediately should they occur.
Following these simple steps will ensure that your epoxy floors remain beautiful long into the future! Regularly cleaning away dirt and messes helps prevent early deterioration from wearing down its protective layer, while being mindful of potential sources of damage lets you enjoy endlessly durable surfaces with hardly any effort made towards upkeep!
Next Steps
Want to join others who are creating the most amazing home redesigns & renovations and get more tips, tricks and hacks on how to make your home the best it can be?
Join my brand new free private Facebook group, Remodel Reality to connect with other people like you to make your space the best!